
Introduction
If you love summer watermelon but hate tossing the rind, Zero-Waste Watermelon Rind Pickles are your sweet, tangy, and sustainable solution. This no-waste kitchen staple transforms the pale inner rind—usually destined for the compost—into crunchy refrigerator pickles or shelf-stable preserves you’ll crave year-round. With the right prep, brine, and storage plan, you can get sunny, spiced flavors and a firm bite every time while cutting food waste, saving money, and building a smarter pantry.
Looking to level up your homestead and no-waste kitchen? Browsing resources like The Self-Sufficient Backyard can help you build systems that keep food, water, and energy cycling efficiently in your home.
Why Zero-Waste Watermelon Rind Pickles Belong in Your Kitchen
The sustainable case
- Waste reduction you can taste: Watermelon rind is about a third of the fruit by weight. Instead of sending it to landfills, you can upcycle it into jars bursting with spice and acidity. It’s a classic example of nose-to-tail produce use that supports a circular, no-waste kitchen.
- Budget-friendly pantry building: Pickles offer long shelf life and big flavor for pennies per serving. When you already paid for the watermelon, the “bonus” rind translates to low-cost condiments and side dishes that brighten meals.
- Flavor architecture: Watermelon rind is a blank canvas with gentle sweetness and a cucumber-like crunch. It takes beautifully to sweet-spiced Southern styles, garlicky-dill brines, chili-lime heat, and ginger-turmeric infusions.
Nutrition and versatility
- Naturally hydrating and low-calorie, the rind turns into a high-impact condiment without heavy fats. Vinegar’s acidity offers brightness that can balance rich or grilled foods.
- Versatile serving ideas: Add to charcuterie and cheese boards, chop into slaws, fold into grain bowls, top pulled pork or BBQ tofu, and run the brine into salad dressings and marinades for zero-waste flavor.
Sustainability beyond the jar
- Efficient water and energy use: Choose quick refrigerator pickles to minimize fuel, or batch-process water-bath canning to maximize payoff for time and energy.
- Whole-fruit mindset: In addition to pickles, rind can be candied or simmered into chutney, while the green skin can be composted where appropriate. This approach aligns with broader homestead systems—gardens, rain-catch, and resilient pantries connect to reduce your footprint and grocery bills.
Prepping Watermelon Rinds for Zero-Waste Watermelon Rind Pickles
Choose the right watermelon
- Seeded or seedless both work. Look for firm, heavy melons with a creamy yellow field spot. A firm rind yields crisper pickles.
- Plan the project: One medium watermelon typically yields 6–8 cups of trimmed rind (about 2–3 pints of pickles depending on cut and packing).
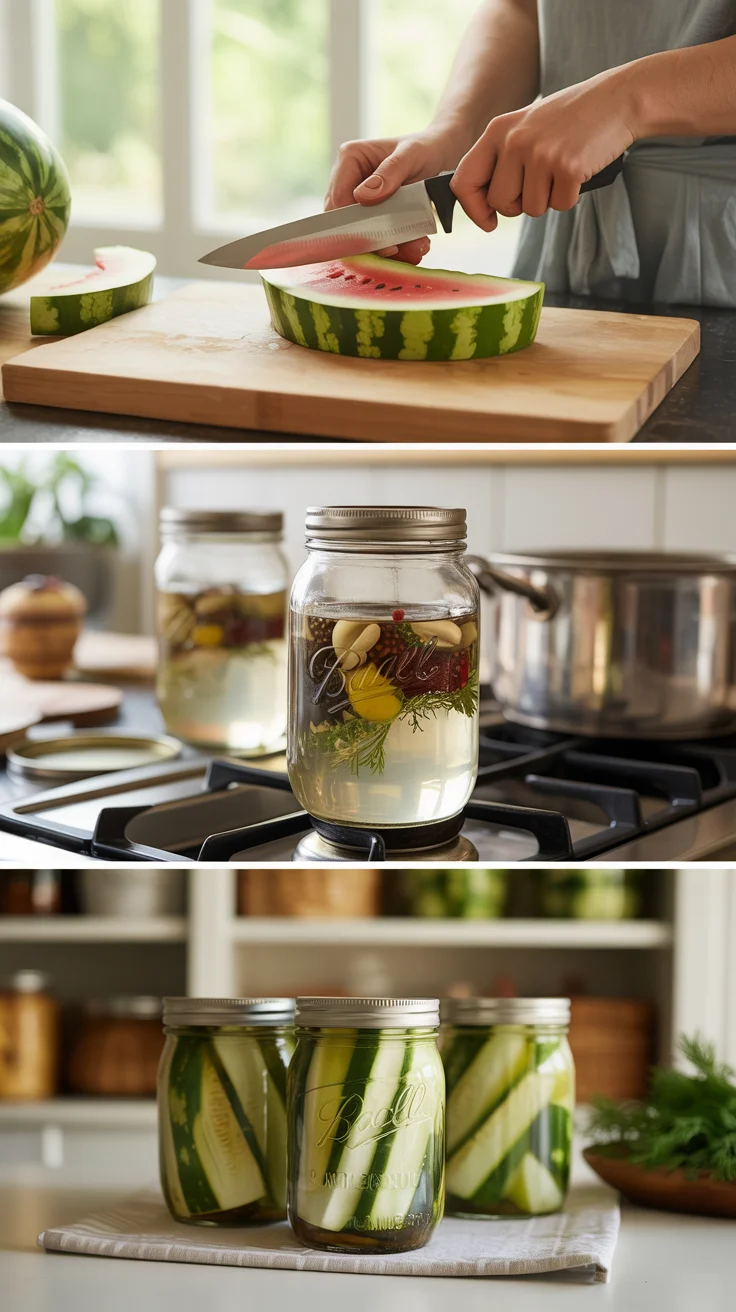
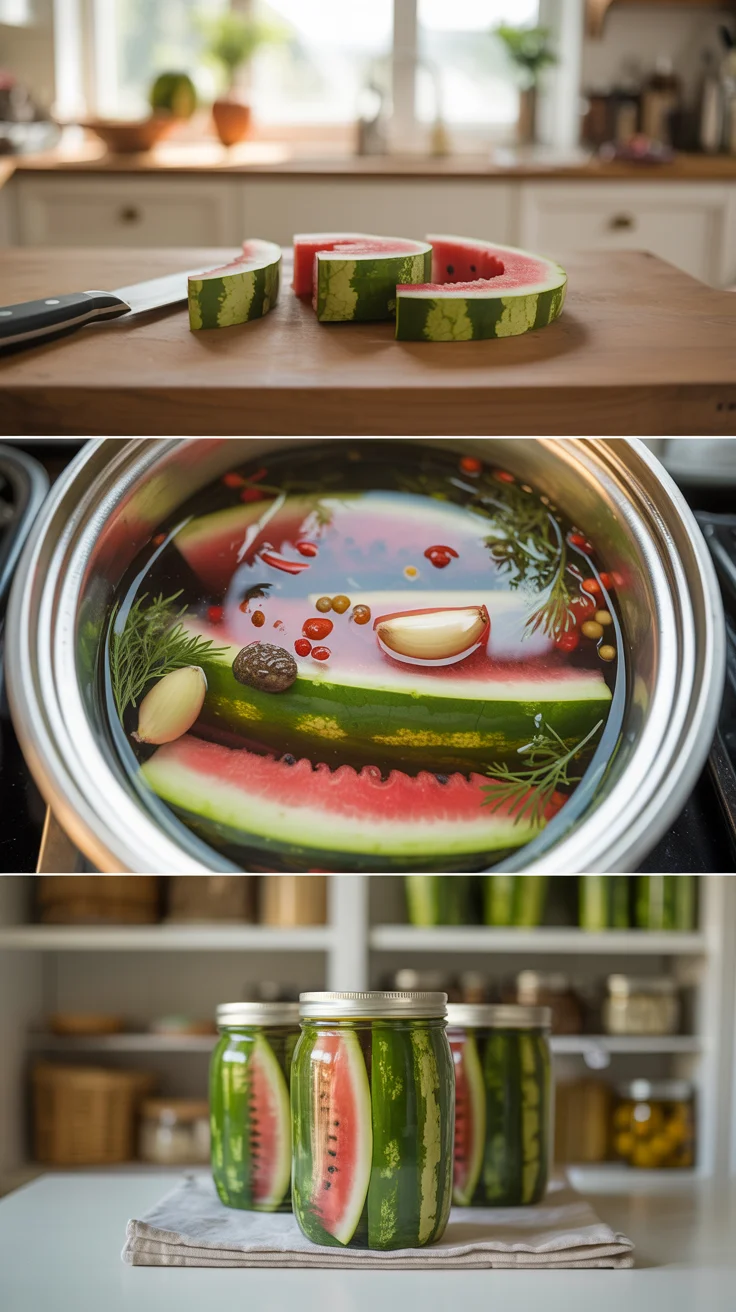
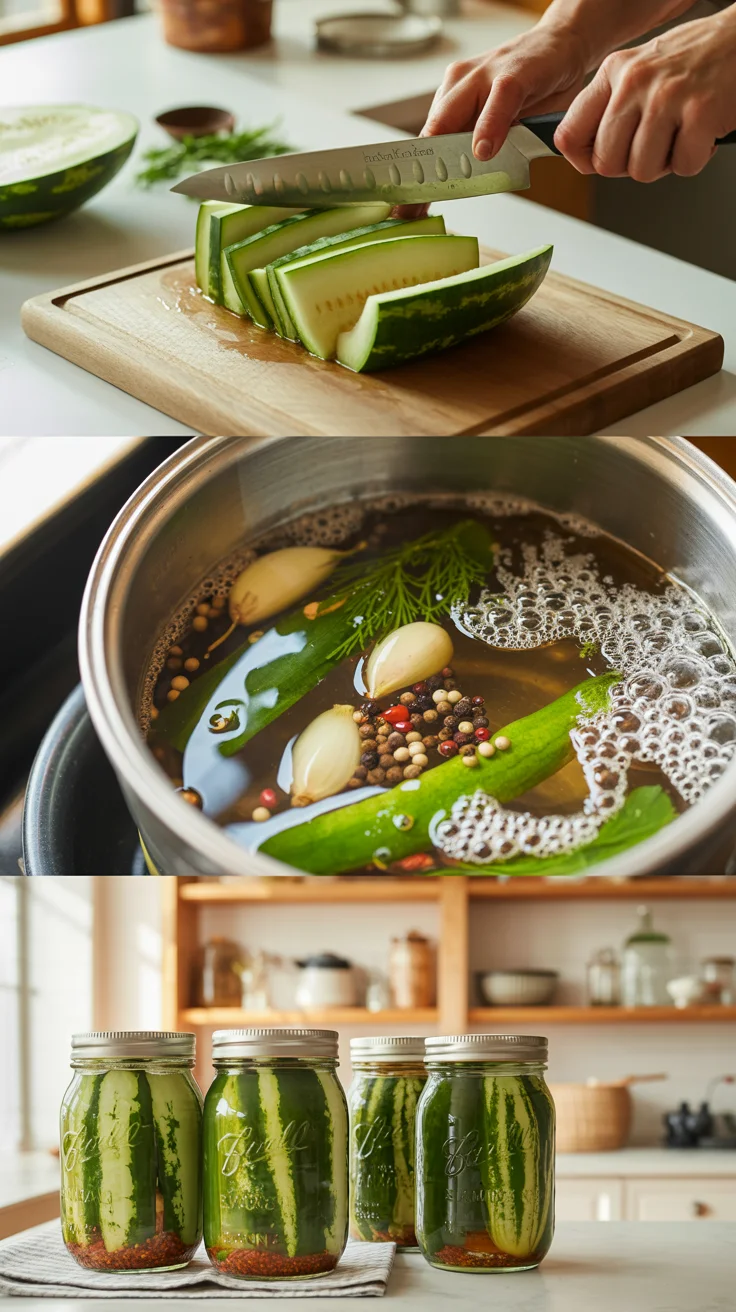
Trim for texture and safety
- Remove pink flesh: Leave only the pale inner rind—any remaining red flesh can cloud brine.
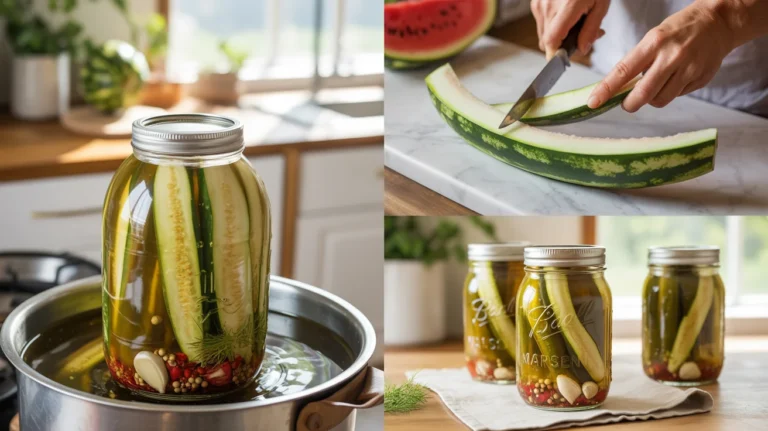
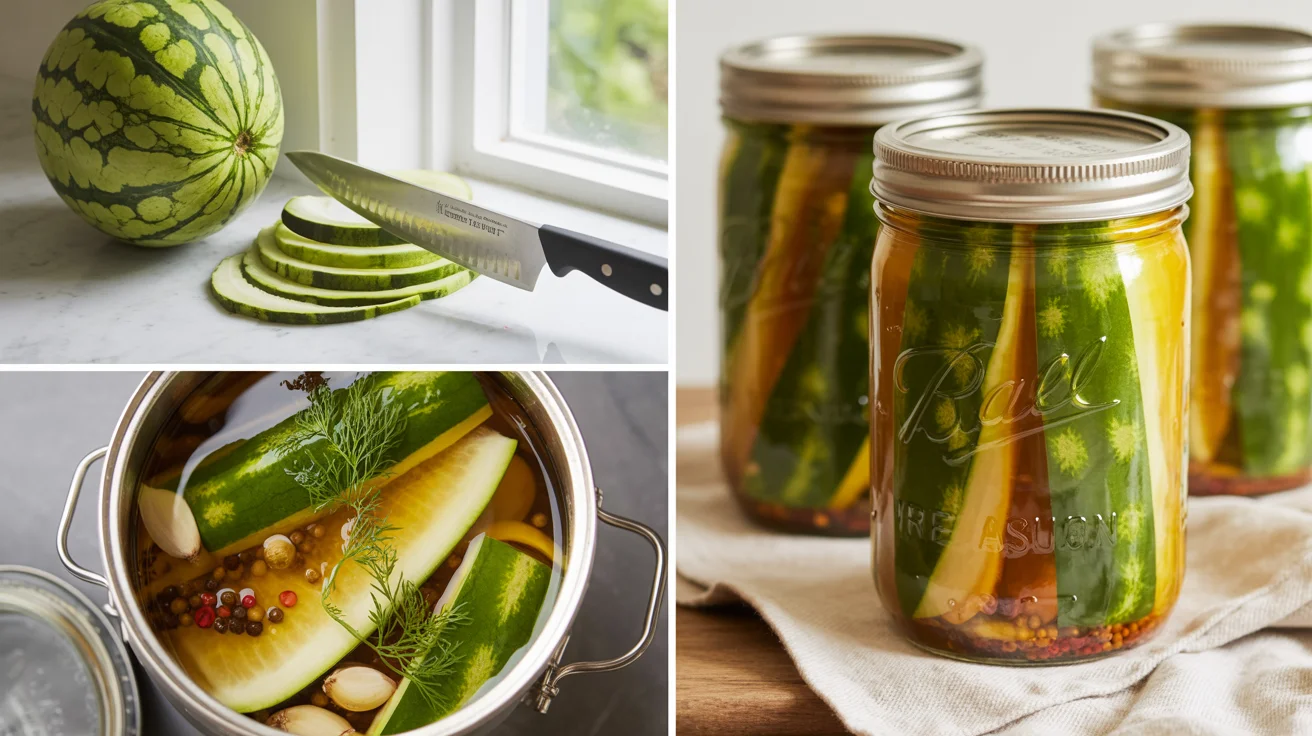
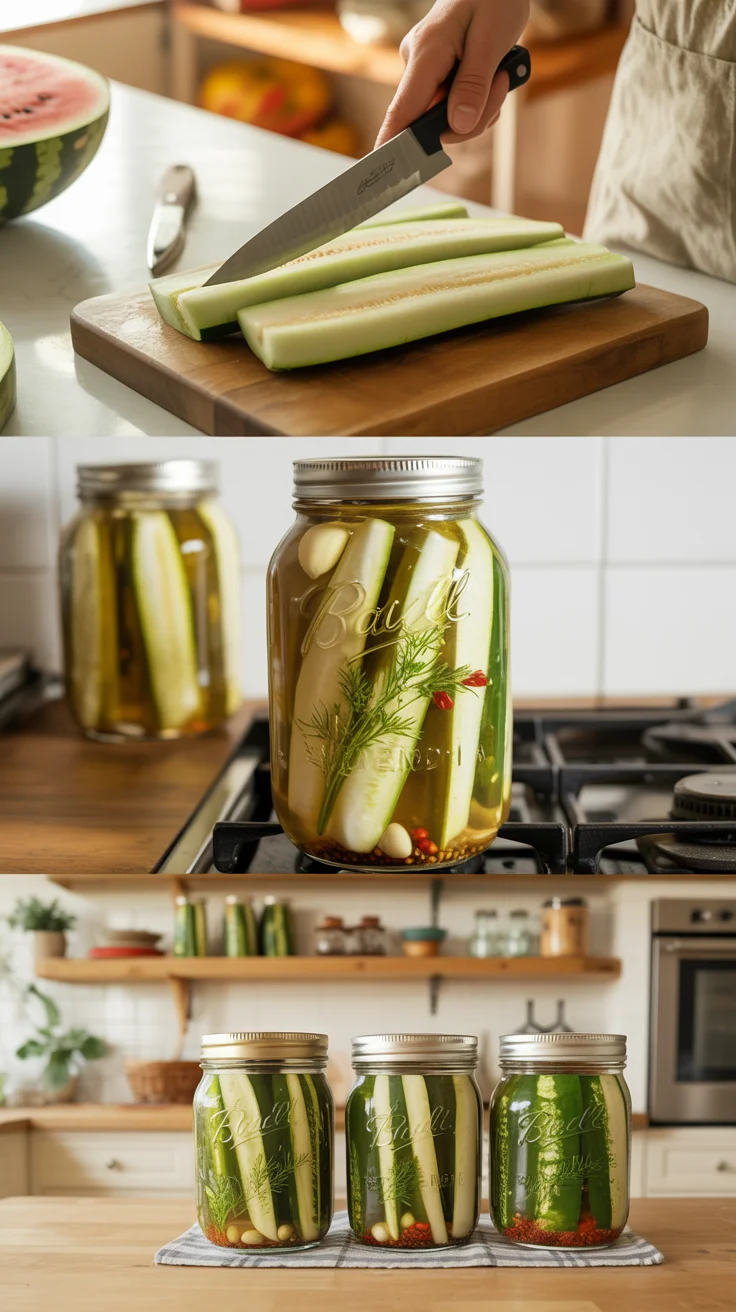
- Do you have to remove the green skin? Yes. The dark green outer skin is tough and bitter. Peel it off with a sharp knife or vegetable peeler until only the white rind remains. Cutting into 1/2–3/4-inch cubes, batons, or slices promotes even texture.
- Rinse and weigh: A quick rinse removes grit. Measuring by weight helps keep your salt and vinegar ratios consistent.
Bitterness and firmness prep
- Salt soak: Toss rind with 1 tablespoon kosher salt per pound and cover with cold water for 2–4 hours (or overnight). This draws out bitterness and boosts crunch. Rinse well after brining.
- Optional quick blanch: For extra tenderness, blanch in simmering water for 2–3 minutes, then shock in ice water. Do not overcook—the goal is crisp-tender.
- Ice bath: A 15–20 minute ice bath before brining can further firm texture.
Food safety essentials
- Use 5% acidity vinegar (distilled white or apple cider). Don’t dilute below tested ratios for canning.
- Avoid reactive cookware (aluminum or copper can affect flavor/color). Stainless steel pots and glass jars are standard.
- For a firmer bite, a pinch of calcium chloride (often sold as “pickle crisp” in canning aisles) can help. If you use pickling lime (calcium hydroxide), follow a tested recipe that includes thorough rinsing to remove excess alkalinity before acidifying.
Foolproof Refrigerator Recipe (Sweet-Spiced or Dill-Garlic)
This refrigerator method is the fastest route to crunchy, bright Zero-Waste Watermelon Rind Pickles. No canning required; they’re ready in 24–48 hours.
Yield: About 2 pints
Ingredients
- 6 cups prepared watermelon rind, peeled of all green skin and cut into 1/2–3/4-inch pieces
- 1 cup distilled white vinegar (5% acidity)
- 1 cup apple cider vinegar (5% acidity)
- 1 1/2 cups water
- 3/4–1 cup sugar (use less for tangier, more for sweet-spiced)
- 1 tablespoon kosher salt
- Optional firming: 1/2 teaspoon calcium chloride, divided
Sweet-spiced add-ins (choose a few) - 1–2 cinnamon sticks
- 6–8 whole cloves
- 1 teaspoon mustard seeds
- 4–6 thin slices fresh ginger
- 1/2 teaspoon black peppercorns
Dill-garlic add-ins (choose a few) - 4 garlic cloves, halved
- 4 dill sprigs (or 1 tablespoon dried)
- 1 teaspoon coriander seeds
- 1 teaspoon mustard seeds
- 1/2–1 teaspoon red pepper flakes
Steps
- Prep the jars: Wash 2 pint jars and lids in hot, soapy water; rinse well. For refrigerator pickles, a quick rinse in hot water is enough. Pack jars with rind pieces snugly but without crushing. If using calcium chloride, sprinkle 1/4 teaspoon per jar over the rind.
- Build the brine: In a stainless pot, combine vinegars, water, sugar, and salt. Add your chosen spices. Bring just to a boil, stirring to dissolve.
- Fill the jars: Ladle hot brine over rind to fully submerge, leaving about 1/2 inch headspace. Tap jars gently or slide in a clean utensil to release trapped air.
- Chill: Wipe rims, apply lids, let cool to room temp, then refrigerate.
- Wait and enjoy: Flavor peaks in 24–48 hours. Use within 3–4 weeks for best crunch. Always keep refrigerated.
Flavor notes
- Sweet-spiced delivers a classic Southern-style vibe that pairs with fried chicken, BBQ, and cheese boards.
- Dill-garlic is punchy and savory—great with sandwiches, potato salads, and grilled fish or tofu.
For long-term pantry storage, keep reading the canning section below. For more pantry organization help, see How to build a pantry inventory system.
Flavor Variations to Match Any Menu
Chili-lime street style
- Add zest of 1 lime, 2 tablespoons lime juice (replace equal volume of water), 1 teaspoon chili flakes or 1–2 dried chilies, and a few coriander seeds. Finish with a pinch of flaky salt and lime wedges when serving. Note: For canning, keep total vinegar at tested ratios; lime juice can supplement, not replace, 5% vinegar.
Ginger-turmeric glow
- Add 1 tablespoon thinly sliced fresh ginger and 1/2 teaspoon ground or 1 teaspoon fresh turmeric plus a few black peppercorns. Earthy, warming, and brilliant color.
Smoky barbecue companion
- Blend 1 teaspoon smoked paprika, 1/2 teaspoon mustard seeds, and a bay leaf for a subtle smoke that matches ribs or slow-cooked jackfruit. Use this on sandwiches with slaw and brisket—or roasted mushrooms for a veg-forward plate.
Savory umami
- Fold in a strip of dried seaweed or a splash of soy/tamari (for refrigerator batches only) to layer savory depth for grain bowls and rice. For canning, skip low-acid additions in the jar.
Low-sugar or no-sugar paths
- Reduce sugar to 1/4–1/2 cup for tangy, less-sweet profiles. You can also sweeten after opening by drizzling a touch of honey or agave on serving. Note that alternative sweeteners may affect texture or clarity; test small batches and stick to refrigerator storage if you deviate from standard ratios.
Herb garden riffs
- Fresh basil, thyme, or tarragon pair beautifully with apple cider vinegar. Add at the end of simmering or directly to jars for gentle aroma. For canning, use whole herbs sparingly to avoid discoloration, and stick with tested spice amounts.
Zero-waste expansions
- Use leftover spices and herb stems from other recipes. Whole spice fragments from one jar can season the next brine to reduce waste. Strain if needed for clarity.
- Reserve the brine for vinaigrettes, marinades, deviled eggs, or to spike a Bloody Mary. For tips on using every drop, see How to use pickle brine in cooking.
Midway resource for preservation lovers: If you’re building a resilient pantry and love heritage techniques, browse The Lost Superfoods for time-tested ways to store and use food across seasons.
Safe Canning and Storage for Watermelon Rind Pickles
Can you water-bath can watermelon rind pickles? Yes—when your brine follows tested acid ratios and you use proper jar prep and processing times. Here’s a reliable approach for sweet-spiced styles.
Basic canning method (sweet-spiced)
- Brine ratio: Use at least a 1:1 ratio of 5% vinegar to water. A common formula is 2 cups 5% vinegar, 2 cups water, 1 1/2–2 cups sugar, and 2 tablespoons pickling salt for roughly 4 pints of rind. Keep acid levels constant.
- Jar prep: Wash jars and lids. Keep jars hot (in simmering water or a warm oven) until filling. Simmer lids according to manufacturer guidance if applicable.
- Pack the rind: Hot-pack method is ideal. Simmer prepared rind in the hot brine 3–4 minutes to heat through, then pack tightly into hot jars.
- Add spices: Divide whole spices (cinnamon, cloves, mustard seed, ginger) evenly among jars for consistent flavor.
- Fill with brine: Cover rind fully with hot brine, leaving 1/2 inch headspace. De-bubble by sliding a clean tool along the jar wall.
- Wipe rims and lid: Use a clean, damp cloth to ensure a good seal. Apply lids and bands fingertip tight.
Processing
- Water-bath process pints for 10 minutes at 0–1,000 ft elevation. Adjust for altitude per standard canning tables: often 15 minutes at 1,001–6,000 ft and 20 minutes above 6,000 ft.
- After processing, cool undisturbed for 12–24 hours. Check seals, remove bands, wipe jars, label, and store.
- Shelf life: Store sealed jars in a cool, dark place for up to 1 year for best quality. Once opened, refrigerate and use within 1–2 months.
Safety reminders
- Always use 5% acidity vinegar and maintain tested ratios. Do not can low-acid versions (e.g., heavy water dilution, soy-heavy brines).
- Avoid thickeners and purees in canned pickles.
- Softening aromatics: Garlic and herbs can darken or mellow during canning—normal, not harmful.
- Cloudy brine can be from minerals or starches. If it smells off or shows gas, sliminess, or mold, discard.
Need a refresher on jar sterilization, headspace, and altitude adjustments? See Guide to safe water-bath canning for step-by-step best practices.
Troubleshooting and Pro Tips for Perfect Pickles
Bitterness fixes
- Remove all green skin: Any remaining peel can impart bitterness. Trim generously until only white rind remains.
- Salt pre-soak: Brine the cut rind with salt and water, then rinse thoroughly to extract bitter compounds.
- Balance with spice and sweet: Whole cloves, cinnamon, and ginger complement acidity, while a moderate sugar level rounds sharp edges.
Crispness that lasts
- Ice bath before brining and avoid overcooking—especially during hot-pack canning.
- Calcium chloride can help maintain crunch without affecting flavor. Add a small amount to jars as directed.
- Cut uniform pieces to ensure even brine penetration.
Color and clarity
- Use distilled or filtered water to minimize mineral haze.
- Briefly simmer spices and strain for ultra-clear brine if presentation matters.
- Avoid aluminum or copper pots that can discolor pickles.
Flavor too sharp or too sweet?
- For refrigerator pickles, adjust on the next batch or gently balance at serving time: drizzle honey for extra sweetness or finish with a squeeze of citrus for brightness.
- For canned pickles, keep ratios tested; adjust flavors by adding herbs or serving condiments rather than changing the preservation formula.
Packing and headspace
- Pack jars tightly, especially with batons and cubes, to prevent excessive float. Leave 1/2 inch headspace.
- Remove air pockets for consistent seal and brine coverage.
Storage strategy
- Date every jar and rotate using first-in, first-out. Keep jars away from light and heat to protect texture and color.
- For refrigerator jars, use clean utensils to prevent contamination and keep contents submerged.
If you frequently preserve seasonal produce, you’ll love the pantry-planning chapters in The Self-Sufficient Backyard. It complements a no-waste kitchen with practical storage, garden, and homestead layouts.
Zero-Waste Pairings, Uses, and Pantry Planning
Use every part
- Leftover brine: Whisk with olive oil and a touch of mustard for a quick vinaigrette; marinate cucumbers, onions, or tofu; or use a splash to brighten bean salads. Try it in deviled eggs for a tangy kick.
- Trimmings and skins: Compost the green peel if local guidelines allow. If you maintain a bokashi or worm bin, rind scraps break down efficiently. Learn more in Compost vs. Bokashi: which is best?
Recipe ideas to feature pickled rind
- Picnic boards: Pair with sharp cheddar, toasted nuts, and cured meats—or a plant-forward spread with hummus, olives, and grilled veggies.
- Slaw upgrade: Dice and fold into cabbage slaw with a touch of brine for acidity. Perfect for pulled pork or mushroom BBQ sandwiches.
- Grain bowls: Layer with quinoa or farro, roasted squash, lemony greens, and a dollop of yogurt or tahini.
- Brunch: Tuck into smoked fish platters or omelets; add to avocado toast for a crunchy, tart surprise.
Batching and seasonality
- Watermelon season is the time to stock up. Process multiple melons over one weekend for an assortment of flavors—sweet-spiced for charcuterie, dill-garlic for sandwiches, chili-lime for tacos.
- Label clearly: Include flavor, batch number, and date. A simple spreadsheet or pantry app can help you track jars and reduce waste.
Resilient pantry, resilient home
- Reliable water and storage are cornerstones of a sustainable kitchen. If water efficiency is on your mind, the modular approach in The AquaTower can help you think about filtration and availability around the home.
- For broader preservation inspiration and heritage techniques, explore The Lost Superfoods.
Recommended resources
- The Self-Sufficient Backyard: Build a tighter loop between garden, pantry, and kitchen to cut waste.
- The Lost Superfoods: Learn time-tested preservation ideas you can adapt to your pantry.
- The AquaTower: Think through water access and filtration to support cooking, canning, and cleaning.
If emergency readiness is part of your homestead plan, an energy backup like the Ultimate OFF-GRID Generator can keep essential kitchen gear running when the grid goes down—handy during large canning days or storm seasons.
Build Your First Jar Today
Now that you know how to prep, brine, and store, this is your invitation to turn today’s watermelon into tomorrow’s crunchy condiment. Start with a small refrigerator batch to dial in your ideal sweet-tangy balance. Then, when flavors feel right, scale up with a weekend canning session to stock the pantry for winter soups, sandwiches, and holiday boards. Every jar of Zero-Waste Watermelon Rind Pickles is a win for flavor, budget, and the planet.
Conclusion
Zero-Waste Watermelon Rind Pickles bring together taste, thrift, and sustainability in one simple jar. With careful trimming to remove the green skin, a vinegar-forward brine for safety, and a set of flexible flavor routes—from sweet-spiced to dill-garlic—you’ll turn “scraps” into something special. Keep a few refrigerator jars for everyday meals and set aside canned batches for the off-season. It’s a small habit with a big impact that makes your kitchen more resilient and delicious.
FAQ
Can watermelon rind pickles be water-bath canned?
Yes. Use a tested, high-acid brine (at least 1:1 5% vinegar to water). Hot-pack into sterilized jars with 1/2 inch headspace and process pints for 10 minutes at sea level, adjusting for altitude (often 15 minutes at 1,001–6,000 ft and 20 minutes above 6,000 ft). Maintain vinegar strength; do not dilute acid for canning.
Do you have to remove the green skin from watermelon rind?
Yes. For pleasant flavor and texture, remove all the dark green skin and any remaining pink flesh. Only the white inner rind should be pickled. The peel contributes bitterness and toughness, especially after processing.
How do you make watermelon rind pickles less bitter?
Peel thoroughly to remove the green skin, then use a salt-water soak (2–4 hours) and rinse well. A brief blanch before brining can also help. Finally, balance with warm spices (cinnamon, cloves, ginger) and an appropriate amount of sugar in the brine.
How long do watermelon rind pickles last in storage?
- Refrigerator pickles: Best within 3–4 weeks. Keep submerged, use clean utensils, and refrigerate at all times.
- Water-bath canned: Up to 1 year at cool room temperature for best quality. After opening, refrigerate and enjoy within 1–2 months.