
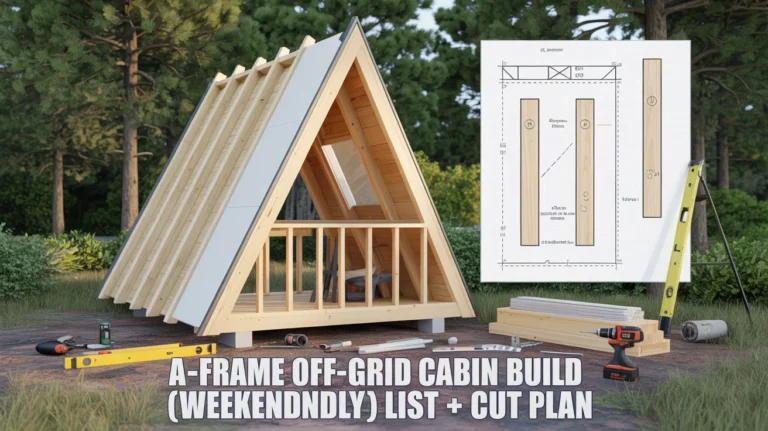
Building a small A-frame is one of the fastest ways to put a beautiful, durable shelter on your land with minimal tools and a realistic weekend schedule. This guide gives you a complete A-Frame Off-Grid Cabin Build (Weekend-Friendly) + Materials List + Cut Plan for a 12×16 footprint you can raise with a helper or two. You’ll also learn the best foundation options, four-season insulation details, off-grid power and water ideas, and the most common mistakes to avoid so your cabin lasts decades. For off-grid power right away, consider the Ultimate OFF-GRID Generator; pair it with a small solar array when you’re ready.
Note: Always check local codes, required permits, and snow/wind loads before building. Adjust member sizes accordingly or consult a local pro.
Project scope, site choice, and a realistic weekend roadmap
The goal here is a sturdy, simple A-frame you can stand up quickly, get dried-in fast, and improve as time allows. The 12×16 plan keeps materials manageable, spans reasonable, and weight low enough for small crews. A 12:12 roof pitch (45°) offers a classic profile, fast layout math, and sheds weather efficiently.
What “weekend-friendly” means:
- Minimal excavation with pier footings or ground screws
- Platform deck frame you can square quickly
- Repeating, identical rafters you can cut with a template
- Simple metal roof for rapid dry-in
- Gable-end framing for the door, windows, and weatherproofing
- Interior work can proceed in future weekends (loft, floor, finishes, built-ins)
Two-weekend plan at a glance:
- Weekend 1: Establish layout, install footings, frame and sheath the platform, set the first two rafter frames, brace, and square. If time remains, cut remaining rafters.
- Weekend 2: Stand remaining rafters, install ridge, sheath and roof underlayment, install metal roofing, frame gable ends, set the door, and housewrap. If weather cooperates, add windows.
Why A-frames excel off-grid:
- A steep roof readily sheds snow and water, minimizing maintenance.
- Simple, repeatable framing means fewer specialized tools and faster learning.
- Compact surface area reduces heat loss and material costs compared to boxier cabins.
- Loftable volume allows sleeping space without increasing the footprint.
Site considerations to decide now:
- Orientation: Face the gable with the entry toward the best views and leeward side of prevailing winds. South-facing glazing helps with passive solar.
- Drainage: Pick a site that dries quickly and sits above grade. A-frame roof drip lines concentrate water—keep vegetation and gravel pads under the dripline.
- Access: Ensure room for material delivery, truck turning, and safe staging.
If your homestead plan includes food, water, and energy self-reliance around the cabin site, a starter blueprint like The Self-Sufficient Backyard helps integrate gardens, composting, chickens, and graywater into the layout.
Dimensions, layout, and permits that keep the build on rails
Target footprint: 12 ft (gable width) × 16 ft (length). This size is efficient on material lengths, keeps spans modest, and often fits “accessory structure” thresholds in many jurisdictions. Always confirm local size limits, frost depth, and wind/snow exposure.

Key geometry (12:12 pitch):
- Half-span (run): 6 ft from deck edge to ridge line.
- Rise over run: 12 in rise for 12 in run, so rise at the ridge is 6 ft above the birdsmouth seat.
- Rafter line length from seat to ridge: about 8 ft 6 in (hypotenuse of 6×6 triangle).
- Overhangs: Add 16–24 in beyond the deck rim to keep siding off splash zones and protect the deck.
Clearances and headroom:
- With a 12:12 pitch, ridge height from the seat cut is roughly 6 ft. If the deck stands 18–24 in above grade and your gable walls frame a door on one end, you get comfortable standing room down the center.
- Loft: Add a sleeping loft spanning half the length (8 ft). Loft joist height can be set by adding 2× ledger plates on the inside faces of opposing rafters and using 2×6 or 2×8 loft joists. Expect crouch height at the perimeter and standing headroom near centerline.
Door and windows:
- Door: Place in one gable end (the 12 ft wall). A 36-in exterior door is standard.
- Windows: Two to four operable windows in gables aid cross-ventilation; skylight alternatives require careful flashing on a steep roof.
Permits and code realities:
- Frost depth determines footing style and depth.
- Snow load may require upsizing rafters (for example, 2×10s instead of 2×8s) or closer spacing.
- High-wind zones may necessitate additional hold-downs, straps, and screws.
- Electrical and plumbing have separate permits. If you’re keeping it truly off-grid, you may avoid some red tape, but always confirm.
Helpful planning resources:
Fast foundations and a deck frame that squares perfectly
Your weekend schedule hinges on foundation choice. The aim is a stable, code-appropriate base without heavy equipment.
Three proven options:
- Concrete pier footings with sonotubes: Dig below frost depth, set Bigfoot or 12–16 in tubes, level top forms, pour concrete, set post bases. It’s the most traditional and often most compliant approach.
- Helical ground screws: Fastest to install, minimal excavation. Ideal for sloped or rocky sites. Have them installed professionally or rent a driver if available locally.
- Precast pier blocks (above frost line): Acceptable for temporary/seasonal structures or mild climates. Quickest DIY, but not for freeze–thaw regions.
Recommended layout for a 12×16 platform:
- Support lines running the 16 ft length (three rows): one at each rim, one centered at 6 ft.
- Footings at 6–8 points (two or three per row depending on soil and lumber): Aim for spacing 6–8 ft along the length.
- Beams: 4×6 or built-up double 2×8 beams sitting on adjustable post bases and 4×4 posts.
- Joists: 2×8 at 16 in on center, spanning the 12 ft width. Rim joists at 16 ft length.
Deck sheathing:
- 3/4 in tongue-and-groove OSB or plywood glued and screwed. T&G minimizes bounce and squeaks and adds racking resistance while you raise rafters.
- Use construction adhesive on joists. Screw down 6–8 in on edges, 12 in in the field.
Anchorage and uplift:
- Set Simpson post bases in the wet concrete or use anchors for ground screws; then strap beams to posts, joists to beams, and rafters to the deck rim. High-wind sites need more steel—plan for it.
Drainage and splash protection:
- Lay landscape fabric and gravel under the drip lines.
- Extend eaves 16–24 in. Use gutters or drip strips if desired.
Extra help:
- Off-grid power systems comparison for choosing tools if no grid power is available on site.
Materials list, tools, and hardware that save time on site
Quantities below suit a 12×16 footprint with 12:12 pitch. Adjust for load requirements and local stock lengths.

Framing lumber:
- Floor system:
- 2×8×12 joists: 13 pieces (16 in on center across 16 ft span count yields ~13 joists; verify on layout)
- 2×8×16 rim joists: 2 pieces
- 4×6×16 beams or built-up double 2×8 beams: 3 runs (cut to suit footing layout)
- 4×4 posts: 6–8 pieces as needed
- Rafters and ridge:
- 2×8×12 rafters: 18 pieces (9 rafter frames at 24 in on center)
- 2×8×16 ridge board: 1 piece (or splice two 2×8×10s with a 4 ft overlap)
- Gable-end framing:
- 2×4 studs and plates: 15–20 pieces for door and window frames, lintels, blocking
- Loft (optional):
- 2×6×12 loft joists: 8–10 pieces (for an 8 ft loft area)
- 2× ledger plates: 2×6×16, 2 pieces
Sheathing and roofing:
- 3/4 in T&G subfloor: 6 sheets
- 1/2 in or 5/8 in roof sheathing: 10–12 sheets (depends on overhangs)
- Synthetic roofing underlayment: 2 rolls
- Drip edge, eave, and rake trim: as needed for 12×16 roof with overhangs
- Metal roofing panels (standing seam or corrugated), color-matched screws: panels cut to rafter run length plus overhang
Waterproofing and exterior:
- Housewrap: 1 roll
- Ice and water shield (eaves and ridge): 2–3 rolls
- Flashing tape for window/door openings
- Door: 36 in exterior prehung
- Windows: 2–4 units sized to your gable framing
Insulation and air sealing (four-season):
- Mineral wool or dense fiberglass batts sized to rafter depth
- Rigid foam for exterior thermal break or interior service cavity strategy
- Smart vapor retarder membrane (Class II/variable)
- Spray foam cans for small gaps
- Tapes and gaskets for airtight transitions
Fasteners and connectors:
- Structural screws for framing (3 in, 4 in)
- Deck screws (2–1/2 in)
- 16d, 10d nails if nailing
- Simpson hurricane ties, rafter ties, rafter to rim clips, ridge straps, angle brackets
- Joist hangers (if using framed loft)
- Construction adhesive
Tools (minimalist kit):
- Circular saw with framing blade, spare battery if cordless
- Speed square, rafter square, chalk line, string line
- Tape measures, levels, plumb bob
- Impact driver and drill, bit set
- Post-hole digger or auger (if using sonotubes)
- Shovel, digging bar, wheelbarrow
- Hammer, nail sets, pry bar
- Safety gear: eye/ear/respirator, gloves, harness if roofing
- Roofing snips, screw gun for metal panels
- Sawhorses and a sturdy worktable
If you’re building a homestead around the cabin, The Self-Sufficient Backyard helps you plan gardens, water, compost, and small livestock in ways that feed into your cabin’s daily life.
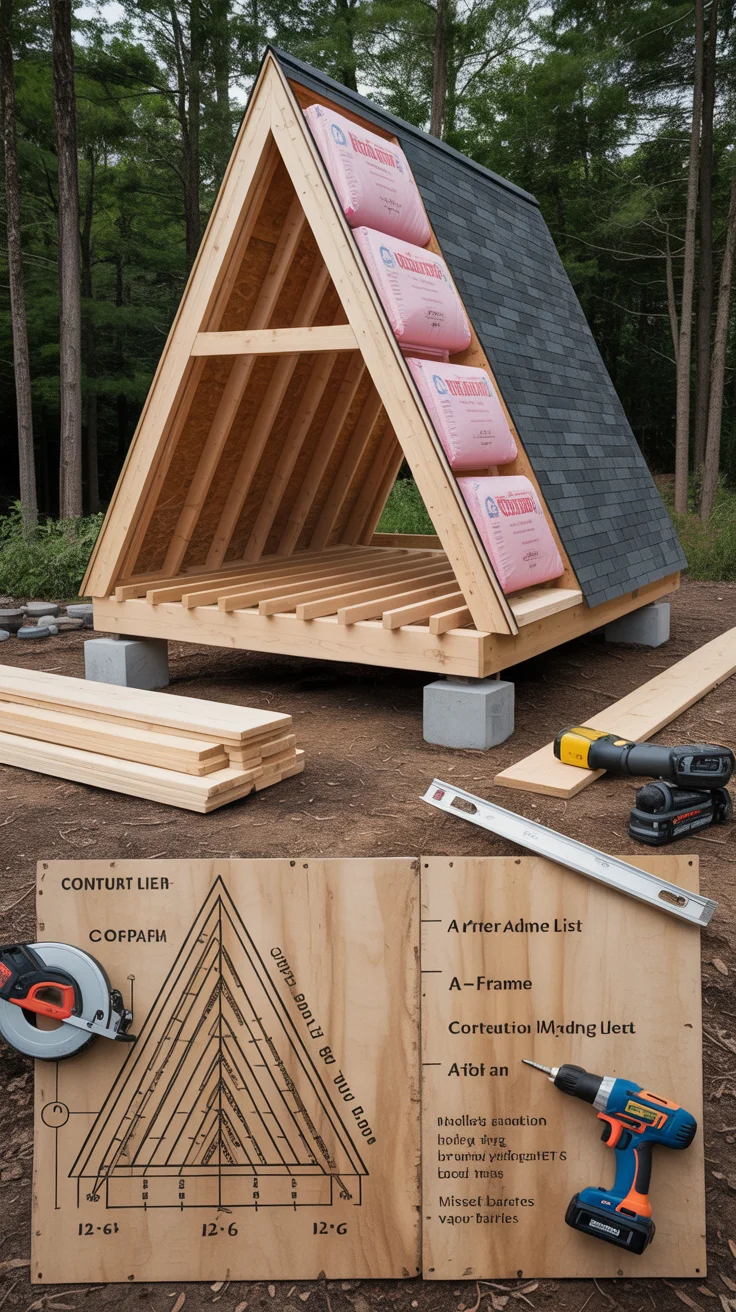
Cut plan and templates for fast, accurate framing
The key to a rapid A-frame is identical rafters. Cut one perfect template; then gang-cut all others.
Rafter layout (12:12 pitch, 2×8 stock):
- Top angle: 45°. Cut a clean 45° at the ridge end.
- Birdsmouth: Seat depth no more than 1/3 of rafter depth (about 2–3/8 in for a 2×8). Horizontal seat length 3–1/2 in to align over the rim or beam.
- Tail/overhang: Add 16–24 in beyond the seat to shield walls and deck. Cut a plumb tail for clean fascia and drip edge.
Rafter length target:
- From ridge cut to birdsmouth seat: ~8 ft 6 in.
- Tail length: 16–24 in.
- Total blank length: 10 ft to 10 ft 6 in fits well on 12 ft stock, leaving waste for blocks.
Template steps:
- Mark 12:12 pitch: Use a speed square—mark 45° on the ridge end and cut.
- From the ridge cut, measure down the rafter 8 ft 6 in and mark the birdsmouth seat line square to the rafter edge. Mark a plumb line for the heel.
- Lay out a 3–1/2 in seat (matches 2× rim width). Cut carefully, maintaining the 1/3-depth rule.
- From the seat line, measure 18–24 in to the tail. Mark and cut a plumb tail.
- Dry-fit the template on the deck rim, check ridge alignment with a plumb line to the deck centerline, and adjust if needed.
Ridge board and spacing:
- Ridge board: 2×8, 16 ft. It serves as a non-structural alignment aid in most A-frames; still, strap rafters across the ridge for uplift resistance.
- Spacing: 24 in on center along the 16 ft length. That’s nine rafter frames (pairs) total: positions at 0, 24, 48, 72, 96, 120, 144, 168, and end. Gable frames land at the ends for sheathing nailing.
Floor and deck cuts:
- Joists: Cut 2×8×12 to exact span if needed. Rim joists remain full 16 ft.
- Blocking: Rip or cut scrap 2× blocks for mid-span blocking or bridging.
- Beams: If using built-up 2×8 beams, cut lengths to align with footing centers and splice over posts with structural screws and construction adhesive.
Gable-end triangles:
- Frame a simple 2×4 triangle within the end rafter frames for sheathing, door, and window openings.
- Header sizes for windows/doors depend on width and load; a pair of 2×6 or 2×8 with jack studs often suffices in small spans—verify for your loads.
Sheathing optimization:
- Roof: Lay full 4×8 sheets perpendicular to rafters, starting at the eave. Snap chalk lines at rafters for accurate screw lines. Stagger seams, leave 1/8 in gaps for expansion.
- Gable sheathing: Use cardboard or thin plywood to template triangular pieces; then transfer to plywood to minimize waste.
Fast hardware layout:
- Pre-stage rafter ties, hurricane clips, and ridge straps. Drill pilot holes in components you’ll be lifting to speed assembly on the ladder.
For a robust water plan, pair your roof with catchment into a gravity-fed tank like The AquaTower; it adds resilience and reduces trips hauling jugs. See also our DIY rainwater collection guide.
Step-by-step weekend build sequence and time-saving tips
Weekend 1: foundation, platform, and first rafter frames
- Lay out the 12×16 rectangle: Set batter boards and string lines, measure diagonals until equal for a perfect rectangle. Mark footing centers.
- Install footings: Drill or dig holes to frost depth and set sonotubes, or install ground screws. Ensure tops are level and on layout.
- Posts and beams: Cut 4×4 posts to height. Set post bases, plumb posts, and attach beams (4×6 or built-up 2×8). Confirm straight and level.
- Frame the deck: Install rim joists and hang interior joists 16 in on center. Square the frame by measuring diagonals and pushing/pulling until equal. Add mid-span blocking if required.
- Sheath the deck: Glue and screw 3/4 in T&G. Snap a centerline down the 16 ft length to align the ridge and rafter layout.
- Cut two rafter templates: Verify angles and birdsmouth with test fits. When satisfied, cut all remaining rafters using the template.
- Stand the first two rafter frames: Position at each gable end. Use temporary diagonal braces to hold plumb. Install the ridge board between them to lock spacing.
Weekend 2: frame-out, dry-in, and weatherproof
- Install remaining rafters: Work from ends toward the middle. Fasten with rafter ties and hurricane clips at seats; strap across the ridge as required.
- Roof sheathing: Lay 1/2–5/8 in panels with glue beads on rafters if allowed. Nail or screw per spec. Add ice and water shield at eaves and ridge.
- Underlayment and metal roof: Roll synthetic underlayment, then set metal panels from eave up, overlapping correctly. Install drip edge, rake trim, and ridge cap.
- Gable-end framing: Frame door and windows within the end triangles. Add headers, king/jack studs, and sill plates. Sheath gables and cut openings.
- Weather barrier: Housewrap the gables, tape seams, and flash openings. Set the door and at least one window. Seal it well.
- Loft: If schedule allows, ledger the rafters, set joists, and sheath the loft with 3/4 in T&G.
- Final bracing: Add permanent rafter blocking or structural panels at the eaves for lateral stiffness.
Pro tips:
- Pre-drill metal roofing panels on sawhorses for dead-accurate screw lines.
- Prep “hardware kits” in zip bags for each rafter bay—clips, straps, and screws—so helpers always have what they need.
- Keep a punch list on a scrap of sheathing; cross off items in real time.
Common A-frame mistakes to avoid:
- Undersized rafters for snow zones: If you’re above 30 psf snow load, consider 2×10s or closer spacing. Check span tables.
- Deep birdsmouth cuts: Never notch more than 1/3 the rafter depth. Use hardware to make up strength, not deeper cuts.
- Poor uplift detailing: Strap ridge joints and seat connections. Use adequate fasteners at metal roof edges.
- Skipping housewrap and flashing: Water finds every gap—do it right the first time.
- Too-short overhangs: At least 16 in keeps walls dry.
- No air gap behind cladding: If you later add siding to the gables, include ventilated rainscreen battens.
If you want fast, silent electricity for lights and tools while you finish the interior, the Ultimate OFF-GRID Generator is a handy bridge until your full solar setup is installed.
Off-grid power, water, heat, and four-season insulation details
Power:
- Start simple with a compact generator-based system, then add solar. A quiet generator paired with a lithium battery and inverter lets you run lights, charge tools, and power a small fridge from day one. The Ultimate OFF-GRID Generator can serve as a primary or backup source.
- Solar sizing: Even a 400–800 W array with an MPPT charge controller and a 100–200 Ah battery bank covers lighting, devices, and intermittent tool use. Expand later for appliances.
Water:
- Roof catchment to a first-flush diverter and storage tank works well with steep A-frames. For a plug-and-play approach, the The AquaTower offers compact, gravity-fed storage you can locate uphill for pressure without pumps.
- Graywater: Keep sinks simple initially; use a gravel trench where permitted. Upgrade to a proper system as you finalize kitchen and bath.
Heat:
- Small wood stove or vented propane heater is ideal for compact A-frames. Follow clearances and use double-wall pipe through the roof with proper flashing on the steep pitch.
Four-season insulation strategy (vented roof approach):
- Rafter bays: Mineral wool or high-density fiberglass sized to rafter depth. If you need more R-value, strap the interior with 2×s perpendicular to rafters for a service cavity and add batts there; this also reduces thermal bridging.
- Ventilation: Maintain a 1–2 in air channel above insulation from soffit vent at the eave to a ridge vent for moisture control. Baffles keep the channel open.
- Air control layer: Install a continuous smart vapor retarder membrane on the warm-in-winter side. Tape and gasket it at seams and penetrations.
- Exterior: Underlayment and metal roofing above sheathing complete the weather layer. If you ever add exterior foam over the roof sheathing, follow dew-point guidance for your climate to prevent condensation.
- Gable walls: Treat like standard walls—sheath, housewrap, rainscreen battens, and cladding. Insulate cavities and install the same interior air barrier.
Food and storage resiliency:
- Stocking shelf-stable staples is smart for off-grid cabins. For simple ideas on what to store and how to rotate it, see The Lost Superfoods.
Interior moisture management:
- Use a vented range hood or operable windows while cooking.
- Keep firewood outside to reduce indoor humidity.
- A small, efficient heat source and a tight air barrier go a long way toward dryness and comfort.
Finishing touches, maintenance, and expandability
Exterior cladding:
- Gable ends: Durable fiber-cement or wood siding with a ventilated rainscreen. Prime all cut ends. Flash windows meticulously.
- Roof edges: Add snow guards if necessary; they protect doors and walkways from sliding snow.
Deck and steps:
- Build a small entry stoop with a landing that’s at least as wide as the door. Use treated lumber or rot-resistant species like cedar.
Interior finishes:
- Keep it light: Pine or poplar paneling brightens the compact volume. Clear finishes reduce maintenance.
- Built-ins: Take advantage of the triangular geometry with triangular shelves, under-loft storage, and a fold-down table.
Loft safety:
- Guardrails at 36–42 in height and a robust ladder or alternating-tread stair keep it safe without consuming floor space.
Future upgrade paths:
- Enclose a small mudroom under one eave.
- Add a dormer for more loft headroom.
- Expand decks along the long sides for outdoor living.
Seasonal maintenance checklist:
- Inspect metal roof screws annually; snug if needed.
- Clear debris from eaves and drip lines.
- Re-seal door thresholds and window trims before winter.
- Check rafter connections and straps after major wind events.
When you’re ready to turn the cabin into a productive homestead hub, The Self-Sufficient Backyard bridges the gap between a great shelter and a great homestead plan.
Build smarter off-grid: recommended resources
- Ultimate OFF-GRID Generator: Get reliable power while you build and beyond. Ultimate OFF-GRID Generator
- Water storage and gravity feed in one package: The AquaTower
- Homestead planning and self-reliance systems: The Self-Sufficient Backyard
- Pantry staples and long-term food strategies: The Lost Superfoods
Note: Choose what fits your goals and climate. None of these replace local code compliance or professional advice when it’s required.
Conclusion: a simple, fast path to an A-frame you’ll love
With a thoughtful plan, a solid foundation choice, and a repeatable rafter template, an A-Frame Off-Grid Cabin Build (Weekend-Friendly) + Materials List + Cut Plan is absolutely doable over two focused weekends. Start by squaring a stiff platform, then raise matched rafters at 24 in on center, sheath and roof with metal to dry-in quickly, and finish gables for weather tightness. From there, add insulation, a compact off-grid power and water setup, and interior touches at your pace. Avoid the common mistakes—undersized framing, weak uplift connections, sloppy flashing—and your little A-frame will handle weather, hold heat, and serve as a solid base for years of adventures ahead.
If you want deep dives on specific skills, explore these next: Beginner’s guide to metal roofing, How to flash doors and windows, and Off-grid heating options.
FAQ
Is an A-frame cabin cheaper to build than a traditional cabin?
- Generally yes at small footprints. The triangular structure eliminates wall-framing on the long sides and uses repeatable rafters with simple connections. You’ll save on siding and trim but may spend slightly more on roofing and insulation because the roof area is larger. Material choices and local loads are the biggest cost drivers.
What foundation works best for an A-frame cabin?
- In frost zones, concrete piers or helical ground screws are best. They offer solid bearing, uplift resistance, and compliance. For mild climates or temporary setups, precast pier blocks on compacted gravel are quick to install. Choose based on soil, frost depth, snow/wind loads, and code.
How do you insulate an A-frame for four seasons?
- Use a vented roof assembly with baffles to maintain a 1–2 in air channel, fill rafter bays with mineral wool or dense fiberglass, install a smart vapor retarder on the warm side, and create a service cavity with interior strapping to reduce thermal bridges. Add a ridge vent and good air sealing around penetrations. Gable ends get standard wall insulation, housewrap, and rainscreen cladding.
What are the most common A-frame building mistakes?
- Undersized rafters for snow loads, over-cut birdsmouth notches, inadequate uplift hardware, skimpy overhangs that soak walls, poor flashing around windows/doors, and skipping a continuous interior air barrier. Each of these shortens the cabin’s lifespan and increases maintenance. Size members appropriately, use proper connectors, and follow a tight air/water control strategy.