
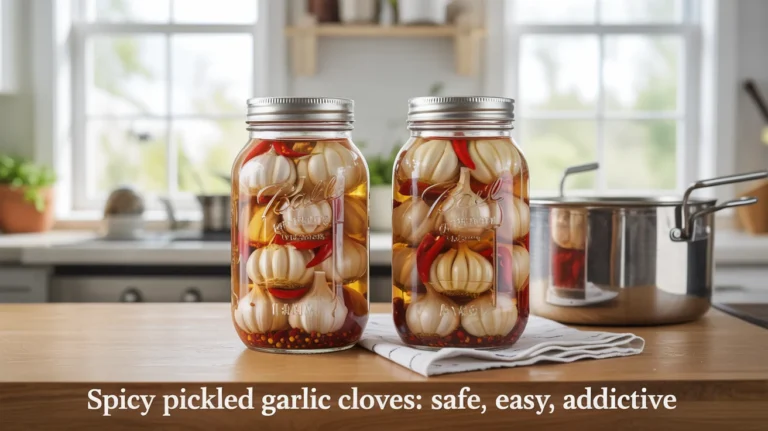
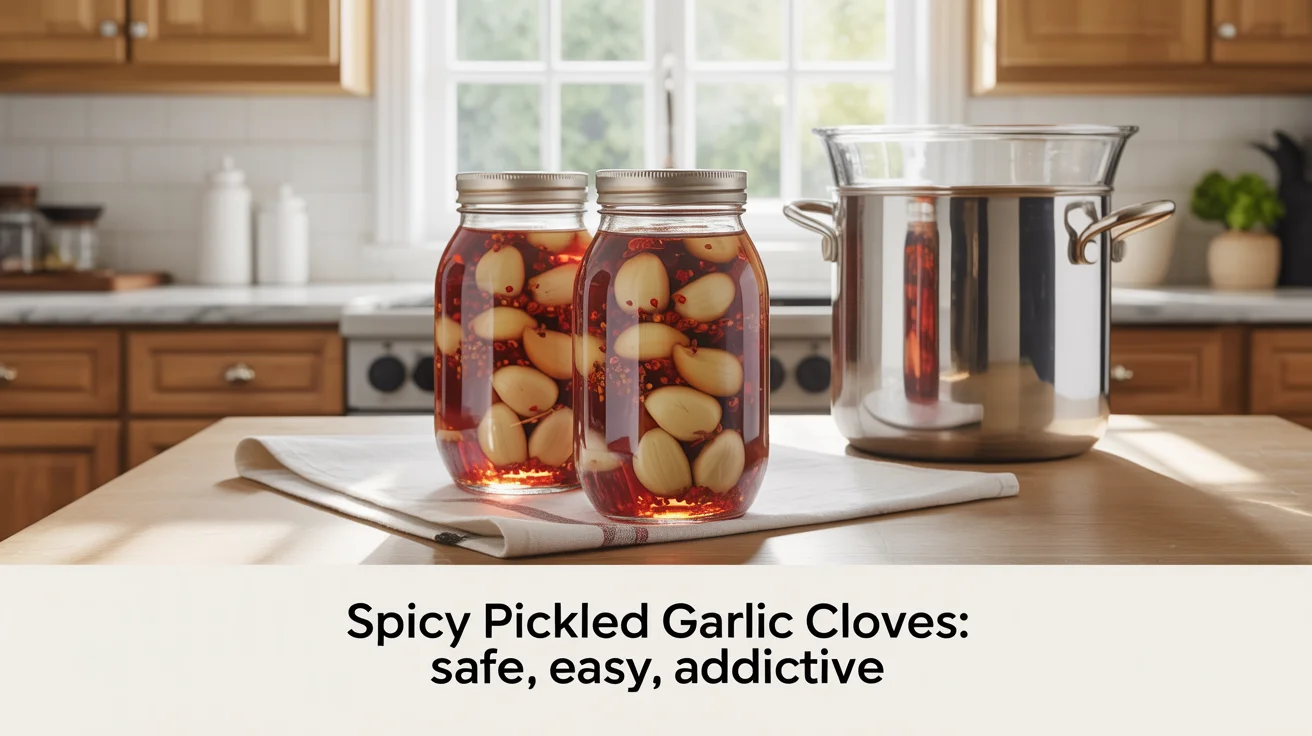
Spicy pickled garlic cloves are the pantry snack trend that actually deserves the hype. Crunchy, tangy, and a little fiery, pickled garlic brings the best of a quick pickle with punchy heat that mellows into a sweet-savory bite over time. Whether you want a fast refrigerator version or a tested, shelf-stable batch for your homestead pantry, this guide covers safe methods, flavor variations, and pro tips so your pickled garlic turns out crisp, bright, and delicious.
If you’re building a resilient pantry that goes beyond trendy snacks, you’ll like the step-by-step preservation ideas in The Lost Superfoods. It’s a practical companion to what you’ll make below.
What makes pickled garlic special and why it’s suddenly everywhere
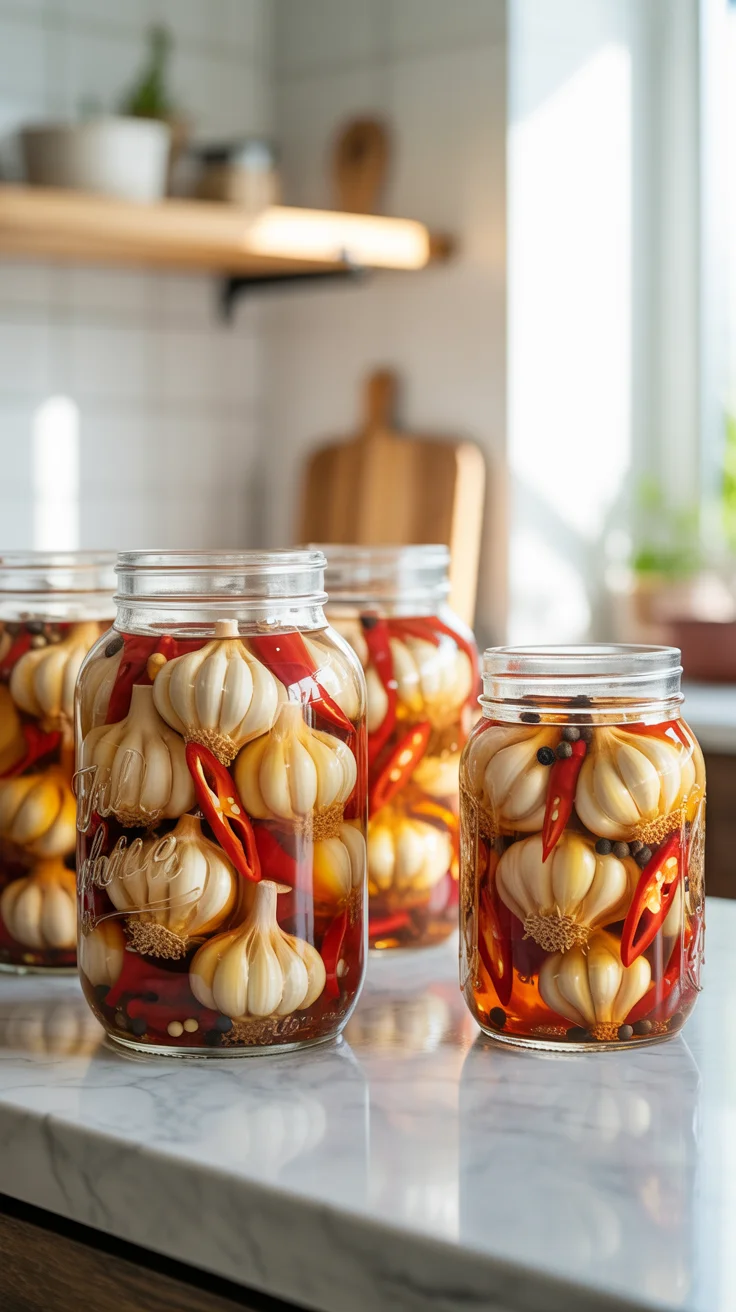
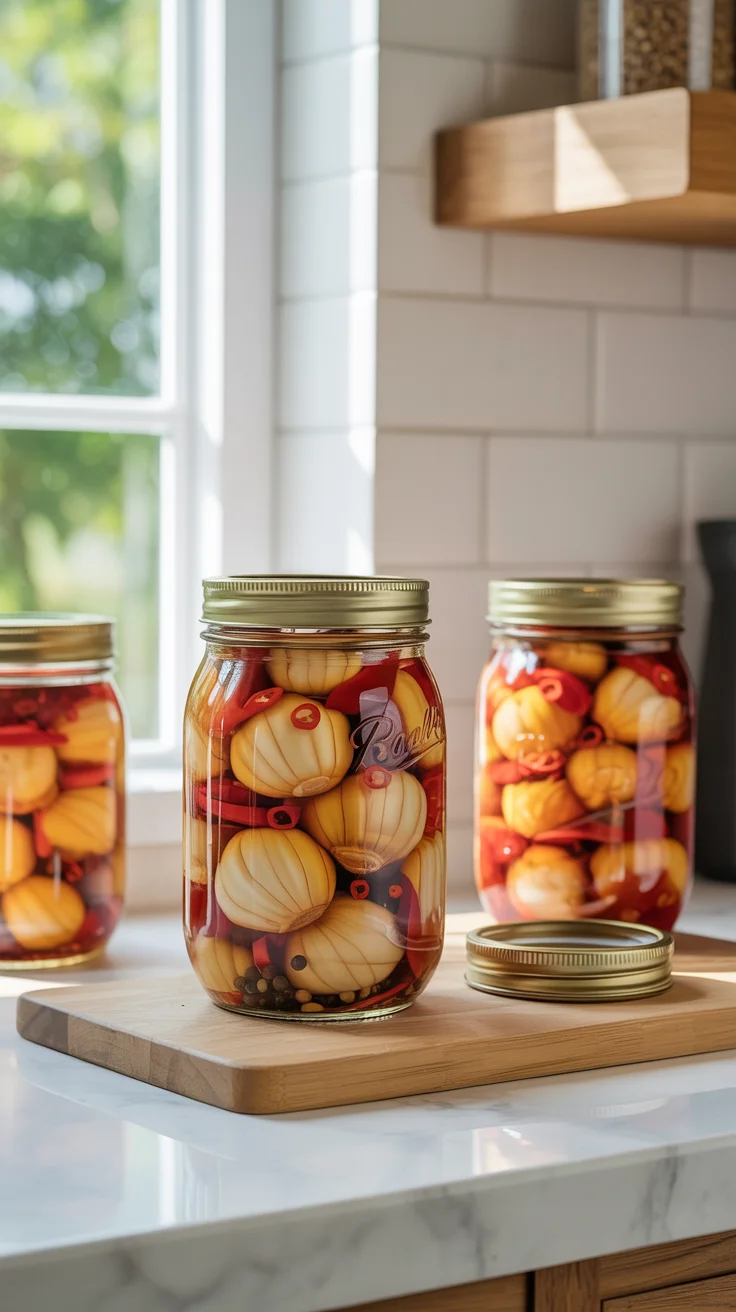
Garlic changes character when it’s pickled. Raw cloves are assertive and sharp; pickling softens that bite and layers on acidity, a touch of sweetness, and spice if you add chilies. The texture stays satisfyingly crisp if you use firm, fresh bulbs and a properly balanced brine. The result is a snack you can spear straight from the jar, toss through salads or grain bowls, or chop into dressings, marinades, and spreads.
Why the buzz now? A social-media wave turned “spicy pickled garlic” into a portable, anytime pantry treat. Creators drain a jar of pickled garlic, stir in chili paste or flakes, and shake to coat. It’s simple, snacky, and customizable. But there’s an important distinction: the viral version is a refrigerator snack, not a shelf-stable preserve—unless you prepare and process it using a tested canning method that ensures pH and heat treatment are safe for pantry storage.
Pickling versus fermenting also matters. Fermented garlic relies on lactic acid bacteria, salt, and time, producing a funky, probiotic-rich product that’s stored in the fridge. Pickled garlic uses an acid (usually 5% vinegar) plus salt and sugar to acidify the cloves immediately. The steps and safety rules are different, so stick to one approach at a time.
What you’ll learn here:
- How to prep garlic so it stays crisp and flavorful
- The best ratios for a bright, balanced spicy brine
- A quick refrigerator method for the trend you can make tonight
- A safe, shelf-stable canning method for long-term pantry storage
- Troubleshooting color changes (blue/green) and managing heat levels
- Storage times, rotation tips, and smart ways to use every clove
Safety-first guide to pickling garlic at home
Garlic is a low-acid vegetable. That means safety depends on acidifying the cloves with a proper brine and, for pantry storage, using a boiling-water canner to heat-process jars. Follow these fundamentals every time.
Key safety principles
- Use 5% acidity vinegar: Distilled white vinegar gives the cleanest flavor and consistent acidity for pickles. Apple cider vinegar (5% acidity) works too but can darken the cloves and add a fruity note.
- Keep a sufficiently acidic brine: For refrigerator pickles, a 3:1 or 2:1 ratio of vinegar to water keeps pH comfortably low. For shelf-stable canning, follow a tested recipe—many target at least 1:1 vinegar to water with 5% vinegar, sometimes stronger. Do not dilute the vinegar beyond recipe limits.
- Choose canning salt: Use pickling/canning salt to avoid anti-caking agents and minerals that cloud brines or affect texture. Kosher salt can work if you measure by weight; table salt isn’t recommended.
- No oil in pickled garlic: Oil creates an anaerobic environment and can increase botulism risk in improperly acidified, non-refrigerated products. Save garlic-in-oil for immediate use and strict refrigeration.
- Use non-reactive cookware: Stainless steel, glass, and food-grade plastic are your friends. Avoid aluminum or copper, which can react with acids and cause off-colors.
- Prep jars properly: Wash with hot, soapy water, rinse well, and keep hot before filling. New lids are recommended for reliable seals. See How to sterilize canning jars safely.
- Headspace and de-bubbling: Leave 1/2 inch headspace unless your tested recipe states otherwise. Slide a non-metallic tool down the jar walls to release trapped air; adjust headspace if needed.
About processing times and altitude
- Water-bath canning drives heat through the jar to inactivate spoilage organisms and form a strong vacuum seal. Typical processing times for tested pickled garlic recipes are about 10 minutes for half-pints and pints at sea level, with adjustments for altitude (e.g., 15 minutes at 1,001–6,000 ft; 20 minutes above 6,000 ft). Always follow the exact time in your tested recipe and adjust for your elevation.
- For authoritative guidance, consult the National Center for Home Food Preservation (NCHFP) and your local extension resources:
If you’re growing your own bulbs and building out a backyard pantry, the practical tips in The Self-Sufficient Backyard pair nicely with the preservation steps here.
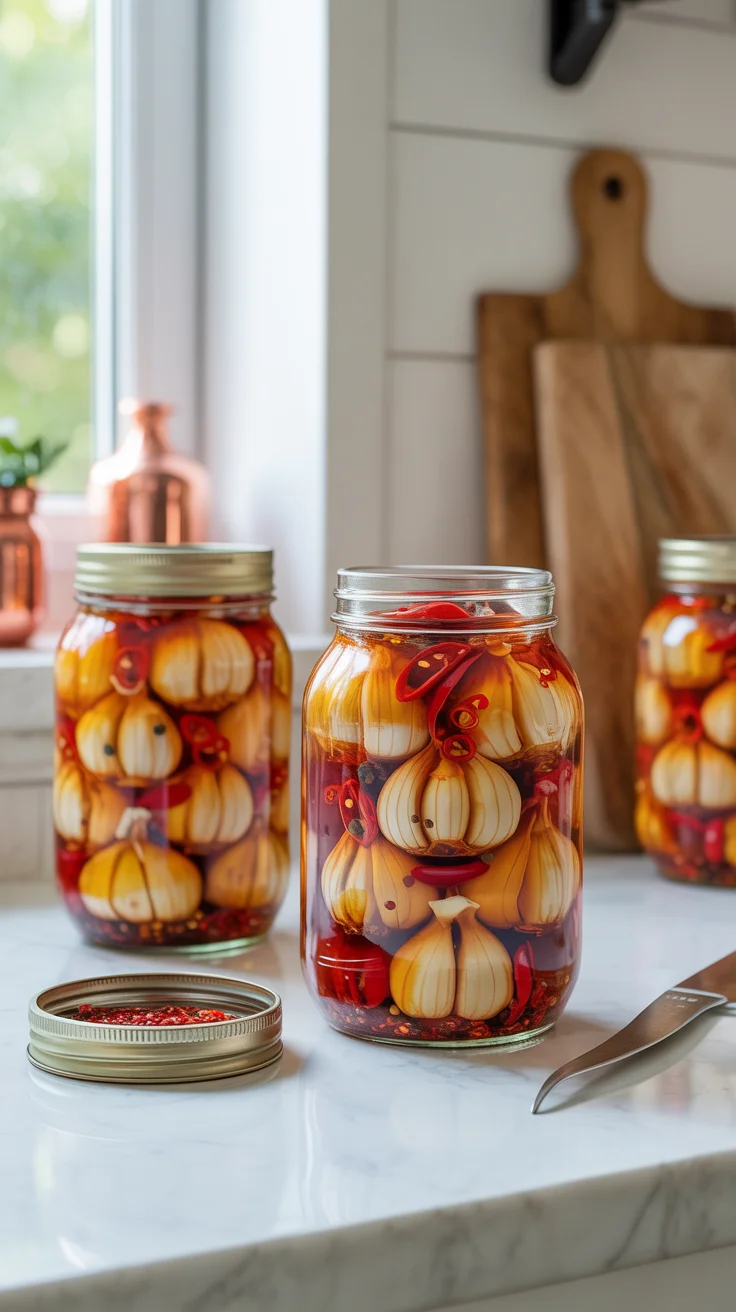
Spicy pickled garlic cloves: refrigerator method for the trending snack
This no-cook refrigerator method delivers the saucy, chili-forward “viral” flavor people love—while keeping the brine safely acidic. It’s ready to eat in 24–48 hours and improves over a week. Because this is not processed in a canner, keep it refrigerated at all times.
Yield: About 1 pint (16 oz)
Ingredients
- 2 cups firm, fresh garlic cloves, peeled (about 5–6 heads, depending on size)
- 3/4 cup distilled white vinegar (5% acidity)
- 1/4 cup water
- 1 tablespoon canning or kosher salt (fine)
- 1–2 tablespoons sugar or honey, to taste
- 1–2 tablespoons chili paste (such as gochujang or sriracha) or 1–2 teaspoons crushed red pepper flakes
- Optional add-ins: 1 teaspoon toasted sesame seeds, 1/2 teaspoon smoked paprika, a few black peppercorns, 1 bay leaf, or a couple of thin lemon slices (no pith)
Steps
- Prep the garlic. Choose heavy, tight bulbs without green sprouts. If a clove has a central green sprout, remove it for a milder taste. Rinse and pat dry.
- Mix the brine. In a non-reactive measuring cup, whisk vinegar, water, salt, and sugar/honey until dissolved. The 3:1 vinegar-to-water ratio keeps acidity high enough for safe pickling in the fridge.
- Pack the jar. Add garlic to a clean pint jar. If using pepper flakes, peppercorns, or bay leaf, add them now.
- Add chili paste. Stir chili paste into the brine until fully combined; pour over the garlic to cover by at least 1/4 inch. Leave about 1/2 inch headspace. If using sesame seeds or paprika, add them now.
- Cap and chill. Seal with a non-reactive, tight-fitting lid. Shake gently to distribute and refrigerate.
- Rest and taste. It’s tasty within 24 hours; at 3–7 days the cloves absorb more heat and flavor. Shake the jar daily to redistribute spices.
Flavor and texture notes
- Heat management: Start with less chili, then add more after 48 hours if you want extra kick. Capsaicin diffuses into the cloves over time, so flavor intensifies gradually.
- Clove size matters: Smaller cloves pickle more quickly; larger ones stay crunchier longer. You can halve very large cloves to speed uptake.
- Color: Spices like paprika and chili paste may tint the brine or cloves red/orange. That’s normal.
Storage
- Keep refrigerated at or below 40°F (4°C). For best quality, use within 1–2 months. Always use clean utensils to remove cloves, and if the brine clouds excessively, smells off, or the jar fizzes, discard.
For more quick-brine ideas and ratios you can adapt across vegetables, see this reference: Quick pickling brine ratios chart.
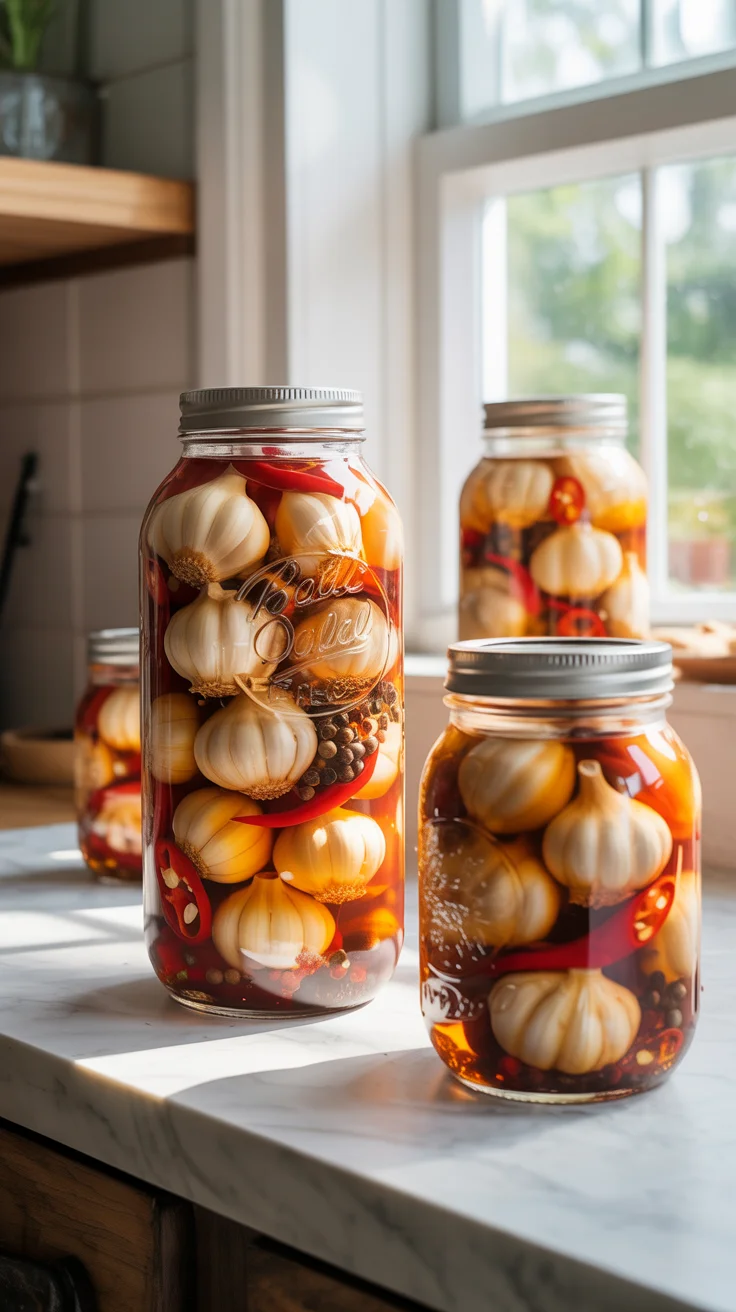
Shelf-stable pickled garlic: water-bath canning method
If you want spicy pickled garlic that’s truly pantry-ready, you’ll need a tested canning recipe and a boiling-water process. The method below outlines the typical steps; always verify exact ingredient quantities and processing times with a tested recipe source such as NCHFP.
Equipment
- Half-pint or pint mason jars with new lids and bands
- Large stockpot or water-bath canner with a rack
- Non-reactive saucepan and ladle
- Jar lifter, canning funnel, and bubble remover
- Clean towels
Typical ingredients (check your tested recipe)
- 5–6 cups peeled garlic cloves, firm and fresh
- 4–6 cups 5% vinegar (distilled white or cider)
- 0–2 cups water (many tested recipes use 1:1 vinegar and water; some go stronger on vinegar)
- 2–4 tablespoons pickling salt
- 2–4 tablespoons sugar (optional but balances heat)
- Whole spices to taste: crushed red pepper, black peppercorns, mustard seed, bay leaf
- Optional: a slice of hot pepper per jar for extra kick
Outline of steps
- Prepare jars and canner. Wash jars and keep them hot (in simmering water or a warm oven). Place lids in hot water per manufacturer guidance. Fill canner halfway with hot water and preheat to around 180°F (82°C) for raw-pack pickles.
- Blanch the cloves (optional but helpful). A quick 30–60 second blanch in boiling water, followed by an ice bath, helps slip skins and can reduce overly sharp flavors. Drain well.
- Make the brine. In a non-reactive pot, combine vinegar, water (if allowed), salt, and sugar. Bring to a boil, then reduce to a bare simmer.
- Pack the jars. Add spices to each hot jar. Pack cloves tightly but without crushing. Ladle hot brine over cloves, leaving 1/2 inch headspace. De-bubble, wipe rims with a vinegar-damp cloth, apply lids and bands fingertip-tight.
- Process. Place jars on rack in the preheated canner, ensuring at least 1 inch water covers the lids. Bring to a vigorous boil, then start timing according to your tested recipe and elevation. Many pickled garlic recipes specify around 10 minutes for half-pints/pints at 0–1,000 ft; increase time for altitude (e.g., 15 minutes at 1,001–6,000 ft; 20 minutes above 6,000 ft). Check your source for confirmation.
- Cool and store. After processing, rest jars 5 minutes in the canner with heat off, then lift to a towel-lined surface. Cool 12–24 hours. Check seals, remove bands, wipe jars, label with date. Store in a cool, dark place.
Quality and safety checks
- Seals and clarity: Brine should be clear, not milky or stringy. Light sediment from spices is normal.
- pH: If you’re experimenting within tested parameters, you may opt to check pH with a calibrated meter; pickles should be below 4.6, and most recipes target lower for safety.
- Wait time: Flavor improves after 2–4 weeks as the brine penetrates. Heat from chilies also rounds out during this time.
Because pantry storage is the goal here, lean on reputable resources for exact recipes and adjustments:
- Your state or county Cooperative Extension publications
Flavor variations, heat levels, and color troubleshooting
Dial in the flavor
- Classic deli style: White vinegar, a pinch of sugar, black peppercorns, mustard seeds, and bay leaf.
- Italian garden: Cider vinegar, red pepper flakes, oregano, and fennel seed. Add a lemon slice for aroma (avoid thick pith).
- Korean-inspired heat: Use gochugaru (Korean red pepper flakes) or a spoon of gochujang in refrigerator pickles; for canning, prefer dry spices inside the jar and serve with chili paste at the table.
- Smoky chili: Smoked paprika plus a slice of jalapeño or serrano per jar. Paprika can add color and complexity without too much added heat.
- Sweet-hot: Increase sugar/honey a touch to balance heat; great for snacking straight from the jar.
Controlling spice intensity
- Choose your chilies: Jalapeño (mild), serrano (medium), Thai or bird’s eye (hot), habanero (very hot). Removing seeds and membranes reduces heat.
- Time is a lever: The longer the rest, the more capsaicin infuses into the cloves. If you’re heat-sensitive, taste at 24–48 hours (refrigerator) or 2 weeks (canned, after curing) and stop there.
- Buffer with sweetness: A teaspoon or two of sugar smooths perception of heat without making the pickle “sweet.”
- Size and cut: Halved or sliced cloves absorb heat faster than whole ones.
Why pickled garlic can turn blue or green
If your garlic blushes blue or green, you didn’t do anything “wrong.” Garlic contains sulfur compounds and amino acids that can form blue- or green-colored pigments (pyrroles) when they interact with acids, age-related enzymes, or trace copper/iron ions. This is a common, harmless reaction and is especially likely with:
- Very fresh, immature garlic
- Garlic that was cold-stored
- The presence of trace metals (from water or cookware)
- Strong acids and salt that accelerate pigment formation
Prevention tips
- Use distilled white vinegar and non-reactive cookware (stainless steel, glass).
- Choose mature, firm bulbs and store them at cool room temperature before use.
- Blanching cloves briefly can reduce enzymes that contribute to color shifts.
- Use filtered or distilled water if your tap water has mineral content.
If color changes happen anyway, the pickles are typically safe to eat provided you followed a tested recipe and good handling practices. The color doesn’t indicate spoilage.
Storage, shelf life, and smart pantry rotation
Refrigerator pickled garlic
- Storage temperature: Keep at or below 40°F (4°C).
- Shelf life: Best within 1–2 months for peak crunch and brightness. It can last longer if always cold and handled cleanly, but quality gradually declines.
- Signs to discard: Off-odors, fizzing, mold, sliminess, or a bulged lid.
Canned, shelf-stable pickled garlic
- Pantry storage: Cool (50–70°F), dark, and dry. Avoid heat and sunlight.
- Shelf life: For best quality, use within 12 months. Properly sealed jars may remain safe longer, but flavor and texture slowly fade.
- After opening: Refrigerate and use within 3–4 weeks.
Rotation and use-it-up ideas
- Label jars with the month and year. Place newer jars at the back so you use older jars first.
- Keep a small “open now” jar in the fridge and top your salads, sandwiches, tacos, or grain bowls.
- Chop into vinaigrettes (use the brine as the acid), blend into aioli, fold into tuna or chickpea salad, or mash with butter for a spicy garlic bread spread.
- The brine is liquid gold: whisk into dressings, splash into pan sauces, or use as a quick marinade for vegetables or tofu. If the brine looks cloudy or smells off, discard rather than repurpose.
Common sense reminders
- Always use a clean fork or spoon when dipping into the jar—no double-dipping.
- If you ever see broken seals on shelf-stable jars or suspect spoilage, discard the jar. When in doubt, throw it out.
Want a pantry system that covers every season from planting to preserving? The guides and projects in The Self-Sufficient Backyard help you plan harvests that align with your canning calendar.
Pantry-ready resources and tools
Here are resources that complement spicy pickled garlic and broader pantry goals. These are optional, but they can accelerate your learning and planning.
- The Lost Superfoods — A pragmatic collection of preservation ideas for long-lasting pantry staples, including ways to diversify what you store and how you rotate. Learn more: The Lost Superfoods
- The Self-Sufficient Backyard — From growing garlic and chilies to building a year-round pantry, this guide focuses on practical homestead systems that support food security. Explore: The Self-Sufficient Backyard
- Mediterranean Plan — If you want everyday meal ideas that make the most of pickled vegetables, a Mediterranean-style framework is perfect for salads, grains, and fish that love garlicky acidity. Get inspired: mediterranean plan
Tool and technique refreshers
- Review proper jar heating and filling: Beginner’s guide to water-bath canning
- Keep a printable checklist on hand: Homestead pantry inventory checklist
- Cross-check a tested recipe for pickled garlic at your local extension or NCHFP before canning variations
Conclusion
Spicy pickled garlic cloves are more than a trend—they’re a versatile, flavor-packed staple that fits every pantry. Start with the refrigerator method for a fast, fiery snack, then move to a tested water-bath process to stock your shelves with safe, shelf-stable pickled garlic you can use all year. Respect the basics—5% vinegar, appropriate brine ratios, clean jars, and proper processing—and you’ll enjoy crisp, tangy cloves that get better with time. With a few chilies and smart storage, your kitchen will never be without an addictively zesty, crunchy bite.
FAQ
Is it safe to can pickled garlic at home?
Yes—when you use a tested recipe and a boiling-water canner. Garlic is low-acid, so safety depends on a sufficiently acidic brine (typically at least 1:1 5% vinegar to water) and proper heat-processing times adjusted for altitude. Avoid adding oil, and follow authoritative guidance such as the National Center for Home Food Preservation.
How long does pickled garlic last in the pantry?
Properly canned and sealed pickled garlic keeps best up to 12 months in a cool, dark place. Quality slowly declines after that. Once opened, refrigerate and use within 3–4 weeks. Refrigerator-only pickled garlic (not canned) should stay chilled and is best within 1–2 months.
Why does pickled garlic turn blue or green?
It’s a harmless reaction between garlic’s sulfur compounds, amino acids, and trace metals that can form blue/green pigments. Young or cold-stored garlic and reactive metals increase the chance. Use non-reactive cookware, distilled vinegar, and mature cloves to reduce it; the pickles are still safe if the recipe and handling were correct.
How spicy will pickled garlic get over time?
Heat intensifies as capsaicin distributes from chilies into the cloves and brine. Refrigerator pickles usually peak within 1–2 weeks; canned pickles round out after a 2–4 week cure. Control heat by choosing milder chilies, removing seeds/membranes, using less chili, shortening rest time, or adding a small amount of sugar to balance.