
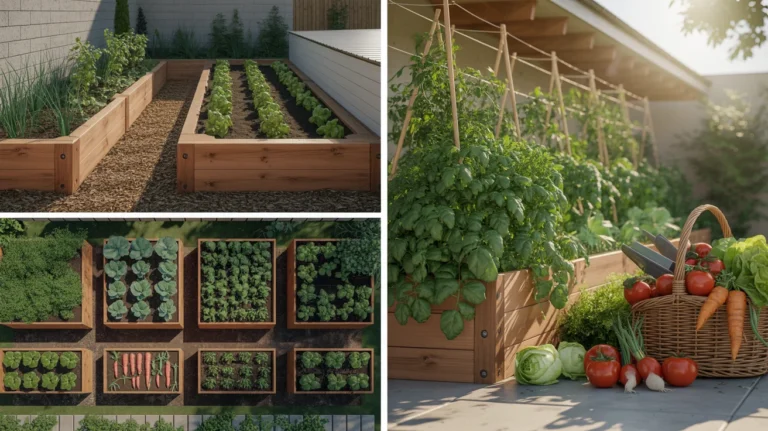
If you want more food from less space, small backyard raised beds are the most reliable, low-maintenance way to do it. This guide shows you exactly how to design small backyard raised beds that maximize harvest, complete with layout maps and crop rotation plans that keep your soil fertile and your yields climbing year after year.
If you’re dreaming of a super-productive micro-homestead, the step-by-step mindset and backyard systems inside The Self-Sufficient Backyard can help you plan once and harvest for seasons.
Design principles that squeeze yield from small spaces
Great harvests in small backyards are built on design, not just good seeds. Start with a quick analysis of sun, access, and wind. Most vegetables need 6–8 hours of direct sun; if buildings or fences cast shade, place fruiting crops (tomatoes, peppers, cucumbers) in the sunniest beds and reserve dappled spots for leafy greens and herbs. Align beds north–south to reduce self-shading, especially important when you’re trellising vertical crops.
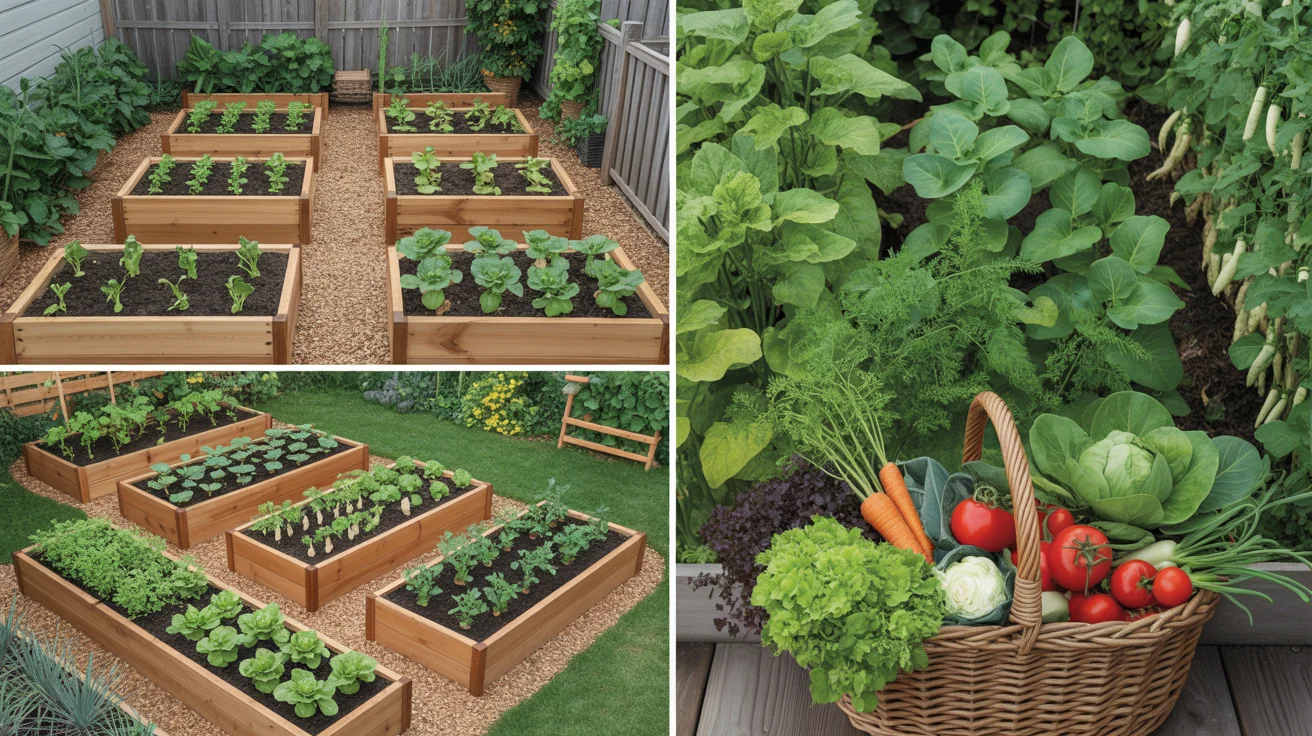
Pathways matter. Narrow but comfortable paths (18–24 inches) maximize bed area while still letting you work without compacting the soil. Keep a main access path 30–36 inches if you’ll wheel in compost or tools. Arrange beds so every area is reachable without stepping into the soil—ideally 3–4 feet wide for access from both sides. The more you protect soil structure, the more roots thrive.

Think in blocks, not pieces. Group beds into functional zones—warm-season crops together for efficient irrigation and trellising, cool-season beds together for easy season extension with low tunnels or row cover. Leave space at one end of a bed for a compost bay, tool rack, or potting station. Add quick-turn “catch-crop” slots along pathway edges (mini strips for scallions, radishes, cilantro) to fill gaps during transitions.
Plan verticals first. Arches, A-frames, or a single sturdy conduit trellis down one bed’s length can double your footprint by letting cucumbers, pole beans, and indeterminate tomatoes climb while salad crops grow underneath in their shade during summer heat. Finally, map a logical water source: a spigot plus 1/2-inch poly header line makes drip irrigation setup fast and modular. If you use rain barrels, elevate them to improve gravity flow and keep runs short.
Bed sizes, depth, soil mix, and materials that work
Bed dimensions are a balance of ergonomics and productivity. The sweet spot is typically 4 feet wide by 8–12 feet long. Four feet lets you reach the center from either side; 8–12 feet is long enough to fit rotations and trellises without making maintenance awkward. If your space is tight, 2–3-foot-wide beds are fine—just plan crops that won’t need heavy tending in the unreachable center.
Depth influences rooting, water-holding, and resilience. For most vegetables, 10–12 inches of soil depth is ideal. Shallow-rooted greens and herbs thrive in 6–8 inches, while deep feeders like tomatoes, parsnips, and potatoes appreciate 12–18 inches (or at least loosened native soil beneath the bed). If you’re building on concrete or compacted subsoil, aim for 12 inches minimum and use a high-organic mix that retains moisture.
Soil is your engine. A classic raised bed blend is roughly 40% compost, 40% high-quality topsoil, 20% aeration/texture materials like coarse sand, leaf mold, or fine wood chips that have been aged. You can also follow a “Mel’s Mix–style” approach: one-third peat or coco coir, one-third vermiculite, one-third compost—but ensure your compost sources are diverse. Each season, top-dress 1–2 inches of finished compost and mulch with shredded leaves or clean straw to feed biology and buffer water.
Materials come down to budget, longevity, and aesthetics. Untreated rot-resistant wood (cedar, redwood) is common. Modern galvanized steel beds are durable, fast to assemble, and shallow-root friendly because they warm quickly in spring. Reused bricks or blocks are stable and let you curve edges around tight backyard constraints. Avoid railroad ties or painted timbers that may leach contaminants. Whatever you choose, build beds level, reinforce corners, and secure trellis bases before filling with soil.
Don’t forget the microclimate extras: black fabric or woven landscape cloth under beds where invasive roots are a problem, a 2–3-inch mulch layer on pathways to suppress weeds, and a couple of 10-gallon grow bags for mobile crops (e.g., peppers or extra potatoes) you can slide into sunny gaps midseason.
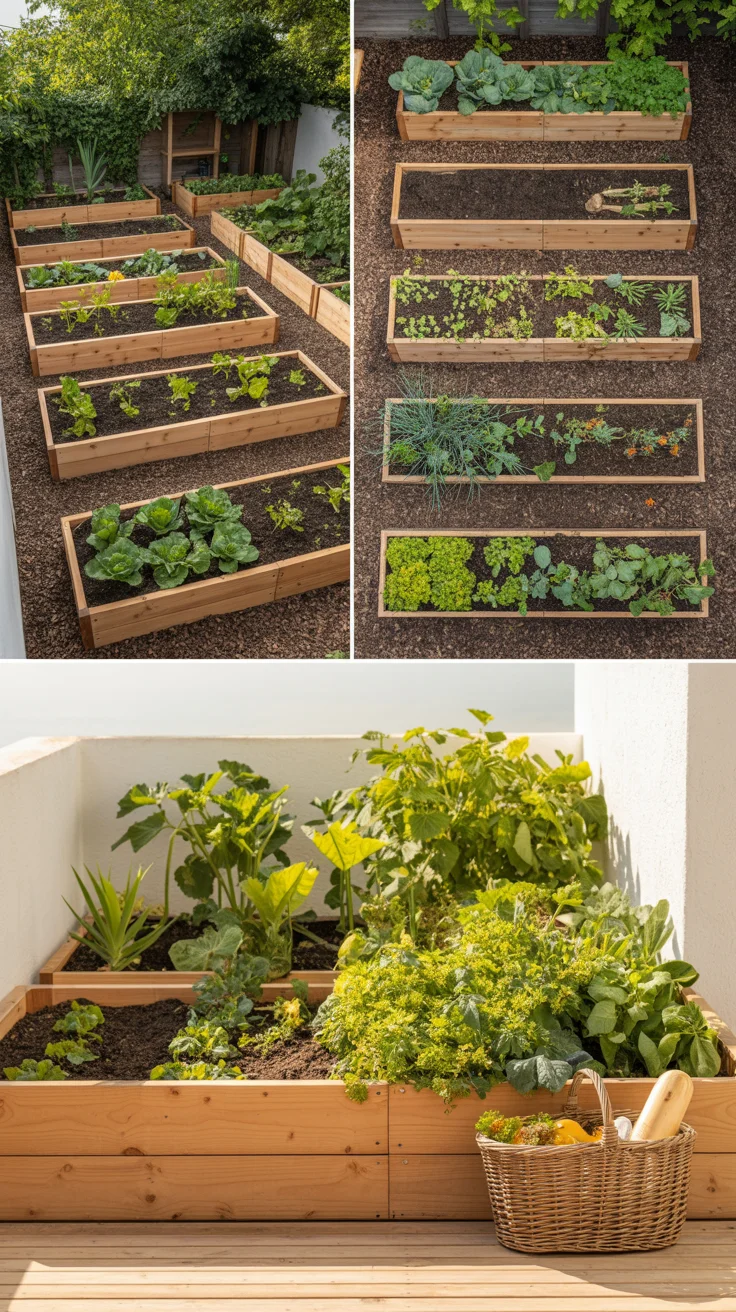
Layout maps for tiny backyards and side yards
Layouts determine how well your small backyard raised beds maximize harvest. Below are three proven footprints you can adapt. Each map assumes 4-foot-wide beds with 18–24-inch paths. “T” denotes trellis-ready beds; “C” denotes cool-season beds; “P” perimeter pots or planters; arrows show sun angle from south.
- Ultra-compact 10×12 ft patio plot
- Orientation: South at the bottom
- Layout:
- [Fence/Screen]
- P P P (herb barrels and strawberries)
- Bed A (4×8) – T along north edge for tomatoes/cukes
- Path (24 in)
- Bed B (4×6) – C for salads/spinach/peas
- Path (18 in)
- Bed C (2×8) – carrots/beets/scallions
- Notes:
- Hang a slim arch between Bed A and P planters for beans.
- Place rain barrel at southwest corner; run drip to each bed.
- Use stepping stones across the 2-foot path to save space.
- Side-yard lane 4.5×24 ft
- Orientation: Long east–west corridor
- Layout:
- Bed D (3×10) – T on north for tomatoes/beans
- Path (18 in)
- Bed E (18 in × 10 ft) – herb strip + flowers for pollinators
- Path (18 in)
- Bed F (3×10) – rotating root crops and greens
- Notes:
- Use vertical trellis panels mounted to fence for wind protection and privacy.
- Integrate a 3-foot tool niche at one end.
- Low tunnels fit easily down each bed’s length.
- Productive backyard core 12×16 ft
- Orientation: North fence along top; south open
- Layout:
- North edge: T T (two trellis beds 4×10 each: tomatoes, cucumbers, beans)
- Center: C (4×8 cool-season bed), 2×8 salad strip parallel to path
- South edge: 4×8 bed for peppers/eggplant/squash; P P perimeter planters
- Main path (36 in) midline; side paths (18–24 in)
- Notes:
- Place compost bay and rain capture at SW corner.
- Interplant marigolds, dill, alyssum along bed edges for pest balance.
- A single 50-foot drip line loop can feed all beds.
Principles to preserve:
- Trellis on the north so tall crops don’t shade shorter ones.
- Group heat-lovers together for simplified watering and feeding.
- Reserve at least one bed for cool-season rotations spring and fall.
- Leave a “staging rectangle” near the entrance for potting, bins, and a hose manifold.
These layouts are templates—swap bed lengths or rotate paths to fit your yard. The key is maintaining a rhythm of access, vertical capacity, and dedicated cool-season space so small backyard raised beds that maximize harvest can breathe and keep producing.
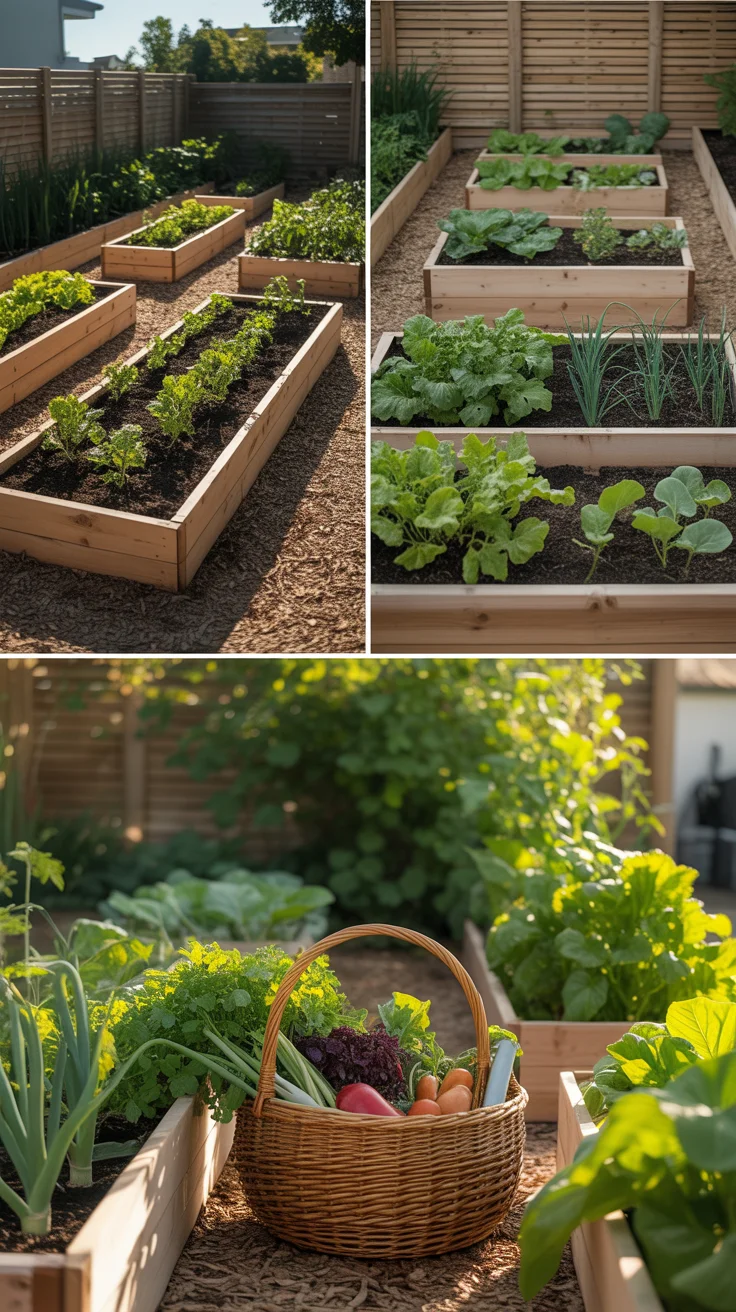
Intensive planting systems that multiply output
Once your beds are down, intensity—not size—drives yield. Three systems work beautifully in small spaces: square-foot spacing, vertical trellising, and succession planting.
Square-foot spacing focuses on tight, accurate plant intervals. Divide bed surfaces into 1-foot squares (with string or simply mentally). Plant densities become predictable: 16 radishes or carrots per square, 9 beets, 4 lettuces, 1 tomato or pepper, 2 cucumbers per square when trellised. This keeps canopies touching just enough to shade soil and preserve moisture while avoiding disease-prone overcrowding. Keep a simple spacing chart laminated at your garden gate for fast reference.
Vertical trellising frees soil. Use cattle panels, EMT conduit frames, or sturdy netting to grow cucumbers, pole beans, indeterminate tomatoes, and even small melons up instead of out. Under the trellis, tuck shade-tolerant greens—arugula, spinach, cilantro—especially during midsummer when bolt-prone crops appreciate filtered light. Remesh cylinders also make superb tomato cages that won’t collapse in July.
Succession planting fills every gap. Think in 4–6 week waves:
- Early spring: peas, spinach, radish, salad mixes, green onions.
- Late spring/early summer: transplant tomatoes, peppers, basil; direct sow beans and cucumbers as peas fade.
- Midsummer: re-seed quick carrots, bush beans, and basil; start fall brassicas in trays under shade.
- Late summer/fall: plug in broccoli, kale, lettuce, and turnips as tomatoes wind down; seed garlic in late fall.
Interplanting puts it all together. For example, set tomatoes at 24 inches on a trellis, then fill the in-between with basil and scallions (harvested early), edge with marigolds, and tuck a late-summer lettuce sowing under the tomato canopy after peak heat.
If you want a compact, vertical add-on to explode leafy greens production, a tower system like The AquaTower can stack dozens of plants in a small footprint—ideal for salads and herbs while your beds host bulkier summer crops.
Keep feeding steady, not heavy. A monthly top-dress of compost around crops, diluted fish/seaweed feed every 2–3 weeks during peak growth, and consistent mulching sustain intensity without salt buildup. Monitor spacing, prune for airflow, and refresh succession calendars often—small spaces reward attention to timing.
Crop rotation for raised beds made simple
Great soil is a living system. Crop rotation breaks pest and disease cycles and balances nutrient drawdown so your small backyard raised beds that maximize harvest can keep producing. In raised beds, rotation is easier when you treat each bed as a block. A simple four-block rotation works beautifully:
- Block 1: Fruiting crops (tomatoes, peppers, eggplant, potatoes)
- Block 2: Legumes (peas, beans)
- Block 3: Leafy brassicas and greens (broccoli, kale, cabbage, arugula)
- Block 4: Roots and alliums (carrots, beets, onions, garlic)
Each season (or between major seasons), shift each block one bed over. After legumes, fruiting crops benefit from residual nitrogen; after heavy-feeding fruiting crops, follow with roots or alliums to reset pest pressure. Brassicas appreciate beds that had compost-heavy amendments and cool soil protected by mulches.
Sample two-year rotation for three beds:
- Year 1 Spring: Bed A brassicas/greens; Bed B peas/beans; Bed C roots/alliums.
- Year 1 Summer: Bed A tomatoes/peppers; Bed B beans/cover crop; Bed C carrots/beets/scallions.
- Year 1 Fall: Bed A lettuces/spinach; Bed B broccoli/kale; Bed C garlic.
- Year 2 Spring: Bed A peas/beans; Bed B roots/alliums; Bed C brassicas/greens.
- Year 2 Summer: Bed A cucumbers/beans; Bed B tomatoes/peppers; Bed C carrots/beets.
- Year 2 Fall: Bed A radish/lettuce; Bed B kale/Asian greens; Bed C garlic again.
Don’t stress perfection—aim for family diversity. If your space is only two beds, rotate “fruiting” vs. “everything else,” and reset with a winter cover crop like oats + peas, which is easy to terminate by spring. For micro-beds or containers, rotate by plant family within each bed and re-amend with compost after each major crop.
Add support moves:
- Undersow clover or buckwheat between slow crops to smother weeds and feed soil life.
- Solarize a problem bed in peak summer by covering with clear plastic for 4–6 weeks to break disease cycles.
- Keep a simple map notebook or digital note of what went where; even basic records make rotation effective.
Most importantly, rotate problems out. If a bed shows early blight or clubroot, keep related families away for a full year and lean on compost teas, mulching, and resistant varieties the following season.
Companion planting and polycultures for harmony
Companion planting—and its more ecological cousin, polyculture—leverages plant relationships to boost vigor, flavor, and resilience. In small beds, this is about canopy layers, root depth diversity, and beneficial insect habitat.
Classic companions that earn their keep:
- Tomatoes + basil + scallions: Basil attracts pollinators and may help flavor; scallions fill gaps and can be harvested young.
- Cucumbers + dill + nasturtium: Dill draws predatory wasps and lady beetles; nasturtium acts as a trap crop for aphids and spills over bed edges, saving space.
- Carrots + radishes + lettuce: Radishes break the soil crust and harvest fast, making room for slower carrots; lettuce shades the soil for better carrot germination.
- Brassicas + aromatic herbs (thyme, rosemary) + marigolds: Scent diversity reduces pest concentration; marigolds provide low, season-long color and habitat.
- Beans + corn (in a tall bed) with squash at edges: A mini Three Sisters adaptation—train squash out of the bed to save space.
Think layers:
- Vertical: trellised tomatoes/beans/cukes.
- Mid: peppers, bush beans, kale.
- Low: lettuces, herbs, nasturtium, alyssum.
Edge strategies are powerful. Ring beds with flowers like alyssum, calendula, or marigolds to host syrphid flies and lacewings that control aphids. Plant chives or garlic along corners to discourage borers and add culinary staples.
Root diversity matters. Pair deep-rooted parsnips or tomatoes with shallow-rooted lettuces to avoid direct competition. Mix time horizons, too—quick cuts (arugula, baby kale) between long haulers (broccoli) turn idle light into food.
Avoid known conflicts:
- Don’t put alliums (onions, garlic) directly adjacent to beans or peas in tight spaces; some gardeners see reduced legume vigor.
- Keep fennel isolated; it can inhibit neighbors.
- Sunflowers can overshadow, so use them sparingly as a living trellis at bed ends.
Finally, “companion” also means pollinators. Dedicate a narrow 12–18-inch herb-and-flower strip along a path or fence with thyme, oregano, sage, dill, and borage. You’ll see better fruit set and a healthier garden web all season long.
Watering, season extension, and essential tools
Resilient small gardens hinge on water efficiency, microclimate control, and a simple toolset you’ll actually use.
Watering for consistency:
- Install a main 1/2-inch poly header with 1/4-inch drip lines to each bed; use adjustable emitters for different crops.
- Aim for deep, infrequent watering: 1–1.5 inches weekly, split into 2–3 sessions in heat.
- Mulch 2–3 inches with shredded leaves, straw, or pine needles to reduce evaporation.
- Water early morning to limit disease and loss to midday heat.
If your plot is sunny and you want a compact, high-density greens engine, a vertical system like The AquaTower can sip water efficiently and deliver consistent salad harvests right beside your raised beds.
Season extension to double the calendar:
- Low tunnels with hoops and row cover keep cool beds productive 4–6 extra weeks in spring and fall.
- Shade cloth over trellises helps lettuce, spinach, and cilantro through summer heat.
- Simple cold frames on the north edge of a bed protect transplants and harden off seedlings.
- Use thermal mass: dark-colored water jugs tucked near tender plants buffer nighttime temperature swings.
Soil-first maintenance:
- Top-dress compost each season; avoid deep tilling to protect fungal networks.
- Inoculate with mycorrhizae when transplanting long-season crops.
- Keep living roots in the soil with quick covers (buckwheat in summer, oats/peas in fall).
A small, smart tool kit:
- 14-inch stirrup hoe for quick weeding, hori-hori knife for planting, hand fork for loosening, pruners, and a 5-gallon bucket caddy.
- A hose timer or battery timer makes drip irrigation nearly hands-free.
- A simple soil thermometer and moisture meter improve timing and reduce guesswork.
If you want power independence for pumps, lights, or a small fan in a mini-greenhouse, an off-grid setup like the Ultimate OFF-GRID Generator can keep essentials running without a full electrical overhaul.
Resource picks to extend your harvests and skills:
- Backyard systems and planning: The Self-Sufficient Backyard
- Vertical salad production: The AquaTower
- Pantry and preservation ideas for surplus: The Lost Superfoods
For step-by-step builds, see: DIY trellis ideas, How to build a drip irrigation system, and Beginner’s guide to composting.
Conclusion: bringing it all together for maximum yield
The secret to small backyard raised beds that maximize harvest is a repeatable system: right-size your beds, map a layout that reserves space for verticals and cool-season rotations, plant intensively with smart spacing and successions, and keep your soil alive with compost, mulch, and diverse roots. Add a simple rotation to break pest cycles, weave in companions for natural balance, and automate watering to free up your time for planting and harvesting—not troubleshooting.
With a tight plan and a few well-chosen tools, even a 10×12-foot corner can grow a surprising share of your groceries. If you want a turnkey blueprint to speed that journey, the practical projects inside The Self-Sufficient Backyard pair perfectly with the layout maps and crop rotation strategies you’ve seen here. Plant once, keep records, and your small space will feed you more every season.
FAQ
- What is the best raised bed layout for a small backyard?
The best layout balances access and vertical capacity. Aim for 4-foot-wide beds you can reach from both sides, 18–24-inch paths, and trellises on the north edge so tall crops don’t shade shorter ones. Group warm-season crops together for shared trellising and irrigation, and dedicate at least one bed to cool-season rotations you can cover with row fabric. Use the 10×12 or 12×16 templates above as a starting point, then adapt bed lengths and paths to your yard. - How deep should raised beds be for vegetables?
Most vegetables thrive in 10–12 inches of soil depth. Shallow-rooted greens and herbs can succeed in 6–8 inches, while deep feeders like tomatoes or parsnips appreciate 12–18 inches or loosened native soil beneath the bed. If building over concrete or compacted ground, target at least 12 inches with a high-organic mix and consistent mulching. - How do you rotate crops in raised beds?
Use a simple four-block rotation by family: fruiting crops (tomatoes, peppers), legumes (peas, beans), brassicas (broccoli, kale), and roots/alliums (carrots, onions, garlic). Shift each block one bed each season. Follow legumes with fruiting crops to leverage residual nitrogen. If you only have two beds, rotate “fruiting” vs. “everything else,” and re-amend with compost between cycles. Keep a notebook map so you don’t repeat families in the same bed too soon. - What plants grow best together in raised beds?
Reliable companions include tomatoes with basil and scallions; cucumbers with dill and nasturtium; carrots with radishes and lettuce; brassicas with thyme and marigolds. These combinations layer canopies, stagger root depth, and attract beneficial insects. Avoid planting alliums directly beside beans or peas in tight spaces, and keep fennel separate since it can inhibit neighbors. - How many raised beds fit in a small backyard?
In a 10×12-foot area, you can fit two 4×8 beds with 18–24-inch paths and a small 2×8 salad strip. In a 12×16 space, three to four beds plus perimeter planters are realistic while maintaining comfortable access. Prioritize fewer, well-managed beds over cramming too many; airflow and workable paths boost yields more than extra wooden frames. - How do I water raised beds efficiently?
Drip irrigation with a hose timer is the most efficient: a 1/2-inch header line with 1/4-inch emitters to each bed delivers water directly to roots and reduces disease. Water early in the day, mulch 2–3 inches to retain moisture, and adjust schedules by weather—1–1.5 inches per week in summer is typical. Consider a rain barrel system near your beds; elevate barrels for better gravity flow and keep runs short. For a full guide, see How to build a drip irrigation system.