
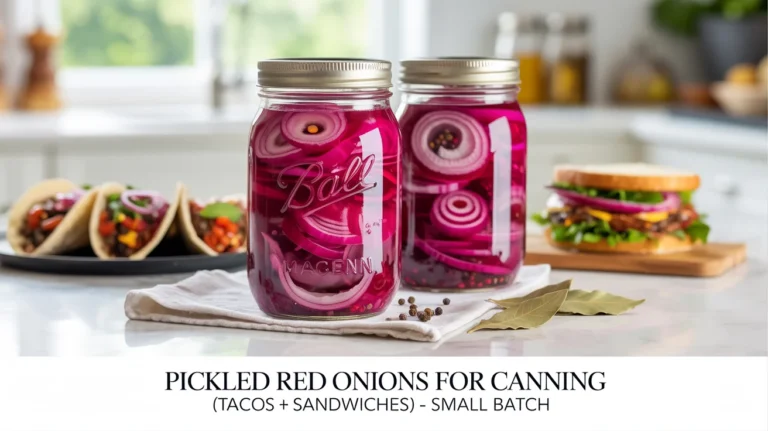
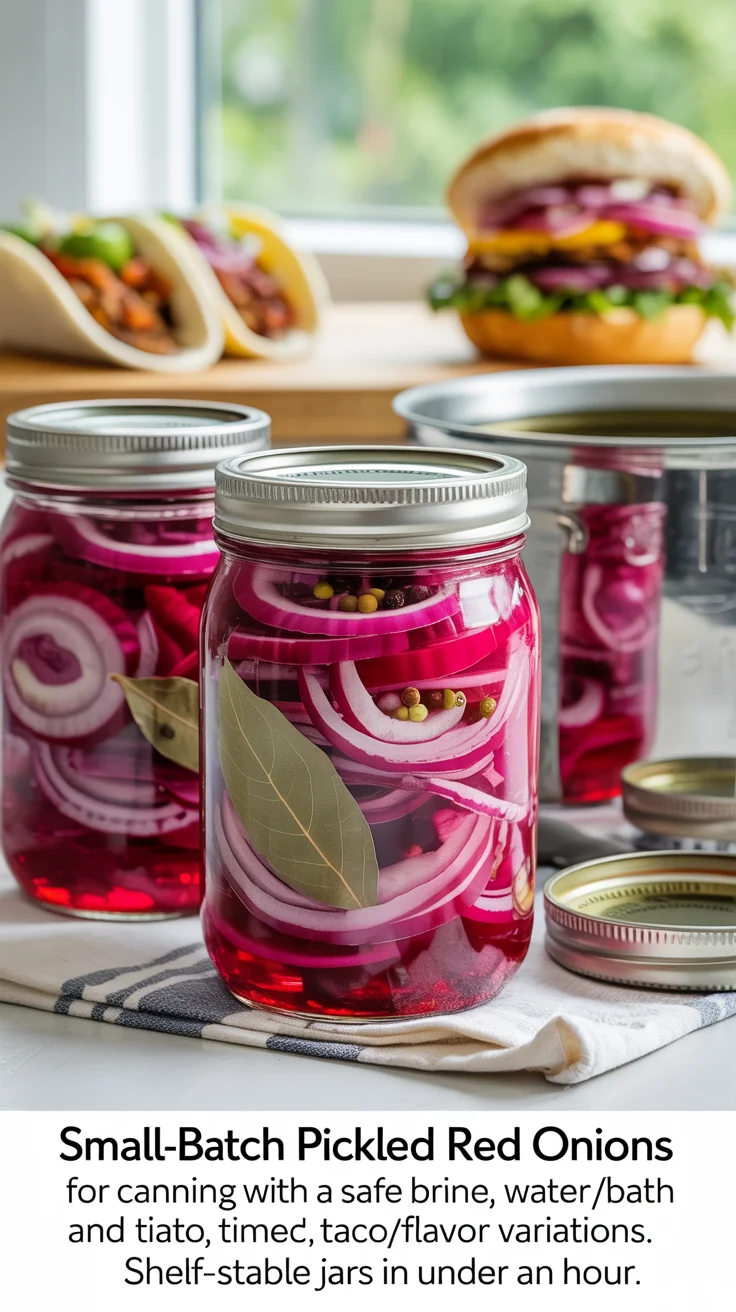
Bright, tangy, and irresistibly crunchy, pickled red onions are the secret weapon that makes tacos pop and sandwiches sing. This small-batch guide shows you how to make pickled red onions for canning with a water-bath process so they’re shelf-stable, perfectly safe, and ready whenever taco night strikes. We’ll cover the right vinegar-to-water ratio, sugar and spice options, and canning times, plus pro tips for keeping color and texture.
If you’re stocking a long-lasting pantry alongside your jars, you might also like The Lost Superfoods, a practical collection of preservation ideas to complement your canning skills.
Why small-batch canning is perfect for taco and sandwich toppers
Small-batch canning isn’t just for tiny kitchens; it’s for cooks who want flavor variety with minimal waste. A couple of half-pints of pickled red onions gives you weeks of taco and sandwich magic, without committing to a dozen jars of the same flavor. Because the batches are smaller, you can try different spice profiles—think citrusy oregano for carnitas tacos, or a deli-style peppercorn mix for roast beef sandwiches—without overhauling your pantry.
Pickled red onions bring balance where rich foods need brightness. Tacos al pastor, barbacoa, carnitas, and chorizo all crave acidity to cut through fat. Sandwiches with smoked meats, grilled cheese, or hummus benefit from the same snap. The quick pucker of onion plus the aromatics you add—coriander, cumin, bay, garlic, jalapeño—turn everyday meals into something memorable. With a canned small batch, you get those payoffs anytime, no last-minute grocery runs required.
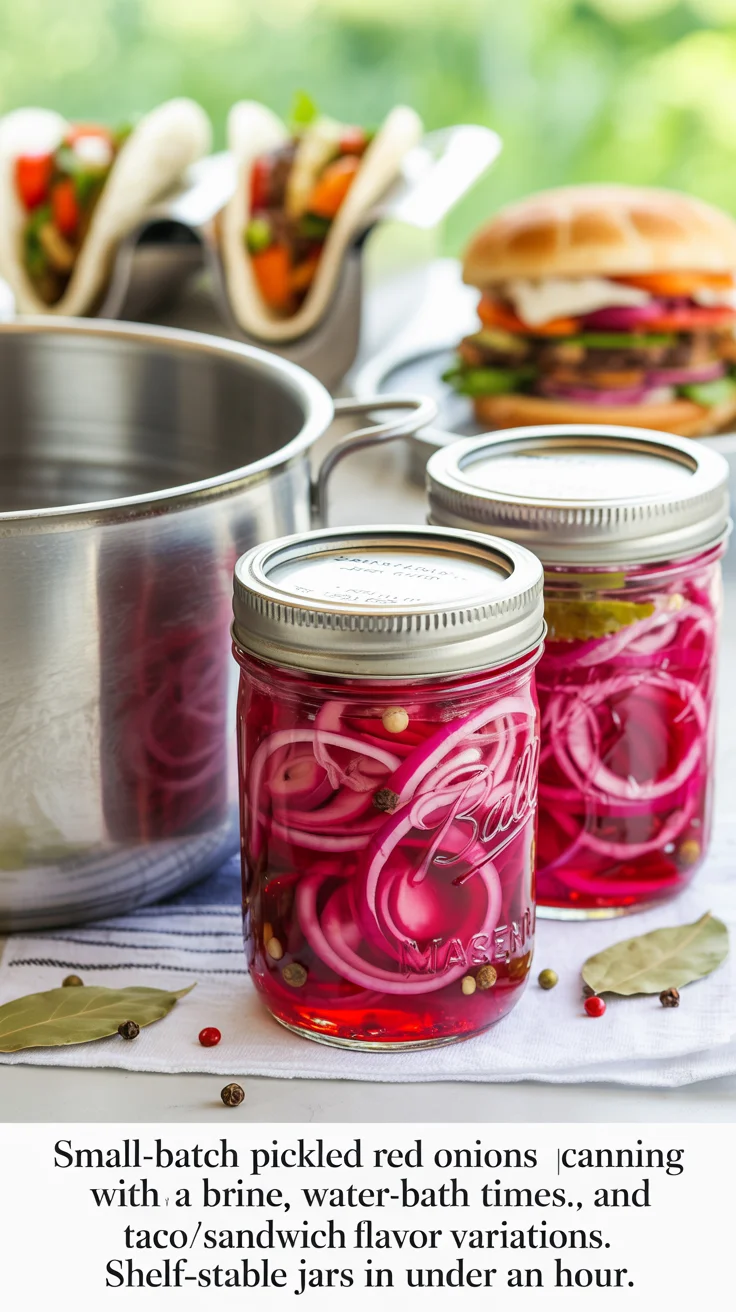
Water-bath canning is especially well-suited to pickled onions because the brine is high in acid (from 5% vinegar), which makes the product safe for this method. The keys are simple: keep the correct vinegar-to-water ratio, process the jars for the proper time, and store them in a cool, dark place. Because you’re dealing with thin slices, heat penetrates quickly and evenly, and the final texture is pleasantly tender with a toothsome bite—ideal for stacking on tortas or layering on carnitas tacos.
Small-batch pickled red onions for canning also make menu planning easier. Set aside a Sunday hour to produce two to four half-pints. That’s enough for a week of lunch sandwiches, a taco Tuesday spread, and a weekend grill night with friends. If you’re hosting, it’s a low-cost, high-impact condiment that instantly elevates a build-your-own bar—just add tortillas, proteins, salsas, and pickled onions, and watch the plates disappear.
If you’re new to canning, this project is a gentle on-ramp: minimal ingredients, short processing times, and flexible flavors. Already experienced? Use this as a base recipe and rotate seasonal variations—chipotle for winter braises, lime and oregano for summer fish tacos. For more fundamentals, see Small-Batch Canning 101 and Quick Pickle vs. Canned Pickle Guide.
Ingredients and gear for small-batch pickled red onions
A reliable canning pantry starts with the right ratios and a few tools. Here’s what you’ll need for 2 to 4 half-pints (or 1 to 2 pints).
Base ingredients:
- Red onions: 2 medium (about 1 to 1.25 pounds), peeled and thinly sliced, 1/8 to 1/4 inch
- Vinegar (5% acidity): 1 cup white distilled vinegar for a bright, clean flavor and electric color; or 5% apple cider vinegar for a mellower, fruity note; 5% red wine vinegar yields a deeper pink hue
- Water: 1 cup; do not reduce the vinegar-to-water ratio
- Pickling salt (or fine sea salt without additives): 1 tablespoon
- Sugar (optional but recommended for balance): 1 to 2 tablespoons; adjust to taste without changing liquid volume
Aromatics (choose 2–4 options per jar; adding a few does not affect safety):
- Whole spices: 1/2 teaspoon per jar of any combination—black peppercorns, coriander seeds, mustard seeds, or cumin seeds
- Bay leaf: 1 small per jar
- Garlic: 1 clove per jar, lightly crushed
- Heat: a few rings of jalapeño, serrano, or a pinch of red pepper flakes
- Herbs: small sprigs of oregano, thyme, or dill
Canning gear:
- Half-pint or pint canning jars with two-piece lids (new lids recommended)
- Water-bath canner or a deep, wide stockpot with a rack
- Jar lifter, canning funnel, clean towels, and a bubble remover or thin spatula
- Heatproof measuring cup and ladle
Why these choices matter:
- The vinegar must be 5% acidity for safe water-bath canning. This is critical for pickled red onions for canning—never use homemade or lower-acidity vinegars.
- White distilled vinegar keeps the color vivid and the flavor neutral. Apple cider vinegar softens the flavor; red wine vinegar deepens color and adds a subtle wine note. Avoid balsamic or malt vinegars for this recipe.
- Sugar isn’t required for safety, but it rounds sharp edges, helps set color, and makes the onions more versatile for tacos and sandwiches.
- Pickling salt dissolves cleanly and avoids cloudiness in jars.
Batch sizing note: If you prefer a micro batch (1–2 half-pints), halve the brine and onion amounts while keeping the same vinegar-to-water ratio and processing times. If you scale up, keep the ratio unchanged and use the same per-jar headspace.
If you’re building broader homestead kitchen skills, resources like The Self-Sufficient Backyard can help you integrate canning with garden planning and storage routines. And if water quality is top of mind, especially for off-grid kitchens, an all-in-one system like The AquaTower can support consistent, reliable prep.
Step-by-step method for pickled red onions for canning
This small-batch method yields shelf-stable jars with dependable texture and flavor. Read through once before starting.
- Prep the canner and jars
- Place a rack in your canner or deep stockpot and fill with enough water to cover jars by at least 1 inch.
- Wash jars, lids, and bands in hot, soapy water. Rinse well. Keep jars hot in the canner as the water heats (not boiling yet). Keep lids ready per manufacturer guidance.
- Set a clean towel near your stove for filling jars.
- Slice and pre-soak the onions (optional for bite and texture)
- Peel and slice red onions 1/8 to 1/4 inch thick. For a milder bite and a bit more crunch, soak slices in ice water for 10–15 minutes; drain well.
- Pack onions into hot jars, leaving room to add brine and distributing evenly. Don’t compact aggressively; you’ll add hot brine which will settle the slices.
- Make the brine
- In a saucepan, combine 1 cup 5% vinegar and 1 cup water. Add 1 tablespoon pickling salt and 1–2 tablespoons sugar (to taste).
- Bring to a boil, stirring to fully dissolve salt and sugar. Maintain a gentle boil.
- Add aromatics and fill jars
- To each hot jar, add your chosen aromatics (spices, bay, garlic, herbs, and any chile slices). Keep quantities modest; spices don’t affect pH, but overstuffing can trap air.
- Using a canning funnel, ladle hot brine over onions, leaving 1/2 inch headspace. Gently slide a bubble remover or thin spatula around the inside edges to release air pockets. Add more brine if needed to maintain 1/2 inch headspace.
- Wipe rims and apply lids
- Wipe jar rims with a clean, damp cloth to remove residue.
- Center lids and apply bands until fingertip-tight (snug, not cranked down).
- Process in a boiling water bath
- Place jars on the rack in the canner. Ensure water covers lids by at least 1 inch.
- Bring to a vigorous boil, then start timing:
- 0–1,000 ft elevation: 10 minutes
- 1,001–6,000 ft: 15 minutes
- Above 6,000 ft: 20 minutes
- Maintain a steady boil for the entire time. If the boil stops, return to a boil and restart the timer.
- Cool and test seals
- After processing, turn off heat, remove the lid, and let jars rest in the hot water 5 minutes to reduce siphoning.
- Transfer jars to a towel-lined counter. Do not tilt or retighten bands. Let stand undisturbed 12–24 hours.
- Check seals: Lids should be concave and not flex when pressed. Remove bands, wipe jars, and label with the date.
Yield and rest time: Expect 2–4 half-pints. Flavor improves after 48 hours; the onions will continue to blush and mellow. Store sealed jars in a cool, dark place. For more canner basics and safe processing, see How to Water-Bath Can Safely.
Flavor variations tailored to tacos and sandwiches
The base brine is your canvas. Keep the vinegar-to-water ratio fixed; then customize the aromatics for specific meals.
- Street taco zing
- 1/2 tsp coriander seed + 1/2 tsp cumin seed + 1 small bay leaf + a few jalapeño rings per jar. Bright, citrusy, and savory—great on carne asada, pollo asado, or black bean tacos.
- Oaxacan-inspired heat
- 2–3 rings of dried guajillo or a pinch of chipotle flakes + bay leaf. Smoky heat complements barbacoa and grilled portobello tacos.
- Yucatán citrus lift
- Replace 2–3 tablespoons of the water portion with fresh lime juice added to the brine after it comes off the heat (do not reduce total vinegar). Add oregano and a few peppercorns. Pair with cochinita pibil or fish tacos.
- Deli classic for sandwiches
- Black peppercorns + mustard seed + a pinch of celery seed + garlic. Perfect with pastrami, roast beef, turkey clubs, or veggie stacks.
- Mediterranean lean
- Red wine vinegar base + thyme or oregano + black peppercorns. Adds depth to grilled chicken pitas, falafel wraps, and antipasto sandwiches.
- Sweet-heat burger topper
- Apple cider vinegar base + 1–2 tbsp sugar per batch + red pepper flakes. Fantastic on smash burgers, pulled pork sandwiches, or BBQ tofu.
Color and clarity tips:
- White distilled vinegar keeps onions neon-pink and brine clear. Apple cider vinegar clouds slightly but adds a nice roundness. Red wine vinegar deepens the pink toward fuchsia. All must be 5% acidity.
- Don’t overstuff herbs; too much can trap bubbles and discolor the brine over time.
Crunch considerations:
- Thin slices give snap after canning; thicker slices become silkier. For tacos, 1/8 inch is snappy; for hearty sandwiches, 1/4 inch is plush.
- A quick 10-minute ice bath pre-soak helps retain texture. Avoid pre-cooking onions; it softens them more than necessary for canning.
If you want more flavor inspiration and pantry planning, The Self-Sufficient Backyard covers year-round garden-to-jar strategies that pair well with small-batch projects like this.
Storage, shelf life, and safety for canned pickled red onions
When you make pickled red onions for canning, safety hinges on acidity, headspace, and processing. Follow these guidelines for dependable results.
- Acid ratio: Keep at least a 1:1 ratio of 5% vinegar to water. Do not reduce vinegar or add low-acid liquids (like broth) to the brine. You can add small quantities of dry spices and herbs without affecting safety.
- Headspace: Maintain 1/2 inch headspace for pickled onions. This helps ensure a strong seal and proper vacuum.
- Processing time: Water-bath process 10 minutes at 0–1,000 ft, 15 minutes at 1,001–6,000 ft, and 20 minutes above 6,000 ft. Start timing at a full rolling boil.
- Jar size: Half-pints and pints use the same times. Avoid quarts for sliced onions with this small-batch method; heat penetration and texture can suffer.
- Shelf life: Store sealed jars in a cool (50–70°F), dark place. For best quality, use within 12 months. Properly sealed jars can remain safe longer, but flavor and texture are optimal in the first year.
- After opening: Refrigerate and use within 2–3 months. Always use clean utensils to avoid contamination.
- Sugar: Optional for balance and color—helpful but not required for safety.
- Salt: Use pickling salt to avoid cloudiness and off flavors. Salt adds flavor but isn’t critical for safety in a properly acidified pickle.
- Vinegar: Must be labeled 5% acidity. White distilled, apple cider, or red wine vinegar at 5% are all acceptable; white distilled offers the brightest color.
Signs of spoilage:
- Bulging lids, leaking, gassiness, spurting liquid when opened, mold, sliminess, or off odors. Discard any suspect jars without tasting.
- Cloudy brine can result from minerals or spice dust; if in doubt and other signs appear, err on the side of caution.
Pantry planning:
- Date your jars, rotate first-in-first-out, and keep a simple log. If you’re building a resilient pantry to go beyond flavor—think emergency readiness—resources like The Lost Superfoods can expand your preservation playbook.
For a broader overview of safety basics, see How to Water-Bath Can Safely.
Troubleshooting and pro tips for consistent results
Even a simple pickle can raise questions. Use these tips to nail texture, color, and seals every time.
- Soft pickles after canning
- Likely cause: Overly thick slices or long hot-hold after processing. Solution: Slice 1/8–1/4 inch, pull jars from the canner promptly after the 5-minute rest, and avoid boiling the onions in brine before jarring.
- Brine turned murky
- Likely cause: Unfiltered water, mineral content, or fine spice dust. Solution: Use filtered water, pickling salt, and whole spices. Murky isn’t always unsafe, but evaluate for other spoilage signs.
- Floating onions
- Normal in fresh jars. Solution: Pack slices more evenly next time and give jars a gentle shake after 24 hours. As the onions absorb brine, the float will lessen.
- Siphoning (liquid loss after processing)
- Likely cause: Rapid temperature change or insufficient rest in canner. Solution: After processing, let jars rest 5 minutes in the hot water before lifting out; avoid drafting and tilting hot jars.
- Lids didn’t seal
- Possible cause: Residue on rims or incorrect headspace. Solution: Wipe rims with a damp cloth, maintain 1/2 inch headspace, and use new lids. Reprocess within 24 hours with a new lid or refrigerate and use promptly.
- Flavor is too sharp
- Solution: Wait 48–72 hours before tasting; acidity mellows. Increase sugar slightly next time (without changing total liquid volume), or choose apple cider vinegar for a gentler profile.
- Want more bite and brightness without adding more vinegar
- Add citrus zest (not juice) or coriander/cumin seeds to the jars; these boost perceived acidity and aroma without altering pH.
Workflow efficiency:
- Pre-slice and pre-pack jars while the canner heats. Set out aromatics in tiny bowls to streamline filling.
- Keep a kettle of hot water ready to top off the canner if needed, maintaining 1 inch of water above lids during processing.
- Standardize your cut with a mandoline for uniform texture. Always use a guard.
Altitude matters:
- Longer processing at higher elevations isn’t optional. Follow the times listed earlier to ensure safety.
- If you’re unsure about your elevation, a quick map search or local extension office can help you find it.
For a broader canning workflow—how to plan batches from garden harvests through winter—The Self-Sufficient Backyard offers practical systems that complement recipes like this.
Meal ideas and weekly prep with pickled onions
Once you’ve got shelves of pickled red onions for canning, your weekly meals get easier, faster, and tastier. A small jar can carry multiple dishes.
Taco night upgrades:
- Carnitas crunch: Warm tortillas, layer carnitas, spoon on salsa verde, finish with pickled onions and chopped cilantro. The acidity cuts richness and brightens the pork.
- Fish tacos: Grilled or baked white fish, lime crema, shredded cabbage, and a generous tangle of pink onions. Try the Yucatán citrus variation for synergy.
- Vegetarian win: Black beans, roasted sweet potatoes, avocado, and pickled onions for contrast and pop.
Sandwich boosts:
- Deli stack: Rye bread, thinly sliced roast beef, provolone, arugula, and deli-style pickled onions.
- Hummus veg: Whole-grain pita, hummus, cucumber, tomato, and a few rings of pickled onion for depth and brightness.
- BBQ pulled chicken or jackfruit: Slaw, pickled onions, and smoky sauce on a brioche bun.
Bowls and sides:
- Grain bowls: Quinoa or farro, roasted veg, feta or beans, and a spoonful of pickled onions to tie it together.
- Quick salads: Toss into chopped salads or top coleslaw with a few rings for instant zing.
- Charcuterie: Bright counterpoint to rich cheeses and cured meats.
Meal prep rhythm:
- Open one jar per week and plan meals that use it across 3–4 dishes.
- Use the brine: Whisk a tablespoon of brine into vinaigrettes or drizzle over tacos for extra tang.
Hosting tip:
- Create a “condiment station” with pickled onions, sliced jalapeños, salsas, and crema. It makes DIY taco bars and sandwich spreads feel restaurant-quality.
Preparedness angle:
- Shelf-stable jars mean you’re never without a flavorful topping. If you’re also optimizing for resilience, systems like The AquaTower help ensure dependable water for cooking and canning, and The Lost Superfoods can broaden your pantry playbook.
For even more ideas that pair with pickled onions, see Homemade Taco Night Ideas.
Conclusion
Pickled Red Onions for Canning (Tacos + Sandwiches) – Small Batch bring bright, pantry-ready flavor to everyday meals with just a handful of ingredients and a short water-bath process. Stick to a 1:1 ratio of 5% vinegar to water, choose your spices, and process for the right time based on altitude. In return, you’ll have jars of color and crunch that transform tacos, sandwiches, bowls, and spreads—all year long. Whether you’re mapping weekly meal prep or building a resilient pantry, these small-batch jars deliver big results.
If you want to take your preservation and homestead planning further, explore:
- The Self-Sufficient Backyard for garden-to-jar systems and sustainable living
- The Lost Superfoods for pantry-ready recipes and preparedness ideas
- The AquaTower for dependable water support in any setup
FAQ
- Can pickled red onions be water-bath canned?
Yes—when made with a sufficiently acidic brine. Use vinegar labeled 5% acidity and keep at least a 1:1 vinegar-to-water ratio. Pack hot onions with hot brine, leave 1/2 inch headspace, and process 10 minutes (0–1,000 ft), 15 minutes (1,001–6,000 ft), or 20 minutes (above 6,000 ft). Spices and herbs are fine; don’t reduce the vinegar. - How long do pickled red onions last in jars?
Properly processed, sealed jars stored in a cool, dark place are best within 12 months. After opening, refrigerate and use within 2–3 months. Always check for signs of spoilage (bulging lids, off odors, mold) and discard if anything seems off. - Do pickled red onions need sugar?
No. Sugar isn’t required for safety; acidity from 5% vinegar is what matters. Sugar balances flavor, softens sharp edges, and helps color, but you can omit it or use a small amount to taste without changing the total liquid volume. - What vinegar is best for pickling red onions?
Any 5% acidity vinegar works: white distilled (clean, bright color), apple cider (milder, slightly cloudy), or red wine vinegar (deeper color, subtle wine note). Avoid homemade vinegars or anything under 5% acidity for water-bath canning. Balsamic is not recommended here.