

Learning how to can applesauce (a step-by-step photo tutorial) style is one of the easiest and most rewarding ways to preserve fresh apples for year-round use. Whether you’re staring at a bumper apple harvest or simply want to stock your pantry with wholesome, preservative-free food, canning applesauce is a beginner-friendly skill that pays off for months—or even years—to come.
If you’re serious about long-term food security and self-reliance, resources like The Self-Sufficient Backyard pair perfectly with this tutorial, offering practical guidance on growing, preserving, and protecting your own food supply.
This how to can applesauce (a step-by-step photo tutorial) guide walks you through the entire water bath canning process—from choosing the right apples to sealing jars safely—using clear explanations and visual checkpoints so you can can with confidence. You’ll also get direct answers to common safety questions, including how long to water bath applesauce, whether lemon juice is required, and if pressure canning is necessary.
By the end, you’ll know exactly how to preserve applesauce in jars that are shelf-stable, delicious, and safe for your family—no special equipment or prior canning experience required.
Why Canning Applesauce Is Worth It
Canning your own applesauce isn’t just about preserving fruit—it’s about reclaiming control over your food supply. When you learn how to can applesauce (a step-by-step photo tutorial) style, you create a shelf-stable pantry staple made with simple, transparent ingredients you trust.
One of the biggest advantages of canning applesauce is long-term storage. Properly water bath–canned applesauce can last 12–18 months on the shelf without refrigeration. That makes it ideal for families focused on preparedness, homesteading, or simply reducing grocery store dependency.
Another major benefit is cost savings. Apples—especially when bought in bulk, picked locally, or grown at home—are far cheaper than store-bought jars of applesauce. Instead of wasting bruised or imperfect apples, you transform them into a nutritious food that’s ready whenever you need it.
Canning applesauce is also one of the best beginner canning projects. Unlike low-acid foods, applesauce is naturally acidic, which means it’s safely preserved using a water bath canner. This eliminates the need for expensive pressure canners and complicated procedures, making this how to can applesauce (a step-by-step photo tutorial) approachable for first-timers.
For those interested in food independence and self-reliance, guides like The Self-Sufficient Backyard expand on these skills, showing how canning fits into a larger lifestyle of sustainability and preparedness.
Finally, homemade applesauce gives you full ingredient control. You decide:
-
Sugar or no sugar
-
Chunky or smooth texture
-
Spiced or plain
That flexibility is exactly why learning how to preserve applesauce in jars remains a timeless kitchen skill.
Equipment You’ll Need for Canning Applesauce
Before diving into the process of how to can applesauce (a step-by-step photo tutorial), it’s important to gather the right equipment. The good news is that applesauce canning requires basic, affordable tools, many of which you may already have in your kitchen.
Essential Canning Equipment
To safely water bath can applesauce, you’ll need:
-
Water bath canner
A large pot with a rack designed to keep jars off the bottom while boiling. -
Canning jars (pint or quart)
Mason jars specifically made for canning—never reuse commercial food jars. -
New lids and screw bands
Lids should always be new to ensure a proper seal; bands can be reused. -
Jar lifter
Essential for safely removing hot jars from boiling water. -
Canning funnel
Helps fill jars neatly and maintain proper headspace. -
Large pot
For cooking apples before turning them into applesauce. -
Blender, food mill, or potato masher (optional)
Depending on whether you prefer smooth or chunky applesauce.
Having the proper tools not only makes the process smoother, but it also ensures your water bath canning applesauce results are safe and shelf-stable.
Optional but Helpful Tools
While not required, these tools can make learning how to preserve applesauce in jars even easier:
-
Apple peeler/corer/slicer
-
Bubble remover or plastic spatula
-
Clean kitchen towels
-
Timer
If you’re building a pantry focused on long-term resilience, food preservation tools are a natural extension of a self-reliant lifestyle. Educational resources like The Self-Sufficient Backyard explain how canning applesauce fits into broader homesteading and food independence strategies.
Once your equipment is ready, you’re set to move into the ingredients and preparation phase of this how to can applesauce (a step-by-step photo tutorial)—where the real transformation begins.
Ingredients for Homemade Applesauce
One of the reasons this how to can applesauce (a step-by-step photo tutorial) is so popular with beginners is the simplicity of the ingredients. You don’t need preservatives, artificial flavors, or complicated additives—just a few basic components to create safe, flavorful, shelf-stable applesauce.
Core Ingredients
At its most basic, homemade applesauce requires:
-
Apples
Use fresh, ripe apples free from mold or rot. Slight bruising is fine. A mix of sweet and tart varieties creates the best flavor. -
Water
Used to prevent scorching while cooking apples down.
That’s it. Applesauce can be safely canned without added sugar, making it a healthy option for families and those watching their diet.
Optional Ingredients (Flavor & Quality)
These additions are optional but commonly used when learning how to preserve applesauce in jars:
-
Sugar or honey – For added sweetness (not required for safety)
-
Cinnamon or spices – Flavor only
-
Lemon juice – Helps preserve color and balance flavor
It’s important to understand that lemon juice is not always required for safety when water bath canning applesauce, because apples are naturally acidic. However, many canners include it to improve color and maintain consistent acidity—something we’ll explain in detail later in this how to can applesauce (a step-by-step photo tutorial).
Choosing the Best Apples for Applesauce
Some apple varieties break down better than others. Popular choices include:
-
McIntosh
-
Golden Delicious
-
Fuji
-
Jonathan
-
Gala
Using a blend of apples improves both texture and taste, especially if you plan to can multiple jars for long-term storage.
For households focused on long-term food planning, applesauce is a perfect gateway food. Preservation skills like this pair well with broader preparedness knowledge found in The Lost Superfoods, which explores nutrient-dense foods and traditional storage methods used for generations.
With ingredients prepared, you’re ready to move into the heart of this how to can applesauce (a step-by-step photo tutorial)—the actual canning process.
Step-by-Step — How to Can Applesauce Safely
This is the core of the how to can applesauce (a step-by-step photo tutorial)—the exact process that turns fresh apples into shelf-stable jars of applesauce. Follow these steps carefully and you’ll have safe, delicious results every time.
Step 1: Wash, Peel, and Prepare the Apples
Start by thoroughly washing your apples under running water. Remove any damaged spots. Peel the apples if you prefer smooth applesauce, then core and slice them into evenly sized pieces. Uniform pieces cook more evenly and prevent scorching.
Tip: If you enjoy a rustic texture, peeling is optional—just be sure to cook apples thoroughly.
Step 2: Cook the Apples
Place sliced apples into a large pot with a small amount of water (about ½ cup per 4–5 pounds of apples). Cook over medium heat, stirring occasionally, until apples are soft and breaking apart—usually 15–20 minutes.
This cooking step is critical for water bath canning applesauce, as it ensures even heating and safe processing later.
Step 3: Make the Applesauce
Once the apples are soft:
-
Use a potato masher for chunky applesauce
-
Use a blender or food mill for smooth applesauce
Add sugar, spices, or lemon juice at this stage if desired. Remember, flavor additions are optional and do not affect the safety of how to preserve applesauce in jars when done correctly.
Step 4: Prepare Jars and Canner
While apples cook, wash jars, lids, and bands in hot soapy water. Keep jars hot until ready to fill. Fill your water bath canner with water and begin heating—it should be hot but not boiling when jars are added.
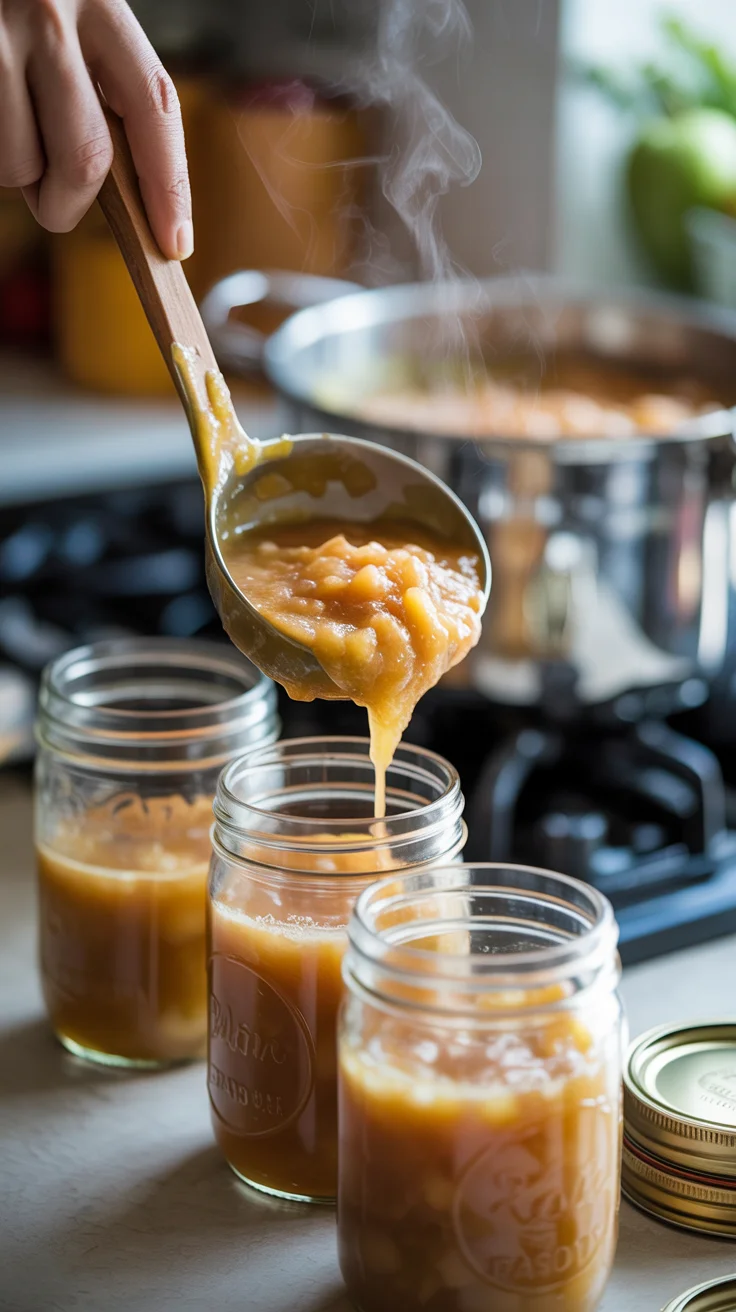
Step 5: Fill the Jars
Using a canning funnel, ladle hot applesauce into jars, leaving ½ inch headspace. Remove air bubbles with a non-metal utensil, wipe rims clean, apply lids, and screw bands on fingertip-tight.
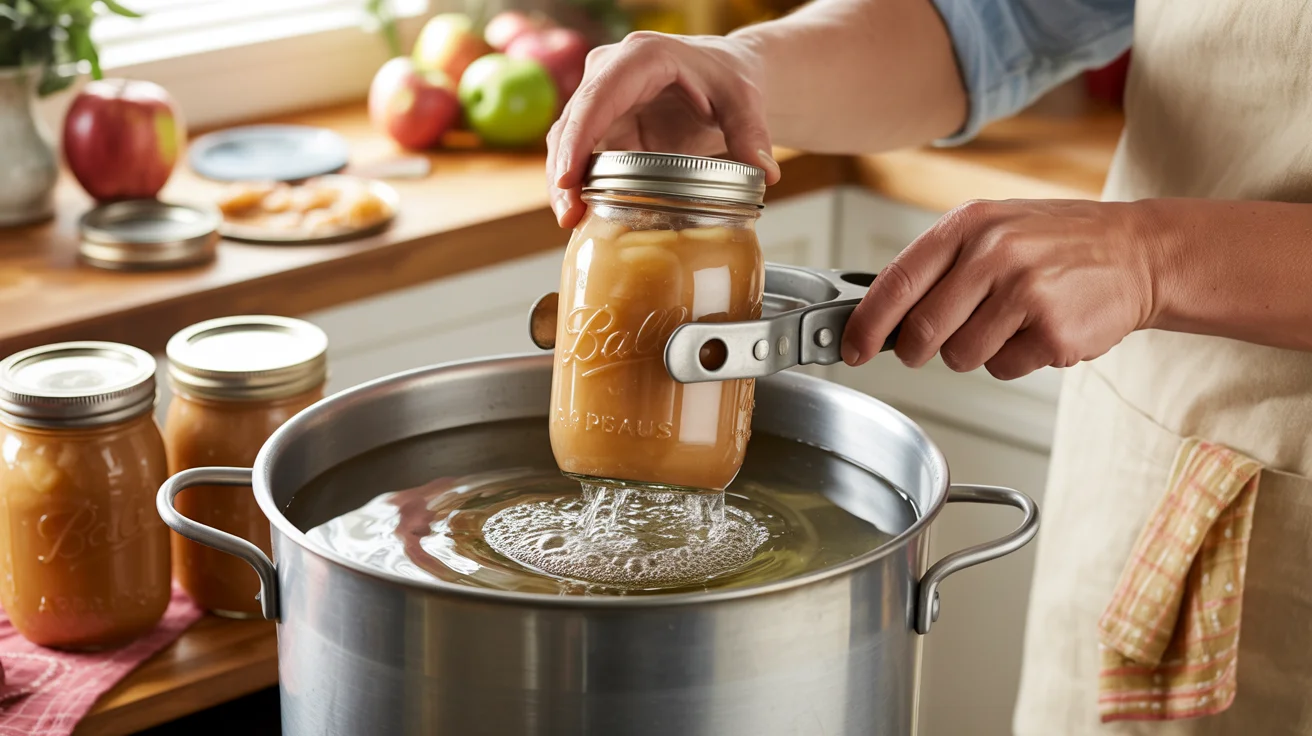
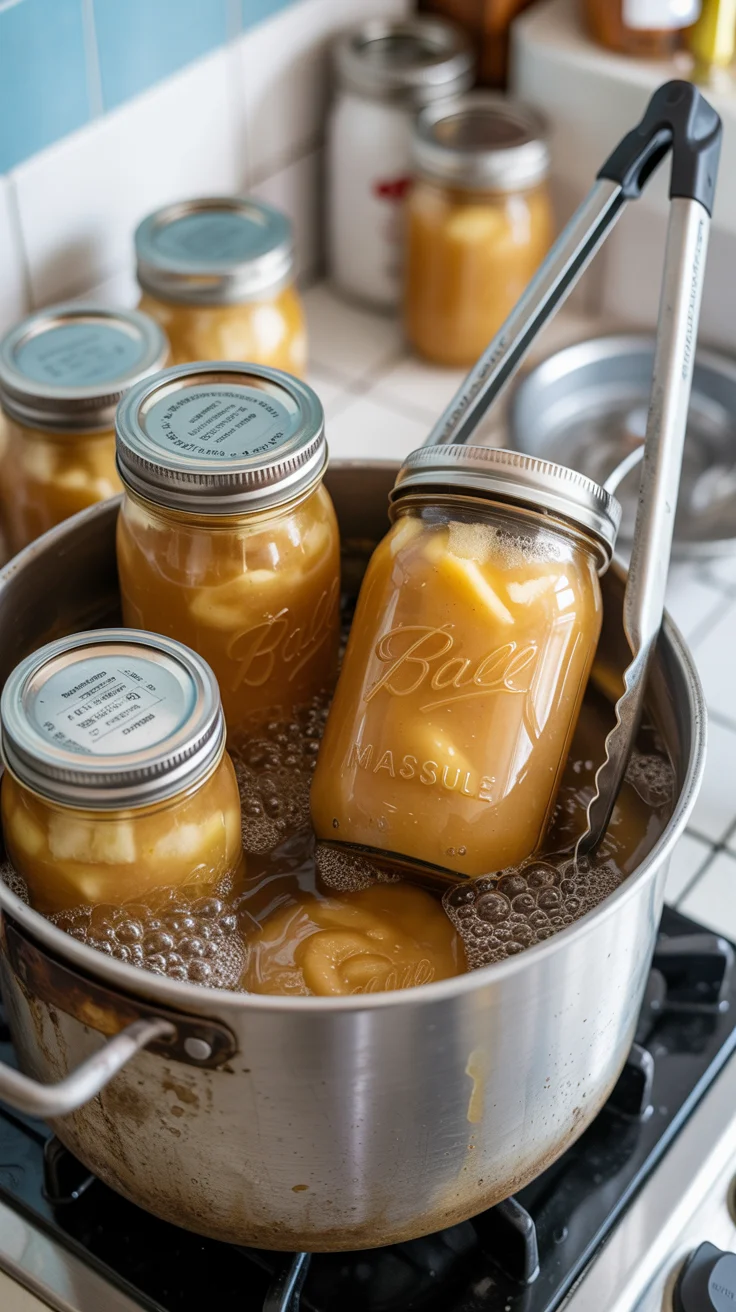
Step 6: Water Bath Process
Place jars in the canner, ensuring water covers jars by at least 1 inch. Bring to a rolling boil.
Process time:
-
Pints or quarts: 15 minutes (adjust for altitude)
We’ll break down how long to water bath applesauce for canning in detail—including altitude adjustments—in the next section of this how to can applesauce (a step-by-step photo tutorial).
Step 7: Cool and Check Seals
After processing, turn off heat and let jars sit in the canner for 5 minutes. Remove jars and place them on a towel. Let cool undisturbed for 12–24 hours. Check seals before labeling and storing.
For families focused on emergency preparedness and pantry stability, mastering steps like these pairs naturally with broader food-security knowledge found in The Lost Superfoods.
How Long Do You Water Bath Applesauce for Canning?
One of the most common safety questions in any how to can applesauce (a step-by-step photo tutorial) is timing. Processing jars for the correct length of time is essential for creating shelf-stable applesauce that’s safe to eat months later.
Standard Water Bath Processing Time
For water bath canning applesauce, the recommended processing time is:
-
Pint jars: 15 minutes
-
Quart jars: 15 minutes
These times apply when canning at 0–1,000 feet above sea level.
Altitude Adjustments (Very Important)
If you live above 1,000 feet, you must increase processing time. Failing to adjust for altitude is one of the most common mistakes when learning how to preserve applesauce in jars.
General guidelines:
-
1,001–3,000 ft: 20 minutes
-
3,001–6,000 ft: 25 minutes
-
Above 6,000 ft: 30 minutes
Always start timing only after the water reaches a full rolling boil.
Why Processing Time Matters
Proper water bath timing ensures:
-
Harmful microorganisms are destroyed
-
Air is forced out of the jars
-
A strong vacuum seal forms
Skipping time or reducing it puts your canned applesauce at risk of spoilage, regardless of how carefully you followed earlier steps in this how to can applesauce (a step-by-step photo tutorial).
After the Water Bath
Once processing time is complete:
-
Turn off heat
-
Let jars rest in hot water for 5 minutes
-
Remove and cool undisturbed for 12–24 hours
For readers focused on long-term pantry planning and food resilience, mastering proper processing times aligns perfectly with the food independence strategies taught in The Self-Sufficient Backyard.
Do You Need to Add Lemon Juice When Canning Applesauce?
A frequent point of confusion in any how to can applesauce (a step-by-step photo tutorial) is whether lemon juice is required for safety. The short answer: no, it is not strictly required—but it can be beneficial.
The Acidity of Applesauce
Apples are naturally acidic, which is why water bath canning applesauce is considered safe without pressure canning. This natural acidity means applesauce does not require added acid to prevent dangerous bacterial growth, as long as you follow proper processing times.
When Lemon Juice Is Helpful
Although not mandatory, many canners choose to add lemon juice when learning how to preserve applesauce in jars for these reasons:
-
Color preservation: Prevents browning
-
Flavor balance: Adds brightness, especially to sweet apples
-
Consistency: Ensures uniform acidity across different apple varieties
If you choose to use lemon juice, bottled lemon juice is recommended for consistent acidity. Typical usage is 1 tablespoon per pint or 2 tablespoons per quart.
When You Can Skip It
You may safely skip lemon juice if:
-
You are using naturally acidic apples
-
You follow tested water bath processing times
-
You are not adding low-acid ingredients
Skipping lemon juice does not compromise safety when done correctly within this how to can applesauce (a step-by-step photo tutorial) framework.
Food Security Perspective
Understanding acidity and preservation science is a key skill for long-term self-reliance. Resources like The Lost Superfoods dive deeper into traditional food preservation methods that kept families fed long before modern refrigeration.
Does Applesauce Need to Be Pressure Canned?
Another common concern people have when following a how to can applesauce (a step-by-step photo tutorial) is whether a pressure canner is required. The clear and reassuring answer is no—applesauce does not need to be pressure canned.
Why Water Bath Canning Is Enough
Applesauce is classified as a high-acid food, thanks to the natural acidity of apples. High-acid foods can be safely preserved using a water bath canner, which reaches temperatures sufficient to destroy harmful microorganisms when proper processing times are followed.
This is exactly why water bath canning applesauce is recommended by tested home-canning guidelines and is considered one of the safest beginner projects.
When Pressure Canning Is Used
Pressure canners are reserved for low-acid foods, such as:
-
Vegetables
-
Meats
-
Beans
-
Soups and stews
Using a pressure canner for applesauce is unnecessary and can actually overcook the product, negatively affecting flavor and texture. Sticking to the water bath method outlined in this how to can applesauce (a step-by-step photo tutorial) ensures both safety and quality.
Safety Reminder
Never mix low-acid ingredients (such as vegetables) into applesauce before canning. Doing so would change the acidity level and require pressure canning instead. Keep recipes simple and tested when learning how to preserve applesauce in jars.
For those focused on long-term preparedness, understanding which foods require pressure canning—and which do not—is a critical skill. Educational resources like The Self-Sufficient Backyard help place these skills into a broader self-reliant lifestyle.
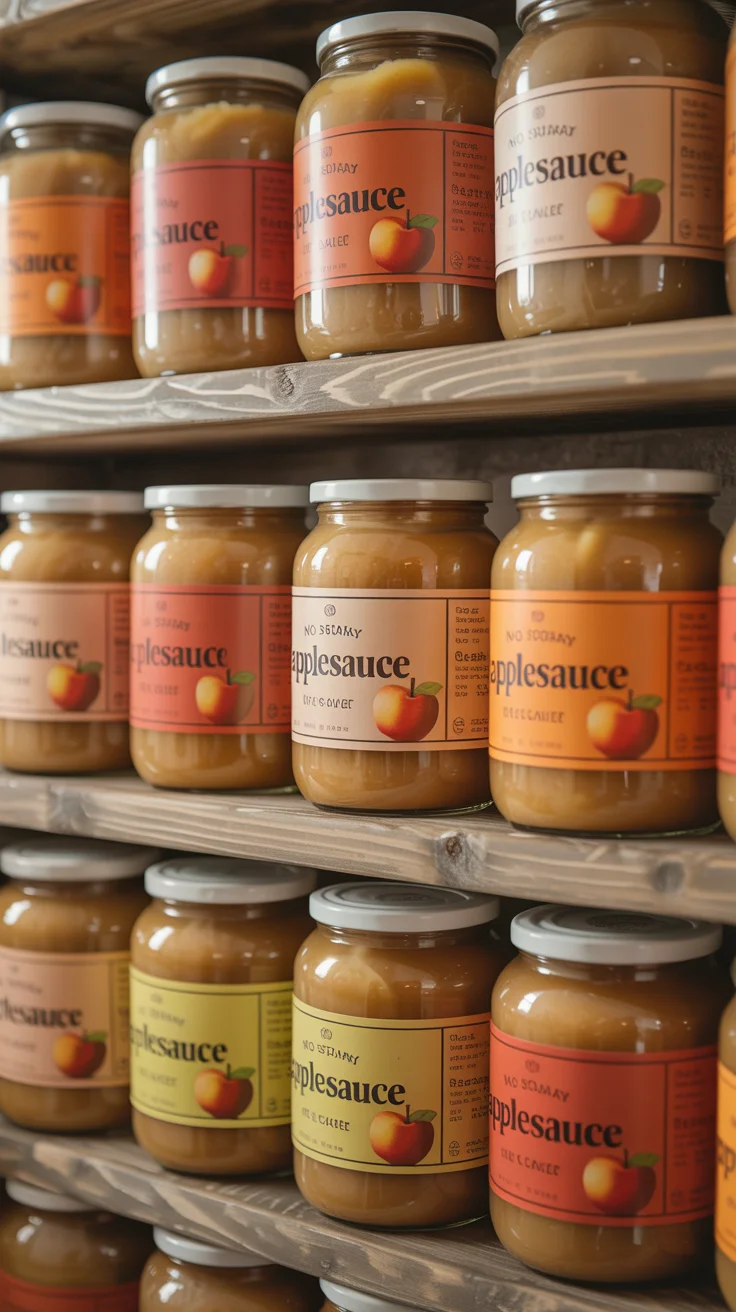
How to Store and Preserve Applesauce in Jars
Once you’ve completed all the steps in this how to can applesauce (a step-by-step photo tutorial), proper storage becomes the final key to long-lasting, safe results. Correct storage preserves flavor, texture, and nutritional value while preventing spoilage.
Checking Jar Seals
After jars have cooled for 12–24 hours:
-
Press the center of each lid
-
If it doesn’t flex, the jar is sealed
-
If it pops, refrigerate and use within a week
Never store unsealed jars at room temperature. This step is essential to safely preserve applesauce in jars.
Ideal Storage Conditions
Store sealed jars of applesauce in:
-
A cool, dark place
-
Temperatures between 50–70°F
-
Away from direct sunlight
Properly stored applesauce will maintain best quality for 12–18 months, though it often remains safe longer if seals remain intact.
Labeling for Success
Always label jars with:
-
Contents
-
Processing date
This helps with rotation and ensures you’re always using the oldest jars first—a best practice emphasized in any how to can applesauce (a step-by-step photo tutorial).
Signs of Spoilage
Discard applesauce if you notice:
-
Broken seals
-
Mold
-
Off odors
-
Bubbling when opened
When in doubt, throw it out.
Pantry Security & Preparedness
Canned applesauce isn’t just a snack—it’s a preparedness food. It’s shelf-stable, calorie-dense, and versatile. For families building long-term food resilience, resources like The Lost Superfoods explore traditional storage techniques that align perfectly with this how to preserve applesauce in jars approach.
Common Canning Mistakes to Avoid
Even with a detailed how to can applesauce (a step-by-step photo tutorial), small mistakes can impact safety or quality. Avoiding these common errors will help ensure your applesauce is shelf-stable, delicious, and safe every time.
Mistake 1: Skipping Headspace
Always leave ½ inch of headspace in each jar. Too little headspace can cause overflow during processing, while too much may prevent proper sealing. Headspace matters in water bath canning applesauce more than many beginners realize.
Mistake 2: Not Adjusting for Altitude
Altitude adjustments are not optional. Failing to increase processing time at higher elevations is a frequent cause of spoilage when learning how to preserve applesauce in jars.
Mistake 3: Over-Tightening Bands
Screw bands should be fingertip-tight, not cranked down. Over-tightening traps air and can prevent seals from forming during the water bath process described in this how to can applesauce (a step-by-step photo tutorial).
Mistake 4: Using Unsafe Jars or Lids
Only use jars designed for canning and new lids each time. Reusing lids increases the risk of seal failure.
Mistake 5: Skipping Cooling Time
Jars must cool undisturbed for 12–24 hours. Moving them too soon can break seals and ruin your effort to preserve applesauce in jars.
Mistake 6: Ignoring Spoilage Signs
Never taste applesauce if:
-
The lid is bulging
-
The seal is broken
-
There’s mold or foul odor
When in doubt, discard the jar.
Building Confidence Through Practice
Mistakes are part of learning, but following tested steps builds confidence fast. For those looking to expand beyond applesauce into broader self-reliance skills, The Self-Sufficient Backyard offers guidance that complements everything taught in this how to can applesauce (a step-by-step photo tutorial).
Mastering How to Can Applesauce Safely at Home
Learning how to can applesauce (a step-by-step photo tutorial) is one of the most practical food preservation skills you can master. It requires minimal equipment, simple ingredients, and a straightforward water bath process—yet the payoff is significant. You gain shelf-stable food, reduce waste, and build confidence in your ability to provide for yourself and your family.
By following the steps in this guide, you now know:
-
How to prepare apples properly
-
Exactly how long to water bath applesauce for canning
-
When lemon juice is optional
-
Why pressure canning is unnecessary
-
How to safely preserve applesauce in jars for long-term storage
Whether you’re canning a few jars for your pantry or processing a full harvest, this how to can applesauce (a step-by-step photo tutorial) gives you a repeatable method you can rely on year after year.
For readers who want to go beyond applesauce and build a resilient, food-secure lifestyle, The Self-Sufficient Backyard and The Lost Superfoods offer deeper insight into growing, preserving, and storing food in uncertain times.
Frequently Asked Questions (FAQ)
How long do you water bath applesauce for canning?
Process both pint and quart jars for 15 minutes at sea level. Increase processing time if you live above 1,000 feet to ensure safe water bath canning applesauce.
How do you preserve applesauce in jars?
Preserve applesauce by hot-packing it into clean jars, leaving proper headspace, and processing in a boiling water bath. Proper storage allows applesauce to remain shelf-stable for 12–18 months.
Do you need to add lemon juice when canning applesauce?
No, lemon juice is not required for safety because apples are naturally acidic. However, it can improve color and flavor consistency when following a how to can applesauce (a step-by-step photo tutorial).
Does applesauce need to be pressure canned?
No. Applesauce is a high-acid food and can be safely preserved using a water bath canner. Pressure canning is unnecessary and not recommended for applesauce.