
A sudden storm, power outage, or winter blizzard can turn a normal day into a survival scenario. An emergency earthbag shelter you can build with minimal tools gives you rapid protection, reliable warmth, and structural strength when you need it most. With a smart plan, lightweight supplies, and careful safety steps, you can raise storm- and winter-ready walls in a day, then refine them as time allows.
If you’re building resilience at home or on a homestead, consider broadening your preparedness playbook with The Self-Sufficient Backyard, a practical resource on food, water, and small-space systems that layer well with shelter planning: The Self-Sufficient Backyard.
Core principles of emergency earthbag building
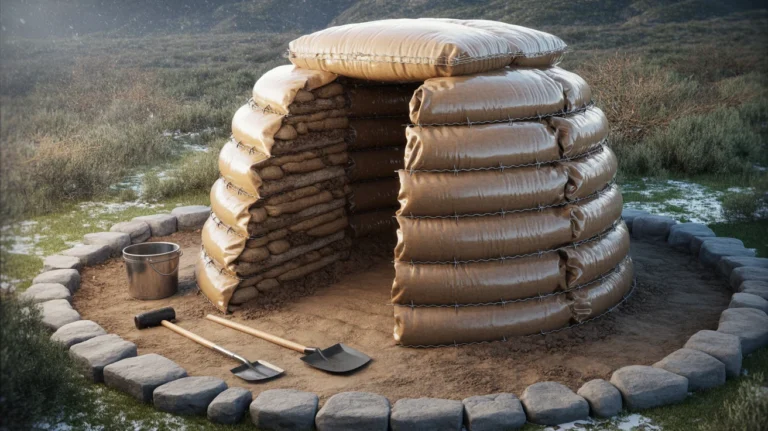
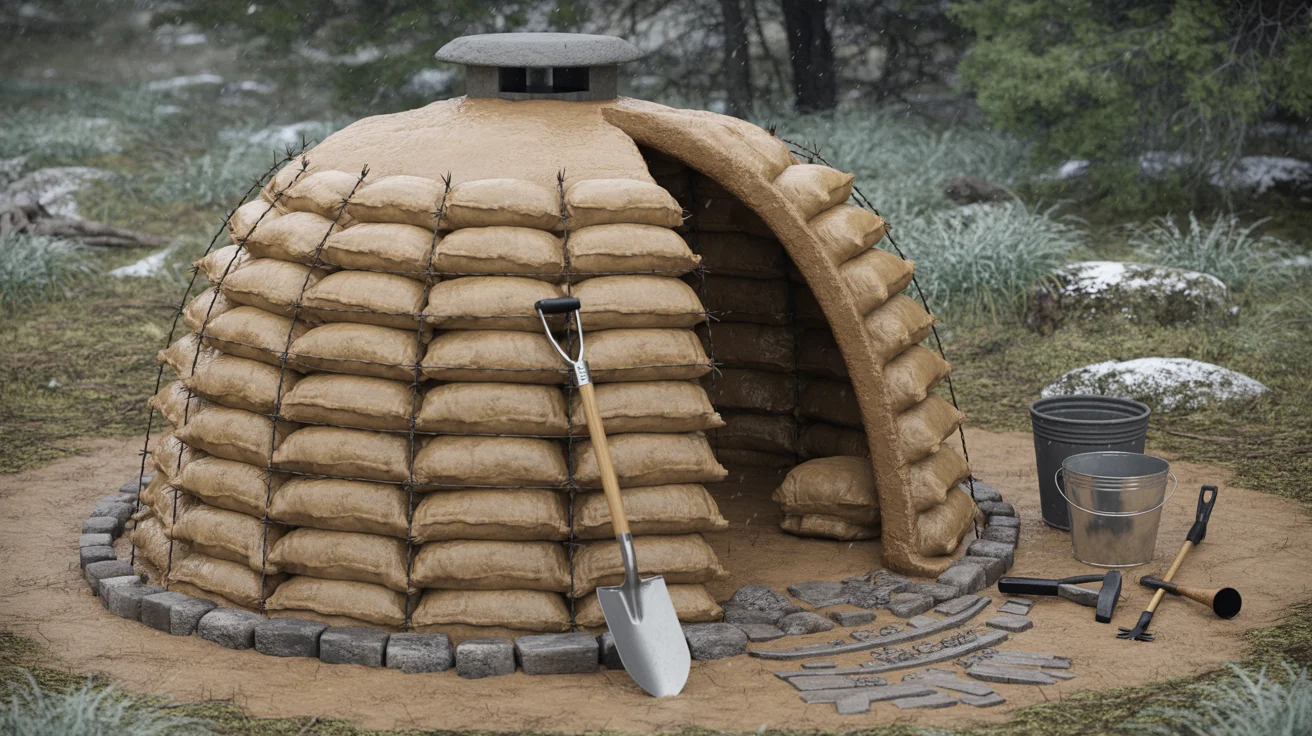
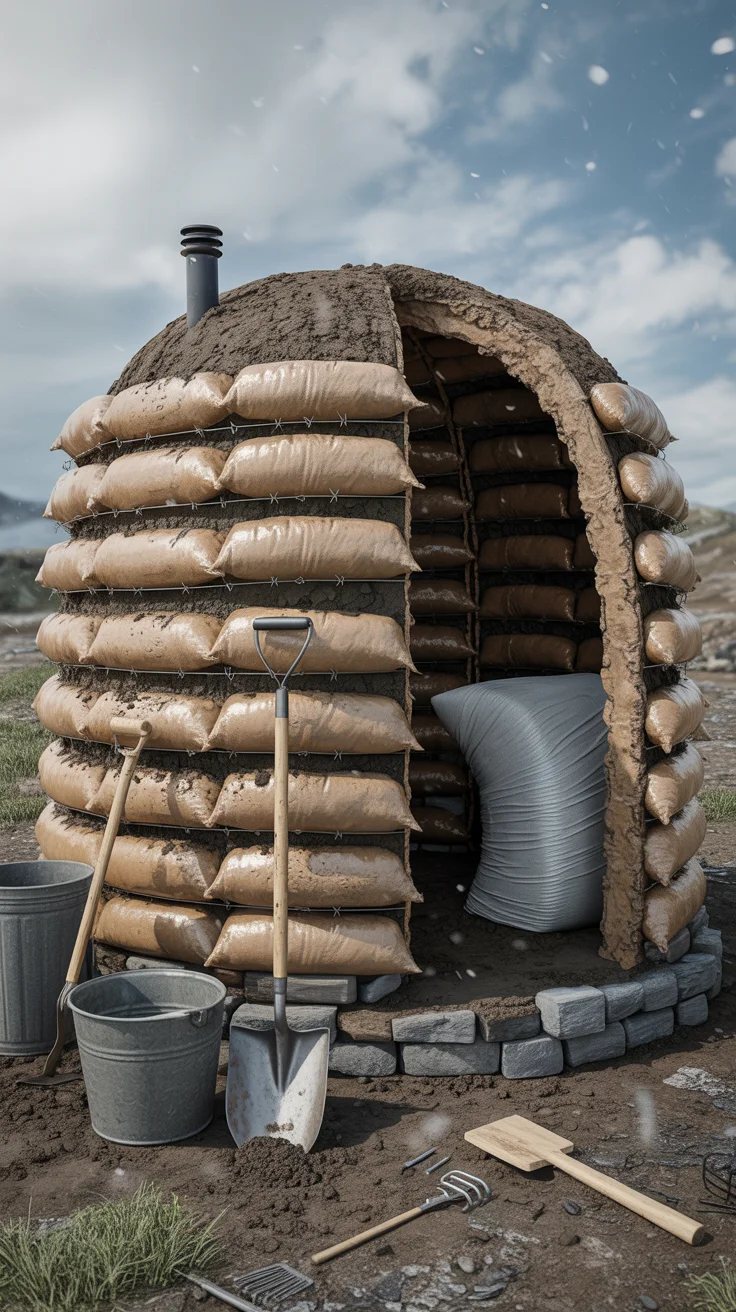
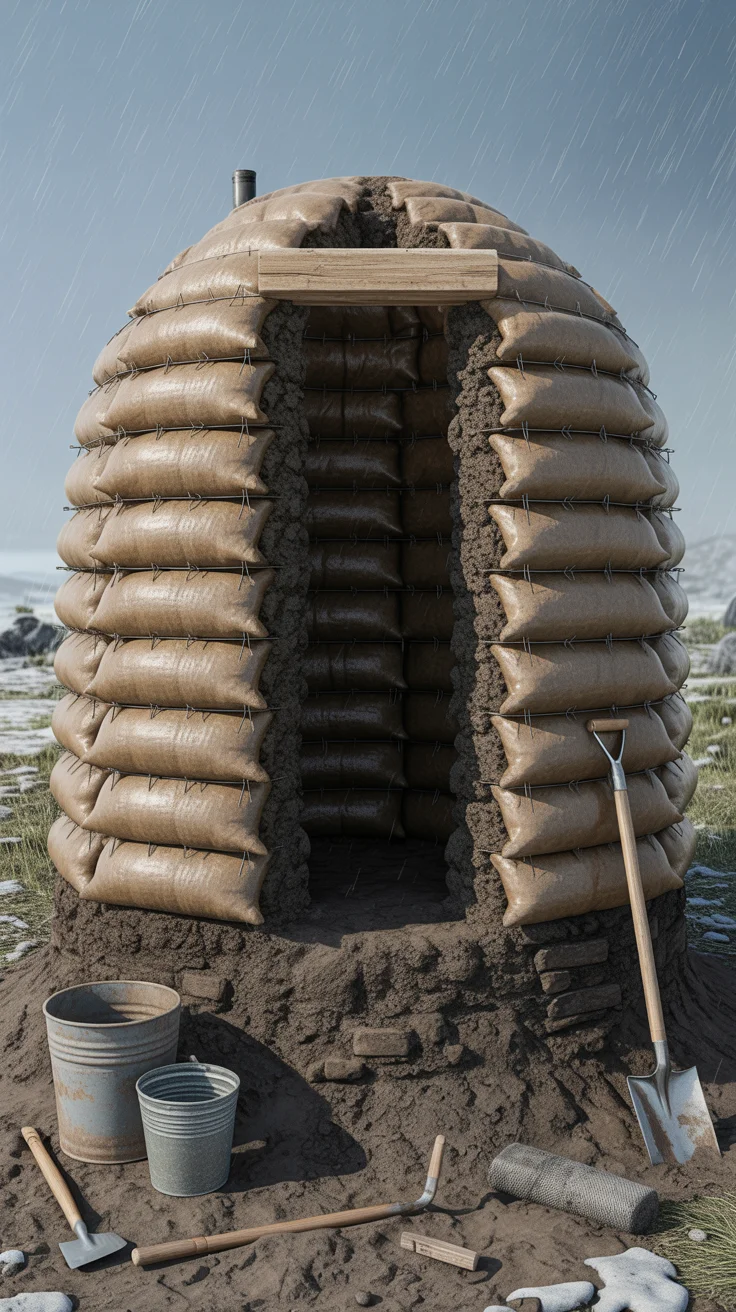
Earthbag construction uses woven polypropylene bags (or tubes) filled with available soil, sand, or gravel, stacked in courses with barbed wire between layers. The result is a monolithic, compressed wall system with high compressive strength, great impact resistance, and outstanding thermal mass. For emergency shelters, the approach is simple: work with what you have, build quickly and safely, and prioritize weather protection and structure over aesthetics.
- Why earthbags in emergencies:
- Material availability: Soil or sand is often on-site. Bags are light and packable.
- Minimal tools: Shovels, a tamper, level/string line, and a bucket funnel are enough.
- Strength: Properly tamped courses and barbed wire create a locked-in wall system.
- Adaptability: Straight, curved, or partial-circle footprints; accepts tarps, temporary roofs, and quick insulation strategies.
- Site selection priorities:
- Drainage first. Choose high ground when possible. Avoid low spots that pond.
- Orient the entrance away from prevailing winds; use natural wind breaks if available.
- Clear organics from the footprint to mineral soil. A few inches of gravel under the first course will break capillary moisture.
- Consider snow shedding and drifting patterns; avoid lee-side snow traps if you can.
- Safety cornerstones:
- Keep roof loads light and well-supported. A failed roof is the fastest route to injury.
- Use buttresses or curved walls for lateral support if you expect strong winds.
- Install vents and maintain airflow to avoid moisture buildup and carbon monoxide risk.
- Work in layers: establish shelter-fast (dry-in) first, then add insulation and refinements.
Key concept: speed-to-shelter. In a storm event, walls that reach chest height and a taut, sloped tarp roof can give immediate refuge. Then you iterate: finish the wall height, lock the top with a bond beam, and add winter insulation and weatherproofing as time and conditions allow.
DIY tarp shelter anchoring tips
Minimal tools and materials you likely already have
An emergency earthbag shelter thrives on improvisation. Gather the essentials before weather moves in, or stash them in a ready-to-go kit.
- Core materials:
- Bags: Woven polypropylene sandbags or long tubes. White or UV-resistant preferred, but standard bags work if you cover them quickly.
- Fill: Subsoil (not topsoil), sandy soil, sand, or gravel. Aim for damp but not wet; it should hold form when squeezed.
- Barbed wire: Two strands per course improve friction and shear resistance.
- Tarp(s): Heavy-duty or multiple lighter tarps, plus cordage. A dark tarp warms faster in winter sun.
- Gravel: For the first course and drainage.
- Wood scraps: For door framing, ridge poles, and temporary braces.
- Plastic sheeting: Vapor breaks, quick rain covers, and temporary windows.
- Stakes and rebar: For anchoring and pinning door frames or corner points.
- Essential tools (minimal set):
- Shovel and spade: Dig, fill, and shape.
- Tamper: A homemade tamper from a 4×4 or metal plate welded to a post is fine.
- Buckets or cut-off container funnel: A 5-gallon bucket with the bottom cut out makes a fast bag-filling funnel.
- String line, measuring tape, and level: Keep courses plumb and consistent.
- Knife and duct tape: Cut bags and tape seams or tears.
- Hammer and nails/screws: For quick frames and bracing.
- Gloves and eye protection: Barbed wire and gravel are unforgiving.
- Smart substitutions:
- No barbed wire? Use thorny brush between courses in a pinch and secure with paracord, knowing it’s a temporary compromise.
- No gravel? Use broken brick, crushed concrete, or well-draining coarse material beneath the first course.
- No tamper? A short, heavy log with a flat end works.
A compact pile of bags, wire, tarps, and a few tools fits in a garage corner yet can translate into a storm-worthy shell in hours. If you plan ahead, pre-cut funnels and prepare a small tool tote so you can mobilize quickly.
Rapid build workflow for a 1–2 person crew
When time matters, a consistent workflow saves energy and prevents mistakes. The goal: safe, plumb walls and a quick dry-in.
- Layout and foundation:
- Mark your footprint: a small oval or rectangle about 8×10 feet gives space for two sleepers and gear.
- Scrape to mineral soil. If possible, dig a shallow perimeter trench and fill with 3–4 inches of gravel to form a rubble trench that drains water away.
- Set a string line to maintain straight or smooth curves.
- First course:
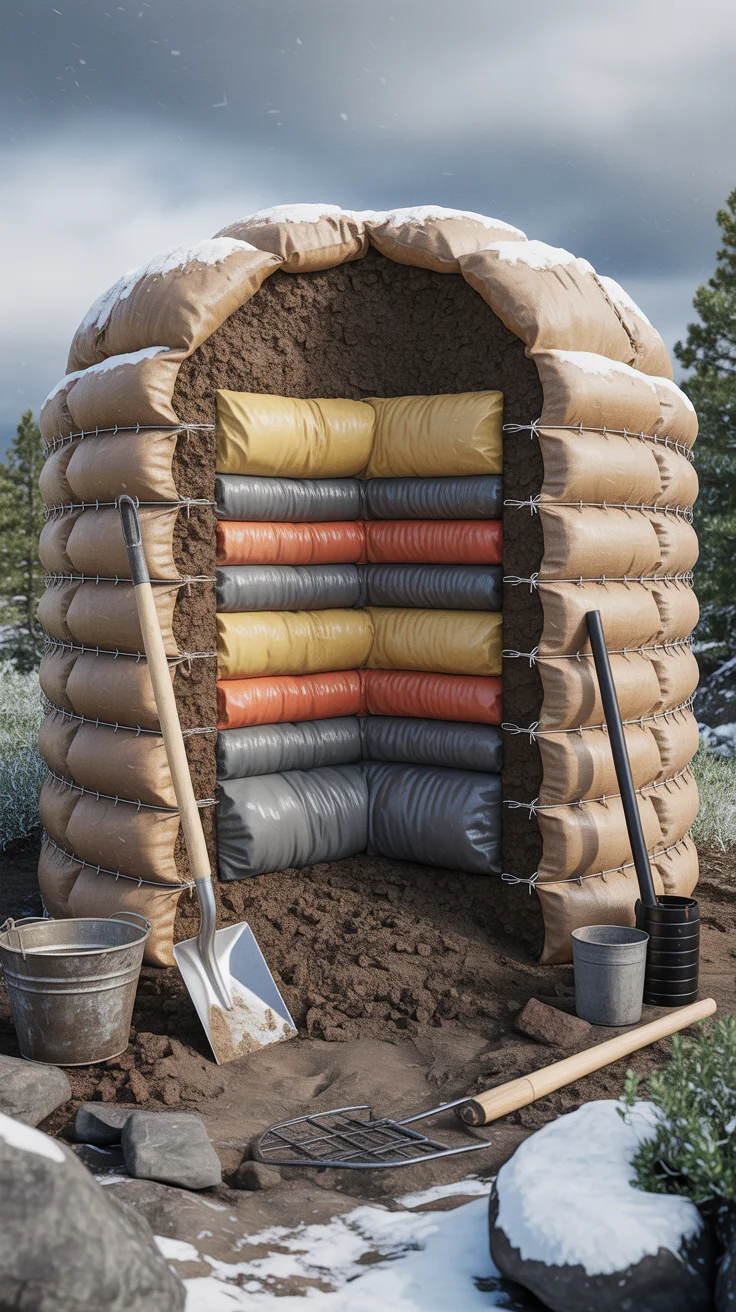
- Place bags filled with gravel as the first course to resist moisture wicking.
- Lay two strands of barbed wire on the gravel course. Place filled bags so they press into the wire.
- Stagger the seams like bricks. Pre-shape corners with partial bags.
- Bag filling and tamping:
- Use the bucket funnel. Fill bags to consistent volume (about 70–80% full), then tuck and fold the end flat toward the wall’s center.
- Place bags, then tamp: light tamp to seat, then hard tamp after the course is complete. Tamping densifies and levels the course.
- Add two strands of barbed wire between every course to resist shear.
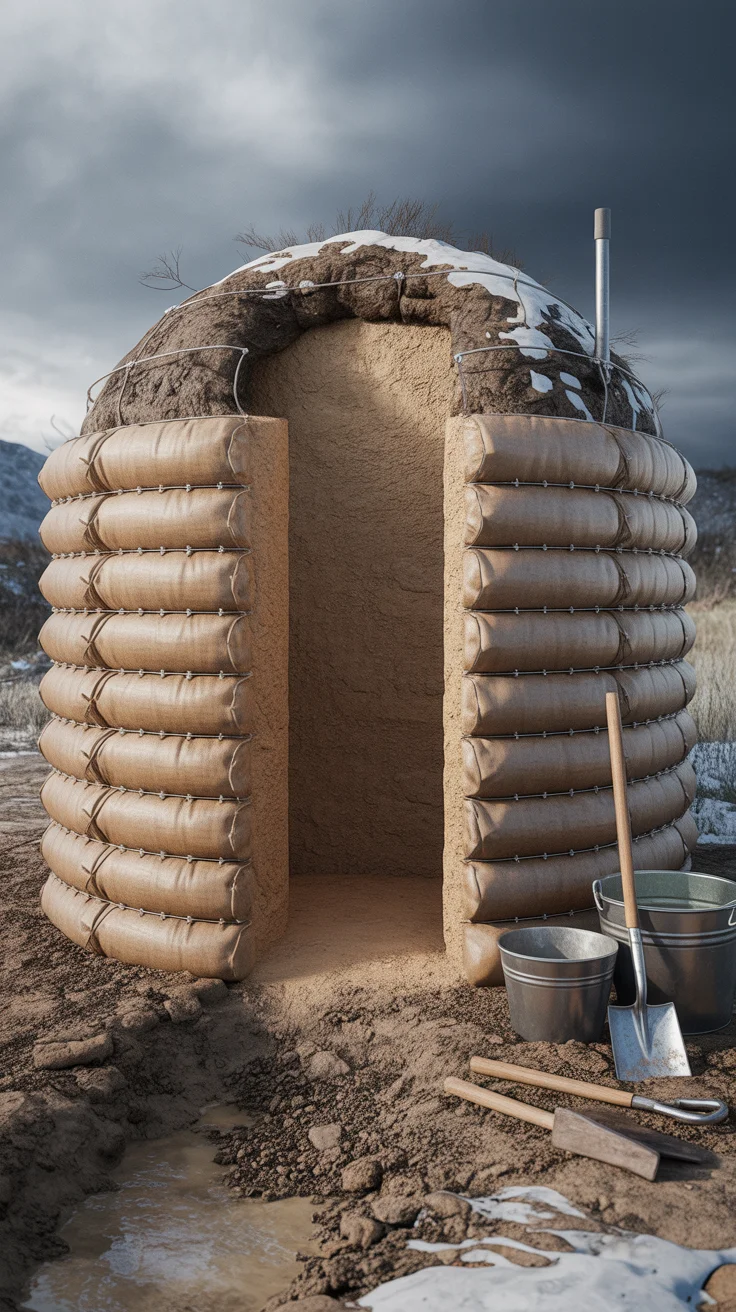
- Openings and frames:
- Build a simple door frame from 2x material, braced to the outside with stakes or temporary diagonals so it won’t rack.
- Extend bags snugly to the frame sides; weave in nails or screws on the frame edges to improve keying.
- Keep the opening low and narrow in winter for heat retention; consider a two-layer door (tarp plus rigid panel).
- Roof quick-dry-in:
- At chest-height walls, rig a ridge pole over the short dimension with strong uprights or forked poles.
- Drape a tarp over the ridge with steep pitch (minimum 3:12) to shed rain and snow.
- Anchor tarp edges with bags, soil berms, or stakes; avoid flapping which quickly destroys fabric.
- Create a small eave; overhanging edges reduce wall wetting.
- Fast interior setup:
- Lay a plastic groundsheet or woven tarp, then insulate under sleeping areas with dry leaves, cardboard, or foam if available.
- Keep gear off the wall edges to maintain airflow and prevent condensation.
A single long day gets you to a secure shell—gravel course, two to three additional bag courses, door frame, and a taut tarp roof. Over subsequent hours or days, continue stacking to shoulder height, then build a lightweight bond beam and improve weatherproofing.
Off-grid water purification methods
Storm- and winter-ready wall techniques
Extreme weather punishes weak points. Strengthen your emergency earthbag shelter for wind and snow by focusing on geometry, interlock, and water management.
- Favor curves and buttresses:
- Curved walls distribute wind loads more evenly and resist overturning.
- Add small buttresses at door sides or long walls every 4–6 feet to stiffen. Tie buttresses into courses for monolithic action.
- Maintain tight interlock:
- Stagger bag seams. Avoid vertical “stacked” joints.
- Tamping matters: an untamped course is a loose bearing surface; a tamped course behaves like stone.
- Use two strands of barbed wire between courses. Keep wire taut—walk it in with gloves, then pin with a few nails or staples into bags if necessary.
- Bond beam at the top:
- Cap with a light timber bond beam: lay parallel 2x lumber on edge around the top course and tie together at corners, secured with strap ties or wire around the wall.
- The bond beam spreads roof loads and ties the top course into a ring, improving performance in wind.
- Drainage and splash protection:
- Grade the surrounding soil to slope away from the walls.
- Add a small gravel curtain around the base to stop mud splashes and capillary wicking.
- Extend roof edges or add a fabric drip edge so runoff doesn’t soak the walls.
- Snow and ice considerations:
- Keep roof spans short. Use a central ridge with props rather than wide, flat tarps.
- Clear heavy snow promptly with a broom, not a shovel, to avoid tearing.
- Avoid heating the roof directly; uneven melt can refreeze and add ice load.
- Cold joint sealing:
- At the end of a workday, cover the top course with plastic to keep the next course clean and bond-ready.
- Protect exposed bag fabric from UV with tarp edges, plaster, or mud slurry once weather allows.
Selecting geometry and detailing that favor continuous load paths will help your shelter withstand gusts and drifting snow. Keep observing: if the structure starts to lean, brace or add a buttress before the next storm arrives.
Insulation and weatherproofing with minimal supplies
Thermal mass (the soil in your bags) slows temperature swings, but mass alone won’t keep you warm. Pair it with insulation and moisture control so the interior stays dry and heat-efficient.
- Insulation strategies:
- Exterior is best: Add a “skirt” of dry leaves, straw, pine needles, or loose-fill around the exterior and hold it with scrap fencing, pallets, or secondary tarps. This reduces wind wash.
- Interior liner: Hang blankets, quilts, or foam panels to create a small, well-insulated “nest” within the larger space. Smaller air volume is easier to warm.
- Ground insulation: Stack cardboard, foam, or dry organic matter under sleeping pads to stop conductive heat loss to earth.
- Snow as insulation: After a storm, pack snow gently against the exterior (not higher than mid-wall) for wind-blocking. Keep it off the tarp roof.
- Weatherproofing layers:
- Temporary renders: A clay-sand slurry brushed on bags reduces air infiltration. Limewash, if available, adds weather resistance. Apply when above freezing and allow to cure.
- Tarp shingling: Overlap tarp edges like shingles and face the lap away from prevailing winds. Tape or clamp laps to prevent wind lift.
- Drip control: Add cord “drip lines” at the tarp edge—tie lengths of string to encourage water to fall off before reaching walls.
- Moisture and condensation:
- Add a ground vapor barrier under floor insulation; lap it up the wall base a few inches.
- Crack a high-low vent pair to purge humid air from breath and cooking. Moisture control equals warmth.
- Heat sources and power:
- Prioritize safe, vented heat or insulated hot water bottles. Never run combustion heaters or generators inside—carbon monoxide is deadly.
- For light and device charging during outages, a compact off-grid power source is invaluable. Explore the Ultimate OFF-GRID Generator for resilient energy planning that pairs well with shelter operations.
Winterizing is a series of small wins: stop drafts, insulate the ground, shrink your heated zone, and ventilate moisture. Combined, they multiply comfort and safety.
Ventilation, heating, and off-grid essentials
Breathable air, dry interiors, and safe heat are non-negotiable in a tight shelter. Design simple, reliable systems you can maintain in bad weather.
- Ventilation:
- Cross-vent: Place a low intake near the door (sheltered from wind) and a high exhaust pipe near the ridge. Even a short length of 2–4 inch pipe boosts stack effect.
- Adjustable control: A rag or piece of foam as a simple damper lets you tune airflow as conditions change.
- Cooking: Cook outside or in a separate, well-ventilated vestibule to avoid vapor and CO buildup.
- Heating best practices:
- Thermal layering: Wear insulating clothing layers, use wool blankets, and share body heat in a smaller sleeping pod.
- Heat sinks: Warm stones near a safe, outdoor fire and bring them inside wrapped in cloth. Place on a non-combustible surface away from bedding.
- Candle caution: Use only enclosed lanterns, never near fabric, and never asleep. Ventilate.
- Lighting and power:
- Headlamps and LED lanterns drastically improve safety for night work.
- For extended outages, a compact off-grid power solution can run lights, charge radios/phones, or power a small fan for ventilation. Plan ahead with the Ultimate OFF-GRID Generator so you’re not reliant on grid power when storms hit.
- Water and food:
- Station a covered water container inside to prevent freezing. Refill daily to keep it fresh.
- Consider a modular water system you can set up quickly for gravity-fed access and basic filtration. See the The AquaTower for ideas that fit off-grid routines.
- Keep dense, shelf-stable foods in a dry bin. If you’re building a resilience pantry, The Lost Superfoods can help you think through no-fridge options that travel well.
- Safety checks:
- Place a battery CO alarm if you have any combustion nearby.
- Keep a fire extinguisher accessible and dry.
- Store fuels outside and downwind.
The goal is a shelter that breathes, stays dry, and supports core needs—warmth, water, light, and calories—without inviting hazards.
Emergency stove safety checklist
Field-proven details for durability and strength
A small set of technical details make a big difference in how your emergency shelter stands up to wind, wet, and freeze-thaw cycles.
- Wall alignment and bracing:
- Check plumb with a level every course. Correct small leans early with tamping bias or temporary braces.
- Use diagonal braces on door frames until the bond beam is in place.
- Bag handling:
- Keep bags out of direct sun as much as possible; UV degrades polypropylene. Cover stacked material with a tarp.
- Double-bag at corners or high-stress points. Extra layers resist abrasion and tearing.
- Course transitions:
- At openings, weave short bags to lock into the adjacent full-length courses.
- Avoid long vertical seams near frames; stagger and overlap.
- Simple bond beam methods:
- Timber ring: Two 2x members on edge with blocking at intervals, all strapped together and anchored with loops of wire running under the top bag course.
- Rope lashing: In a pinch, wrap strong rope around the top course and ridge supports to prevent uplift.
- Anchoring roofs and tarps:
- Use over-the-top straps or ropes that connect to ground anchors instead of relying on wall edge tie-outs.
- Create “sacrificial” tie points on tarp edges (short loops of webbing or paracord) so if something fails, the main tarp remains intact.
- Freeze-thaw and wet weather:
- Keep a perimeter swale to divert surface water.
- Add a small threshold step at the doorway to stop rain and snow from tracking in.
- Limewash when possible: multiple thin coats on dry days add breathability and water-shedding to bag exteriors.
- Interior comfort:
- Hang a reflective layer (survival blanket) behind your sleeping area to bounce heat back.
- Separate wet gear near the entrance so moisture doesn’t migrate through the living area.
These refinements don’t add much time, but they significantly increase reliability. Build the basics fast; then add resiliency details as the weather window allows.
Maintenance, testing, and pack-down protocol
Emergency shelters are living systems. They settle, absorb weather, and need periodic checks to stay safe.
- Daily checks after storms:
- Inspect for wall bulges or lean. If present, add a temporary interior prop and plan a buttress.
- Retighten tarp anchors and inspect for wear points. Add padding under ropes where they rub.
- Clear snow before it accumulates; check drip lines and re-establish if water starts to wick toward walls.
- Settlement and tamping:
- Expect slight settlement after the first heavy weather. Add a top-up course or re-tamp the upper course to keep the bond beam tight.
- Re-seat barbed wire if any course has shifted. Add pins where necessary.
- Moisture management:
- Ventilate daily. Open the high vent briefly at the warmest point of the day to purge moist air.
- Lift floor coverings and dry them if condensation forms underneath.
- Interior hygiene:
- Keep a dry sweep area by the entrance and a separate wet gear hook. This simple separation reduces mold risk.
- Rotate food and water stores; log dates with a marker on containers.
- Pack-down or upgrade:
- If the shelter was temporary, deconstruct responsibly: salvage lumber, tarps, and usable bags. Spread clean soil and seed over disturbed ground.
- If you’ll keep it as a seasonal refuge, upgrade: replace temporary tarp with a more durable membrane, add a proper lime render, and improve the door and vents.
Quick picks to complement your shelter work:
- Build long-term resilience with The Self-Sufficient Backyard.
- Add reliable power redundancy with the Ultimate OFF-GRID Generator.
- Simplify off-grid hydration with The AquaTower.
- Stock compact, shelf-stable staples using The Lost Superfoods.
How to secure tarps in high wind
Conclusion
An emergency earthbag shelter you can build with minimal tools (storm/winter ready) is one of the most practical, low-cost ways to protect your family during disruptive weather. A few dozen bags, available soil, barbed wire, and a tarp can form a strong shell in a single day, and every small improvement—tighter tamping, better drainage, smarter insulation, safer ventilation—turns it into a warmer, safer haven. Start small, build fast, then refine. With a prepared kit, a clear workflow, and attention to safety, you’ll have a dependable backup shelter waiting when you need it most.
FAQ
How fast can you build an emergency earthbag shelter?
- With materials on hand and a simple plan, a 1–2 person team can establish a basic earthbag shell—gravel base, two to three courses, door frame, and a tensioned tarp roof—in a long day. Reaching shoulder-height walls with a light bond beam can take another day. The speed-to-shelter mindset is key: get dry and wind-protected first, then add height, insulation, and finishes as weather allows.
What are the biggest safety concerns with emergency shelters?
- Roof failure, carbon monoxide from combustion devices, and moisture management are the top concerns. Keep roof spans short and well-supported, never run generators or heaters inside, ventilate with a low intake and high exhaust, and manage ground moisture with a vapor barrier and drainage. Regularly check walls for lean or bulge, retension tarp anchors, and clear snow promptly.
How do you insulate a temporary shelter for winter?
- Combine mass and insulation. Add exterior wind-blocking skirts of straw, leaves, or pine needles held by scrap fencing, insulate the ground under sleeping pads with cardboard or foam, and hang an interior liner of blankets or reflective material to reduce the heated volume. Control moisture with a ground vapor barrier and a high-low vent pair. Safe heat sources, warm bedding, and layered clothing amplify these gains.
What materials are essential for an earthbag emergency shelter?
- Woven polypropylene bags (or tubes), fill soil/sand/gravel, barbed wire between courses, gravel for a drainable first course, a heavy-duty tarp with cordage, basic tools (shovel, tamper, buckets, level, knife, tape), and wood for a door frame and simple ridge. Extras that help include plastic sheeting, stakes/rebar, and a small off-grid power source for lighting and comms. These basics deliver the structure; drainage, ventilation, and insulation complete it.