
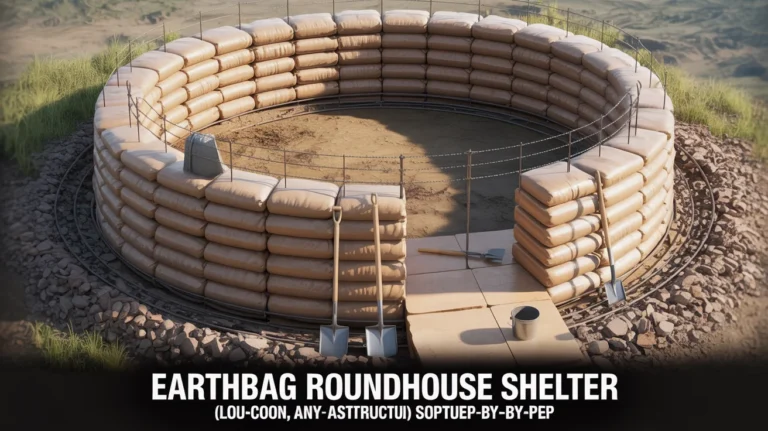
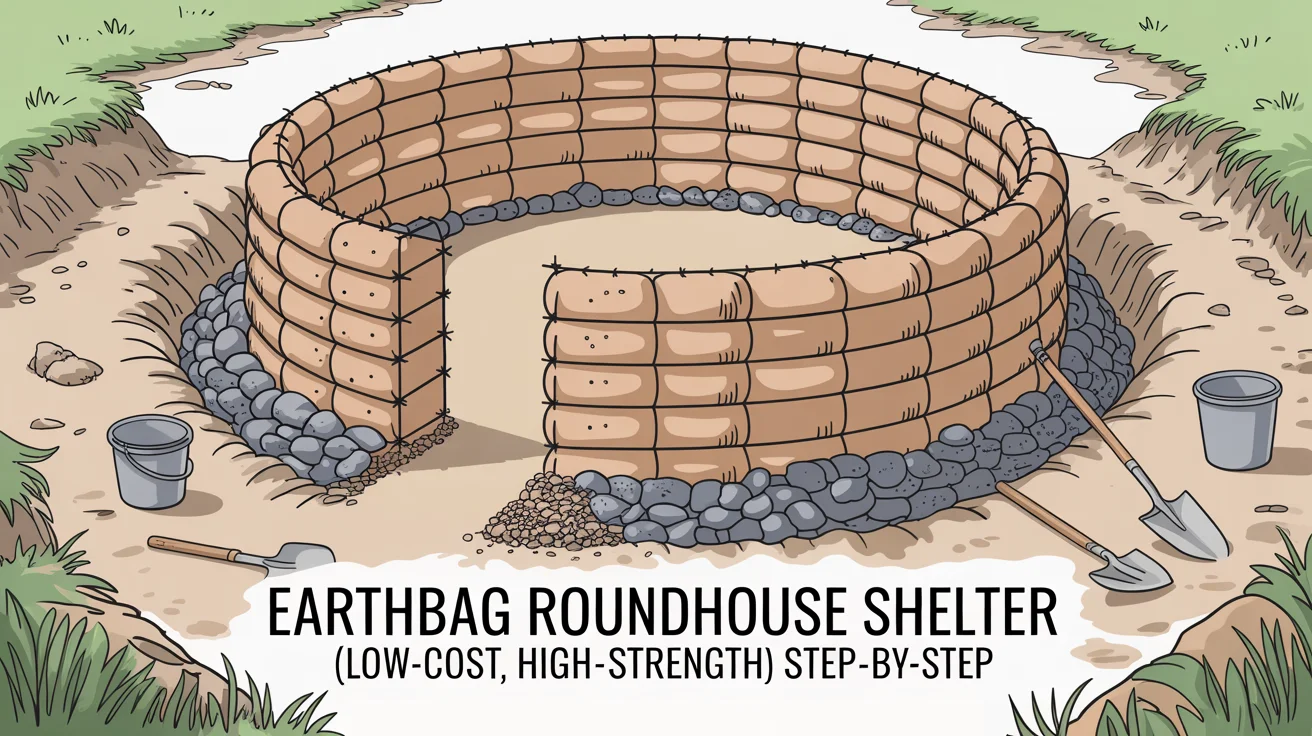
Durable, affordable, and surprisingly beginner-friendly, an Earthbag Roundhouse Shelter can be built with simple tools, local soil, and community help. This step-by-step guide shows you how to plan, design, and build a low-cost, high-strength roundhouse you can use as a cabin, studio, guest room, or resilient storm shelter—while avoiding common mistakes and ensuring long-term weather protection.
If you’re building a retreat or homestead around your roundhouse, consider The Self-Sufficient Backyard for practical, small-footprint systems that pair well with earthbag projects.
Planning and design fundamentals for an earthbag roundhouse
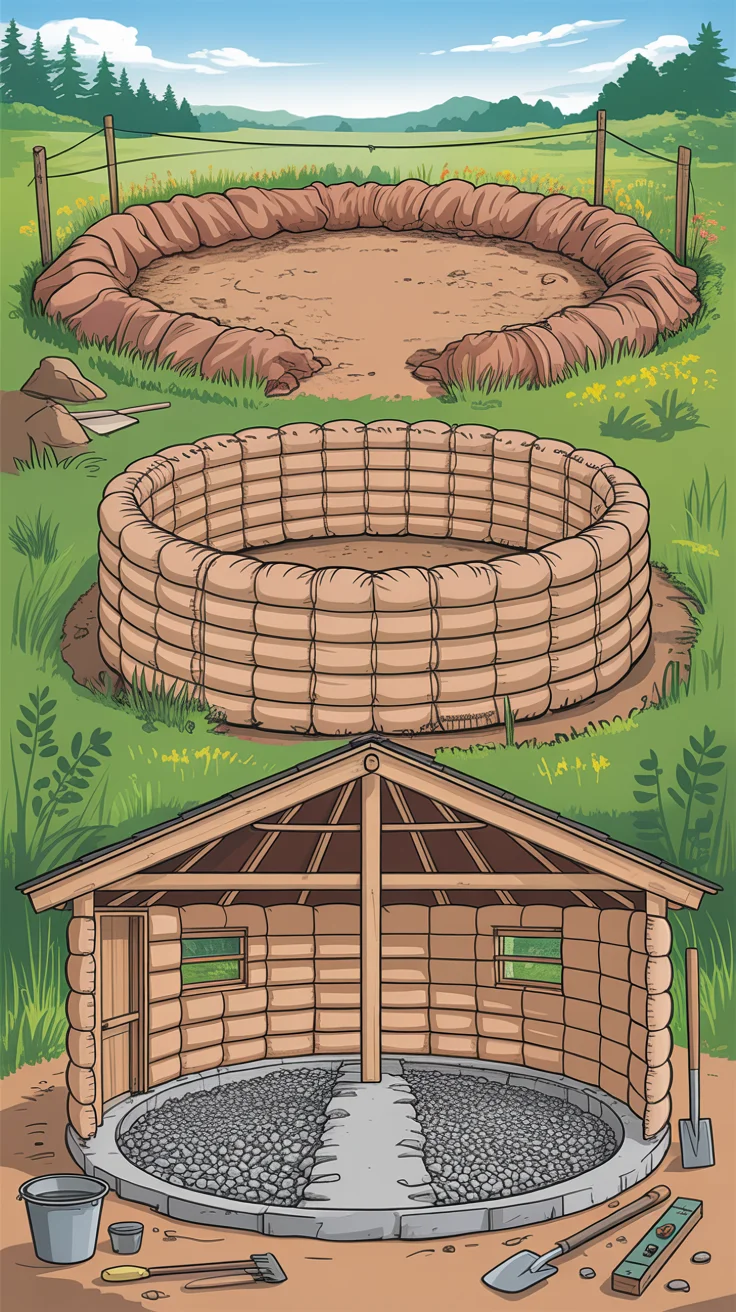
Before you lift a shovel, define the purpose, space needs, and climate strategy of your Earthbag Roundhouse Shelter. Roundhouses are inherently strong because circular walls spread loads evenly and reduce weak corners, but small layout choices will determine your budget, build time, and comfort.
- Footprint and diameter: A 12–18 ft inside diameter is a popular sweet spot for DIY crews. Smaller is faster and cheaper to complete; larger spans need more wall material and a stronger roof system.
- Wall thickness: Most earthbag walls are 15–18 inches thick with tamped 14–18 inch wide courses. This gives massive thermal mass and structural stability.
- Climate approach: In hot-arid and warm climates, the mass of earthbags stabilizes diurnal swings. In cold climates, add exterior insulation (e.g., rigid foam or pumice/perlite bags on the exterior) to prevent heat loss through mass. Design for passive solar: south-facing glazing, roof overhangs sized for seasonal sun, and cross-ventilation.
- Uses and layout: Plan for a bed nook, mini-kitchenette, shelving niches, and a small bathroom if plumbing is included. Round interiors benefit from built-in curves and radial furniture.
- Timeline and labor: A modest roundhouse can be built by 2–4 people in a few months of weekends if planning is solid. Factor in curing time for plasters and concrete bond beams.
- Budgeting: Expect most costs in foundation drainage, barbed wire, bags, roof timber, and plastering. Soil is often free on-site.
Permits and engineering: Earthbag construction is not yet codified in many regions, so approvals vary. Document your design, include a bond beam and adequate roof connections, show buttressing of openings, and be ready to consult a local engineer. See How to navigate natural building permits and How to test soil for natural building before you submit plans.
Key design features to include:
- A raised stem wall or gravel first courses for capillary break
- Wide roof overhangs and a perimeter drain
- A continuous bond beam to tie the wall and roof together
- Buttresses or piers at large openings
- A breathable plastering system to protect UV-sensitive bags
Choosing a site, soil, and materials that last
Site selection will decide much of your shelter’s durability. Pick high, dry ground with natural drainage and avoid depressions or zones of standing water. A gentle slope is ideal because you can shed water away from the structure with perimeter grading and swales.
Soil: Proper bag fill is typically subsoil (not topsoil) made of sand, silt, and clay. You want a well-graded mix with enough clay to bind but not so much that it shrinks and cracks. For many regions, a sandy loam amended with additional sand works well. Perform:
- The jar test: Let a soil sample settle in a clear jar with water to gauge sand, silt, and clay layers.
- Ball drop/toughness tests: Make a moist ball and drop from waist height; it should hold together, not splatter.
- Test bags: Lay and tamp a few test bags to see how they compact and cure.
Reference: The USDA soil texture triangle is a helpful visual for understanding soil composition (a quick web search will find a free chart on the USDA NRCS site).
Bags: Use woven polypropylene bags or continuous tubes designed for grain storage. White or UV-stabilized bags last longer during the build; always plaster to protect them from sunlight. Store bags out of the sun and moisture.
Barbed wire: Two strands of 4-point barbed wire between each course add critical tensile resistance, acting like rebar in a masonry wall. Don’t skip this.
Other materials and tools:
- Shovels, buckets, tampers (hand tampers are fine; a pneumatic tamper speeds things up)
- Two-fill-bucket jig or a stand to hold bags while filling
- Levels, string lines, a center pole and radius string for round layout
- Window/door bucks (wood frames), hurricane ties/straps, rebar pins for bucks
- Moisture barrier roll, gravel, drain pipe, and geotextile for foundation
Plan now for electrical conduit runs and any plumbing penetrations. Conduits are often laid within or between courses with protective sleeves. See Beginner earthbag tools checklist for a full kit you can prep before day one.
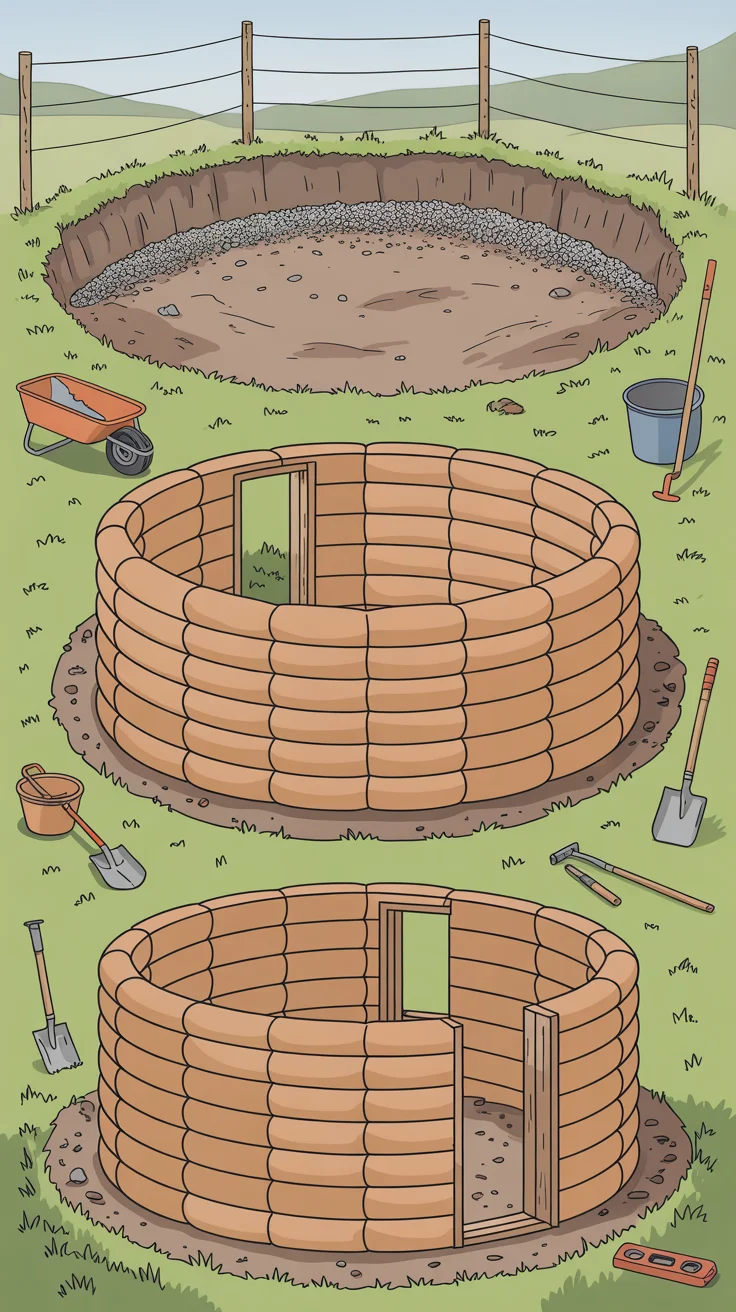
Foundation, drainage, and floor assembly done right
A great earthbag wall can still fail if the foundation lets moisture rise. The goal is to stop capillary action, drain bulk water, and elevate the wall base above splash-back.
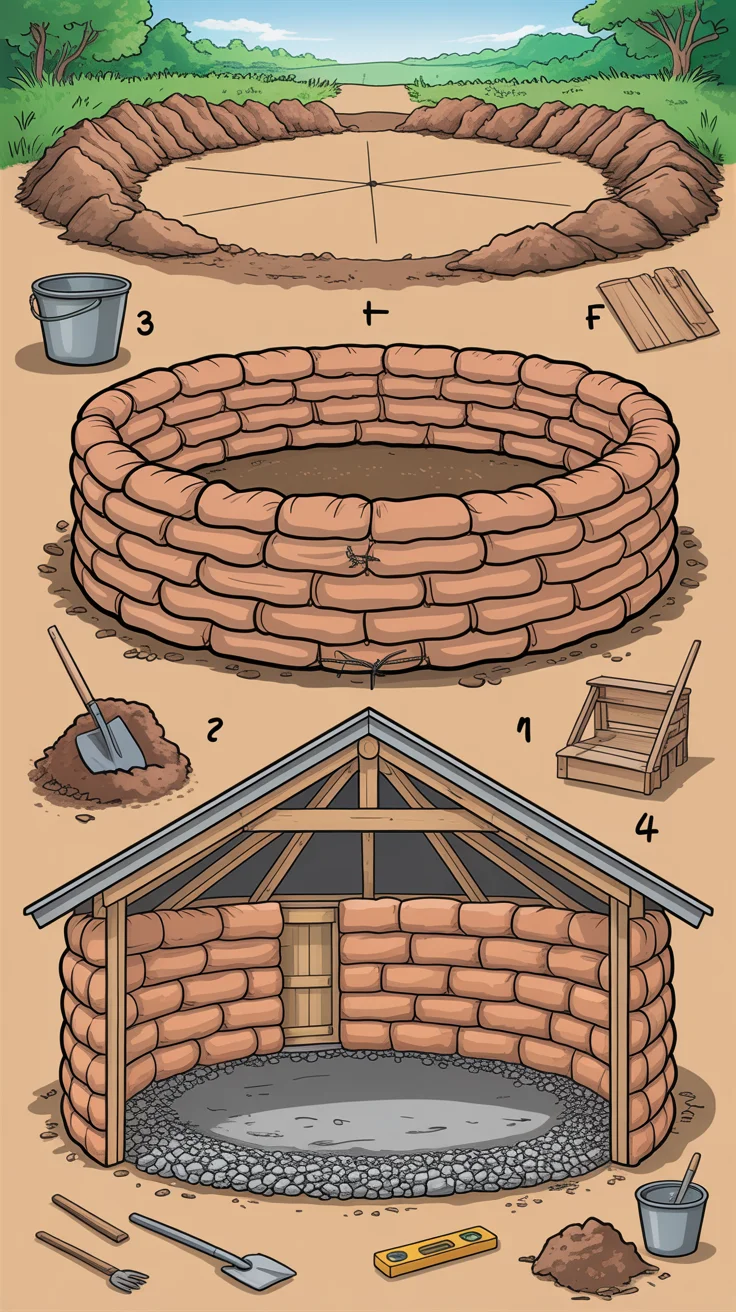
Rubble trench and perimeter drain:
- Excavate a trench below frost depth (or to stable subsoil in warm climates), sloping gently to daylight.
- Line with geotextile, then fill with washed gravel or crushed rock; seat a perforated drain pipe at the bottom leading to a dry well.
- Backfill with more gravel and wrap with geotextile to keep fines out. This is your capillary break and drain.
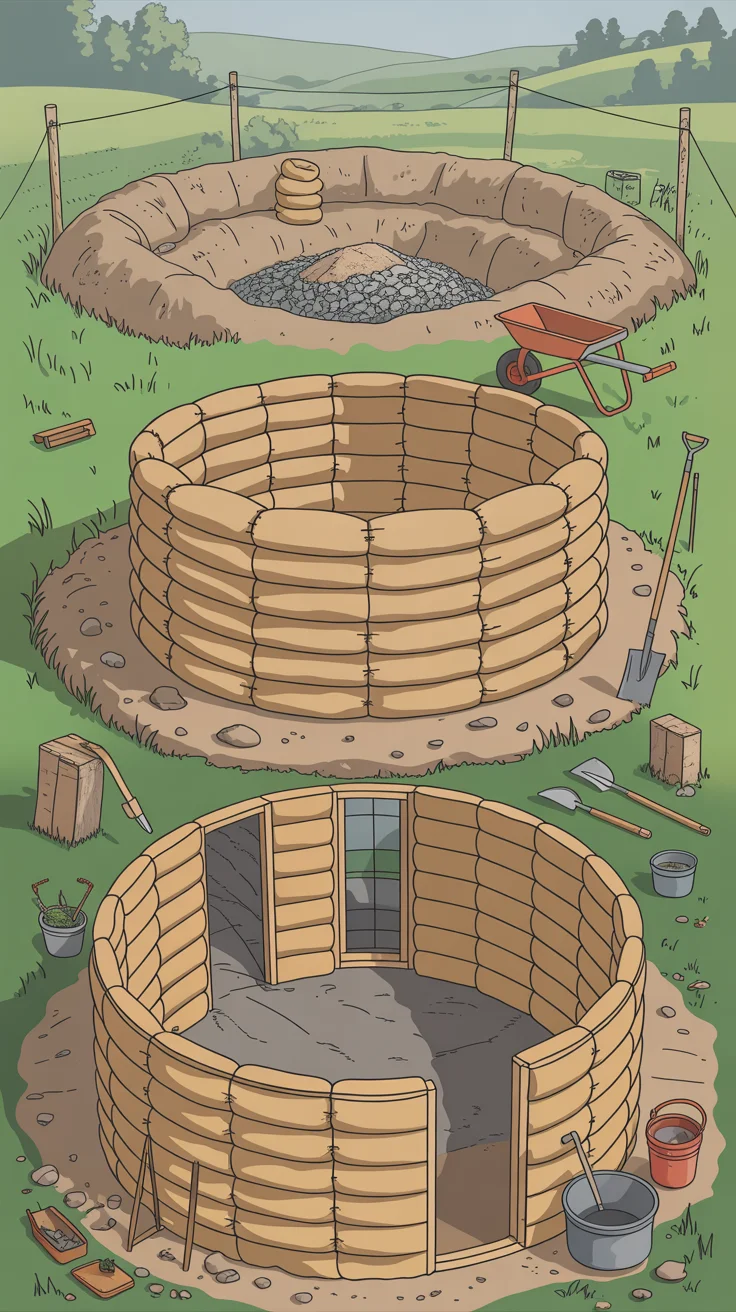
First courses of the wall:
- Lay one or two full courses of gravel-filled bags directly on the compacted rubble trench and/or a compacted gravel pad. These act as a raised stem wall.
- Place two strands of barbed wire between each course, even in the gravel base.
- Level each course by tamping thoroughly. A well-tamped course makes a huge difference later.
Moisture barriers and splash zone:
- Install a moisture barrier (e.g., EPDM or peel-and-stick) on the exterior side of the gravel stem wall before soil backfill.
- Plan a drip edge and 24–36 inch roof overhang to reduce wall wetting.
- Grade soil away from the wall for at least 6–10 feet around the structure.
Floor options:
- Earthen floor: compacted sub-base, insulation if needed (e.g., scoria in cold regions), vapor control strategy, then earthen layers (clay/sand mix), and an oil finish.
- Raised wood floor: useful for very wet sites but requires additional framing and venting.
Water planning: As you manage site drainage, also think about reliable water access for mixing plasters and day-to-day use. A compact gravity-fed system pairs well with off-grid builds; the modular The AquaTower offers a simple way to add water security and irrigation options without complex infrastructure. See Homestead water planning for layout ideas.
Take your time on the foundation. Precision here pays back with straight walls, fewer plaster problems, and a dry interior for decades.
Stacking, tamping, and bonding: building the wall system
Laying earthbag courses is repetitive, meditative work. Focus on consistency and compaction.
Layout and first soil courses:
- Place a stout center pole with a pivot arm or a taut radius string to your planned wall centerline. This keeps the circle true.
- Prepare bag stands and a team rhythm: one digs, one fills, one places, one tamps.
- Moisten soil to a “snowball” consistency. Overly wet mixes slump; too dry won’t compact.
- Set the first soil-filled course on top of the gravel stem wall. Stagger bag ends like bricks; alternate seams.
Barbed wire and compaction:
- Lay two strands of barbed wire on top of each course, keeping them slightly tensioned.
- Protect hands and bags when handling wire—use heavy gloves and wire holders.
- Tamp each course thoroughly, first around edges, then across the middle, until the thud becomes a crisp ring. Tamping reduces height and locks courses together.
Maintaining level and plumb:
- Use a long level, laser, or water level. Correct minor errors immediately; they compound quickly.
- Keep the radius exact from the center pole. Minor inch-level deviations are noticeable in a small round room.
Windows and doors:
- Install pre-built bucks where openings go. Secure them with rebar pins driven through bags into the ground or with keyed notches in courses.
- Include temporary braces to keep bucks square during tamping.
- For arched windows, form with a temporary arch and use well-tamped wedge bags to distribute load.
Bond beam planning:
- Leave space for a continuous ring beam at the top course. The beam ties the wall into a single unit and provides robust attachment for the roof.
- In seismic or high-wind regions, a reinforced concrete ring beam is common. In low-risk regions, a well-strapped timber ring can work.
Safety:
- Keep the site tidy—barbed wire ends, tools, and loose bags create tripping hazards.
- Rotate tasks to reduce fatigue. Tamping is physically demanding.
For roof ideas that marry beautifully with circular walls, see the Reciprocal roof guide for layout tips and joinery basics.
Openings, bond beams, and roof systems that work with earthbags
Openings concentrate forces, so reinforce them thoughtfully. Buttresses or curved returns can add stiffness at wide doors. Use lintels sized for loads or true arches that push into well-tamped walls.
Bond beams:
- Concrete ring beam: Typically a formwork atop the final bag course, with rebar rings tied and poured monolithically. Anchor bolts set into the beam secure the roof.
- Timber ring beam: A circular or faceted ring of laminated members, strapped to embedded anchors or to dedicated tie-downs pinned through the top courses. Ensure continuous strapping.
Roof options:
- Reciprocal roof: Elegant for round plans; each rafter leans on the next and into a compression ring or self-supporting knot. Cover with decking, membrane, insulation, and roofing.
- Conical roof: Rafters to a central post or ring; simple and shed-efficient.
- Light earth or green roof: Possible but heavy; requires engineered structure and robust waterproofing.
Key roof details:
- Overhangs: 24–36 inches with gutters dramatically reduce wall wetting.
- Ventilation: A high vent or operable skylight with low intake vents drives stack ventilation.
- Attachment: Through-bolted hurricane ties from rafters to the ring beam and straps down into the wall assembly help resist wind uplift.
Power during the build and beyond: If you’re off-grid or far from a service panel, a portable, easy-to-maintain backup power solution is invaluable for tools, lights, and emergency loads. The Ultimate OFF-GRID Generator offers a straightforward pathway to energy independence without complex installs—handy on remote sites and later as part of your homestead system.
Plan penetrations (flues, vents, skylight curbs) now. Flashing details should be sketched before cutting anything; water is relentless, and good flashing is your quiet hero.
Weatherproofing, plaster, and moisture management for decades of service
Keeping earthbags dry is about layers, overhangs, and breathability. Your goal: shed rain, prevent UV damage to bags, and allow walls to dry if they ever get damp.
UV and first coats:
- Protect bags early if the build will sit exposed. A clay slip (“elephant skin”) or breathable primer can shield UV for weeks.
- Apply a base coat (brown coat) of clay-sand plaster with fiber over roughened bag surfaces or lath. This levels and keys the finish layers.
Reinforcement:
- Tie on mesh or netting at transitions and around openings to prevent cracking.
- Use corner beads and drip edges at sills.
Finish coats:
- Lime plaster is a top choice: it’s breathable, sheds rain, and hardens over time. A two- or three-coat lime system over a clay base coat balances moisture handling.
- Earthen finishes inside: beautiful, repairable, and help regulate humidity.
Water details:
- Flash all windows and doors with sill pans, side flashing, and head flashings.
- Add a gravel skirt around the perimeter to reduce muddy splash-back.
- Ensure roof gutters and downspouts discharge far from the wall, ideally to a rain garden or cistern.
Vapor and insulation strategy:
- In cold climates, consider insulating the exterior before the final plaster (e.g., pumice, perlite, or rigid boards with mechanical fastening and mesh), keeping the exterior finish vapor-open.
- Avoid non-breathable acrylic sealers on lime/earthen systems; they can trap moisture.
Maintenance plan:
- Inspect after the first winter and yearly thereafter: touch up cracks, repaint limewash, clear gutters, and verify drainage.
- Monitor interior humidity; add trickle vents or a small HRV if the space stays sealed for long periods.
For training and examples of proven earthbag plasters and details, CalEarth (short for the California Institute of Earth Art and Architecture) offers reputable educational resources online.
Final fit-out, interior comfort, and off-grid readiness
With the shell complete, shift to comfort, safety, and function.
Thermal comfort:
- Thermal mass works best when it can absorb daytime heat and release it at night. South glazing, shading devices, and night ventilation make a small roundhouse remarkably stable.
- In cold climates, supplement mass with efficient heat: a small wood stove or rocket mass heater (with proper clearances and floor protection) is a natural fit.
Interior finishes:
- Built-in niches and benches formed during wall building save space and materials.
- Earthen plasters and clay paints regulate humidity and are easy to touch up.
- Consider a simple radial layout: bed against the curve, mini-desk or fold-down table, and open storage that follows the wall.
Utilities:
- Electrical: Pre-run conduits in walls to avoid chasing later. Use a small subpanel or a safe off-grid system with proper grounding.
- Plumbing: If adding a bathroom, plan vent stacks through the roof before final roofing. For a lighter footprint, place a composting toilet in an attached or nearby outbuilding.
Resilience and supplies:
- Water: Pair your gutter system with storage. Modular systems like The AquaTower make capture-to-use simple.
- Power: Keep the Ultimate OFF-GRID Generator fueled and ready for outages or remote living.
- Food: Shelf-stable staples and preservation know-how turn a shelter into a self-reliant space. The Lost Superfoods compiles durable, practical foods and methods that complement a small, cool, earth-sheltered interior.
If you’re establishing a full micro-homestead around the roundhouse, the plans and seasonal checklists in The Self-Sufficient Backyard can help you integrate gardens, rain capture, and energy systems from day one.
Recommended off-grid resources for earthbag owners
- The Self-Sufficient Backyard: Practical blueprints for small-space gardens, energy, and water planning that align well with earthbag simplicity. Link: The Self-Sufficient Backyard
- Ultimate OFF-GRID Generator: A straightforward backup and off-grid power option for tools during the build and essential loads later. Link: Ultimate OFF-GRID Generator
- The AquaTower: Modular water storage and delivery for irrigation, washing, or emergency use—ideal for sites without a well yet. Link: The AquaTower
- The Lost Superfoods: Long-lasting food strategies and recipes to keep your shelter provisioned. Link: The Lost Superfoods
Get started on your build with confidence
You now have a clear, field-tested path to plan, drain, stack, strap, plaster, and finish an Earthbag Roundhouse Shelter. Start small, perfect your soil mix with test bags, and focus on moisture management and a solid roof connection. Build in layers, check your level and radius each course, and don’t rush plaster details—these protect your investment.
As you break ground, use your first weekend to set stakes, lay out the circle, and excavate the trench. Week two, install the drain and gravel stem wall. Then build up a course or two daily until you reach bond beam height. Roof and plaster are the last big pushes; after that, it’s just trim, fit-out, and enjoying the calm of a naturally quiet, curved room.
When you’re ready to power tools or add essential utilities off-grid, the Ultimate OFF-GRID Generator, The AquaTower, and The Self-Sufficient Backyard are helpful companions to keep your project moving smoothly.
Conclusion
An Earthbag Roundhouse Shelter (Low-Cost, High-Strength) Step-by-Step build is within reach of dedicated DIYers. By prioritizing drainage, proper soil mix, consistent tamping, a continuous bond beam, wide roof overhangs, and breathable plasters, you get a robust, comfortable structure with minimal ongoing costs. Whether you’re crafting a weekend cabin, a studio, or a resilient shelter, the roundhouse’s strength-to-cost ratio is hard to beat—and its quiet, curved interior quickly becomes a favorite place to live and work.
Explore related guides to deepen your skill set:
FAQ
What is an earthbag house and how does it work?
- An earthbag house uses woven polypropylene bags or tubes filled with moistened subsoil, stacked in courses with two strands of barbed wire between each layer. Tamping compacts the bags into a solid, interlocked mass. The barbed wire acts like tension reinforcement, preventing sliding. A continuous bond beam at the top ties the wall together and anchors the roof. In a round layout, compressive forces travel evenly around the circle, making the wall system extremely stable. With a good roof, overhangs, and breathable plaster, an Earthbag Roundhouse Shelter can perform for decades with low maintenance.
Are earthbag homes safe in storms?
- When properly engineered and built—especially as roundhouses with a continuous bond beam, adequate buttressing at openings, and strong roof tie-downs—earthbag structures have shown excellent resistance to high winds and seismic activity. Their mass helps resist uplift and lateral loads, and circular walls minimize weak corners. However, storm safety depends on design, site exposure, quality of construction, and roof connections. Consult local professionals for site-specific wind and seismic detailing, and always include robust anchors, straps, and a well-braced roof.
How do you keep earthbag walls dry?
- Start with a rubble trench and perimeter drain to break capillary rise and move water away. Use one or two gravel-filled bag courses as a raised stem wall, then grade the ground to shed water. Add 24–36 inch roof overhangs with gutters, and a gravel splash skirt around the base. Protect bags from UV and moisture with a breathable plaster system—typically a clay base coat and a lime finish coat—plus careful window/door flashing. Avoid non-breathable sealers that can trap moisture. Regularly inspect and maintain plasters and drainage.
Do you need permits for an earthbag build?
- Requirements vary by location. Some jurisdictions allow small accessory structures without permits below a size threshold; others require full permits and engineering for any habitable structure. Because earthbag isn’t universally codified, be ready to present drawings showing a continuous bond beam, roof tie-downs, buttresses, and drainage details. A local engineer’s letter can smooth approvals. If you can’t permit a dwelling, consider classifying the first build as an accessory structure or agricultural shed, following local rules. Always verify with your local building department before you start.