
Introduction
A cordwood cabin blends homestead character with practical performance. If you’ve dreamed of stacking short firewood “rounds” into thick, insulated walls, this guide will walk you through cordwood cabin walls from start to finish—planning, the right mortar mix, moisture control, and the most common mistakes to avoid. You’ll learn how to detail foundations, doors and windows, bond beams, and the ideal wall thickness so your DIY rustic shelter goes up faster and lasts for generations.
If you’re building a broader off‑grid life around your cabin, consider complementing your project with field‑tested homestead systems in The Self-Sufficient Backyard—a practical resource that helps you design water, food, and power resilience around your cordwood build.
Planning a Cordwood Cabin That Stays Dry, Solid, and Efficient
Great cordwood construction starts on paper. Whether you’re erecting a tiny one‑room shelter or a family cabin, a clear plan minimizes rework and avoids moisture‑related failures.
- Building approach. You can go load‑bearing (walls carry the roof) or hybrid (cordwood infill within a timber frame). For beginners and areas with snow or seismic activity, a simple timber frame with cordwood infill offers stability and speed. It also simplifies roof erection before walls, letting you build under cover and keep your mortar dry.
- Climate lens. In wet climates, increase roof overhangs, prioritize drainage, and choose rot‑resistant species. In cold climates, aim for thicker walls and high‑R center insulation fills. In hot‑humid regions, emphasize elevated foundations, vapor‑open walls, and sharp water‑shedding details.
- Wall thickness. Common thicknesses run from 12 to 24 inches. Around 16 inches is a sweet spot for most climates, balancing labor with insulation potential. Thicker walls blunt temperature swings and boost thermal lag, helping your cabin ride through day‑night temperature changes.
- Footprint and span. Keep the cabin simple: rectangles are easier than complex shapes. Limit long unsupported spans; plan posts or frames for roof beams. Place big openings (doors, picture windows) near corners or under beams rather than cutting too much out of your cordwood field.
- Foundation. A raised, well‑drained foundation is non‑negotiable. Options include poured concrete stem walls, CMU block, or a rubble‑trench with grade beams. Aim to elevate the cordwood at least 8–12 inches above grade with a capillary break.
- Roof first, walls second. Whenever possible, build the roof early. A dry site doubles your speed and improves quality. Wide eaves (18–24 inches min., 30 inches or more in very wet climates) are cordwood’s best insurance.
Before you finalize, verify local permitting and code compliance. Some jurisdictions recognize cordwood explicitly; others require an engineer or alternative methods approval. The simpler the plan, the easier the approval. For related framing tips, see How to build with a simple post-and-beam frame.
Choosing and Preparing Wood for Cordwood Cabin Walls
The soul of cordwood is, well, wood. Selecting the right species, drying it correctly, and cutting uniform lengths keeps mortar happy and walls crack‑free.
- Species selection. Rot‑resistant softwoods like cedar, tamarack (larch), eastern white cedar, northern white cedar, and some pines are common. Dense hardwoods can work but are heavier and slower to dry. Local availability often decides; just avoid known rot‑prone species without protection.
- Debarking and drying. Always peel bark and dry thoroughly before building. Bark holds moisture and pests, and it weakens mortar bonds. Air‑dry billets off the ground with stickers and a roof. A target moisture content of roughly 12–20% is workable in many climates; avoid green wood that will shrink and check excessively.
- Length and consistency. Cut pieces (“billets”) to your wall thickness, typically 12–16 inches for most cabins. Consistency matters—good, even lengths yield plumb walls and uniform mortar joints. Build a cutting jig to batch your lengths quickly.
- Orientation and checking. End grain will check (split) as wood dries. That’s normal and not a structural problem; it may even add rustic character. Aim to orient any major existing checks horizontally to reduce water tracking inward. Avoid pith‑center pieces for outer corners if you can.
- Storage and staging. Keep billets under cover and off soil. Bring them into the work zone in batches to reduce on‑site wetting. If rain threatens, wrap pallets with breathable covers, not plastic against the wood.
- Special pieces. Harvest some attractive slices for pattern breaks—quarters, angled cuts, or “cookies” for artistic touches. Bottle bricks (glass bottles joined at the neck) can add light but require careful thermal and moisture detailing; use them sparingly in cold climates.
As you gather and dry cordwood, map which billets go where: straighter and more uniform pieces for corners and openings; knottier or irregular pieces for the field. For more prep ideas, see How to season and store homestead firewood.
Mortar Mix and Insulation Strategy for Cordwood Cabin Walls
Mortar is as much about water management and flexibility as it is about strength. A good cordwood mortar mix bonds well, breathes, and accommodates minor movement while anchoring billets.

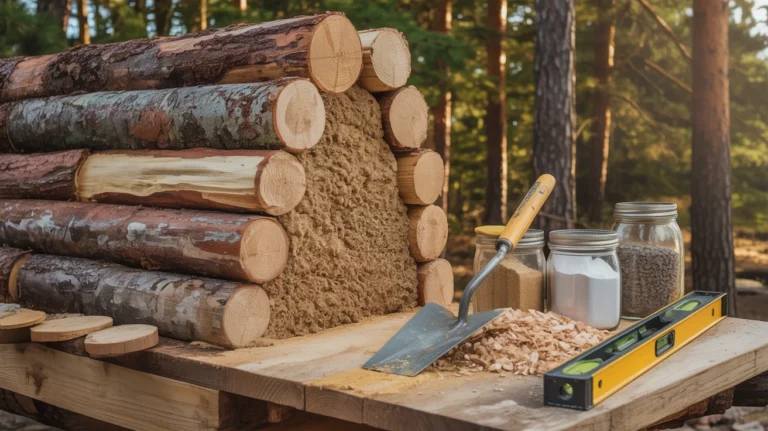
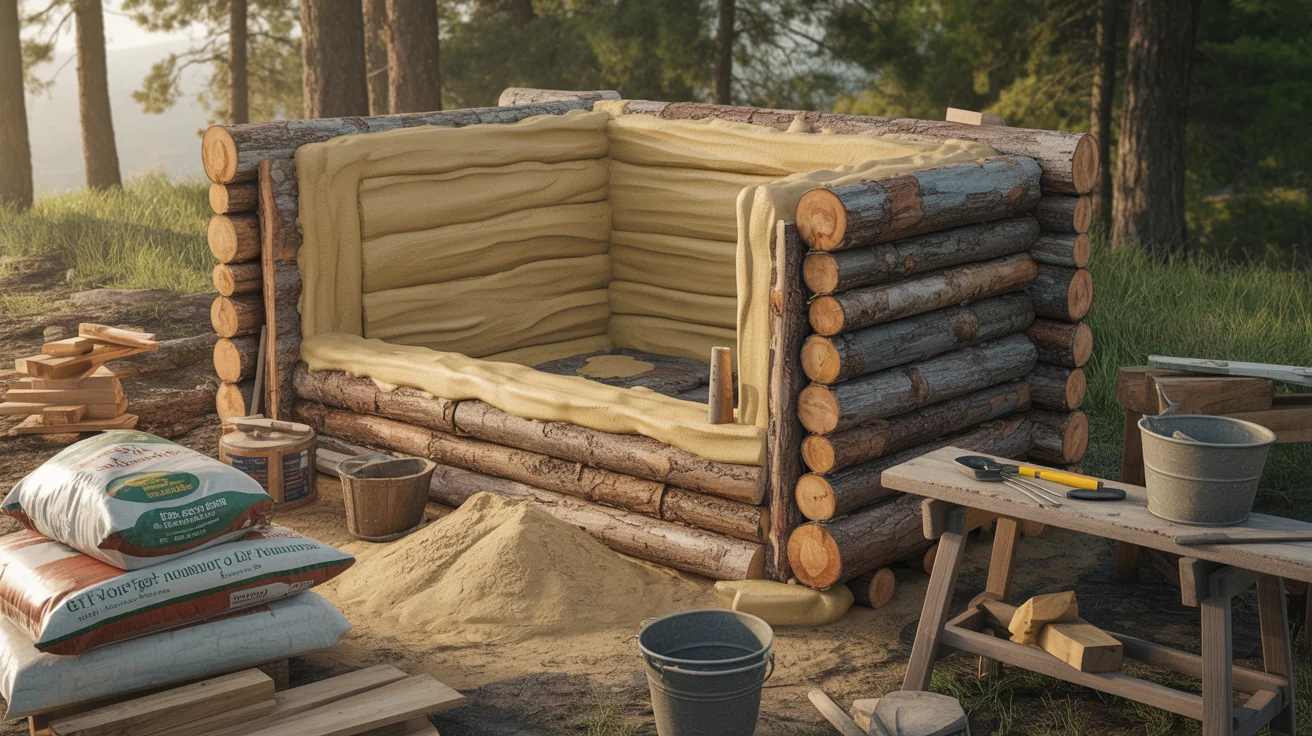
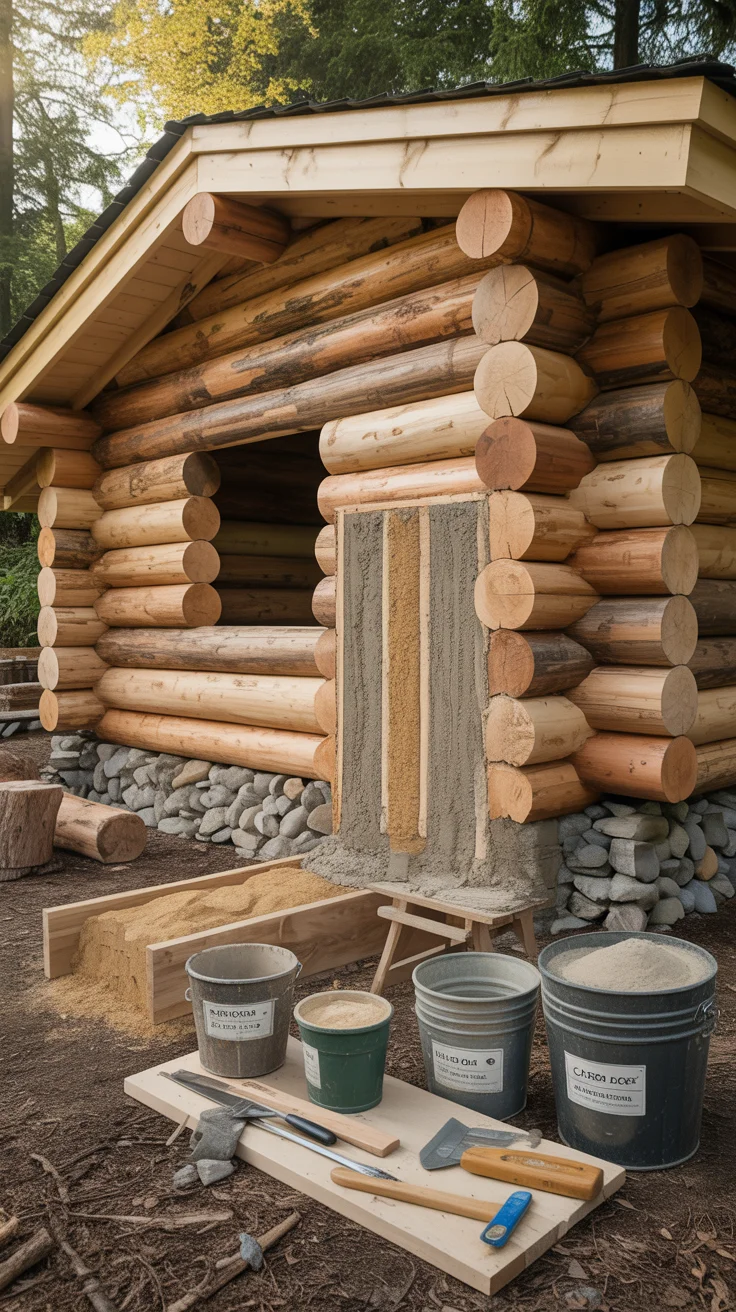
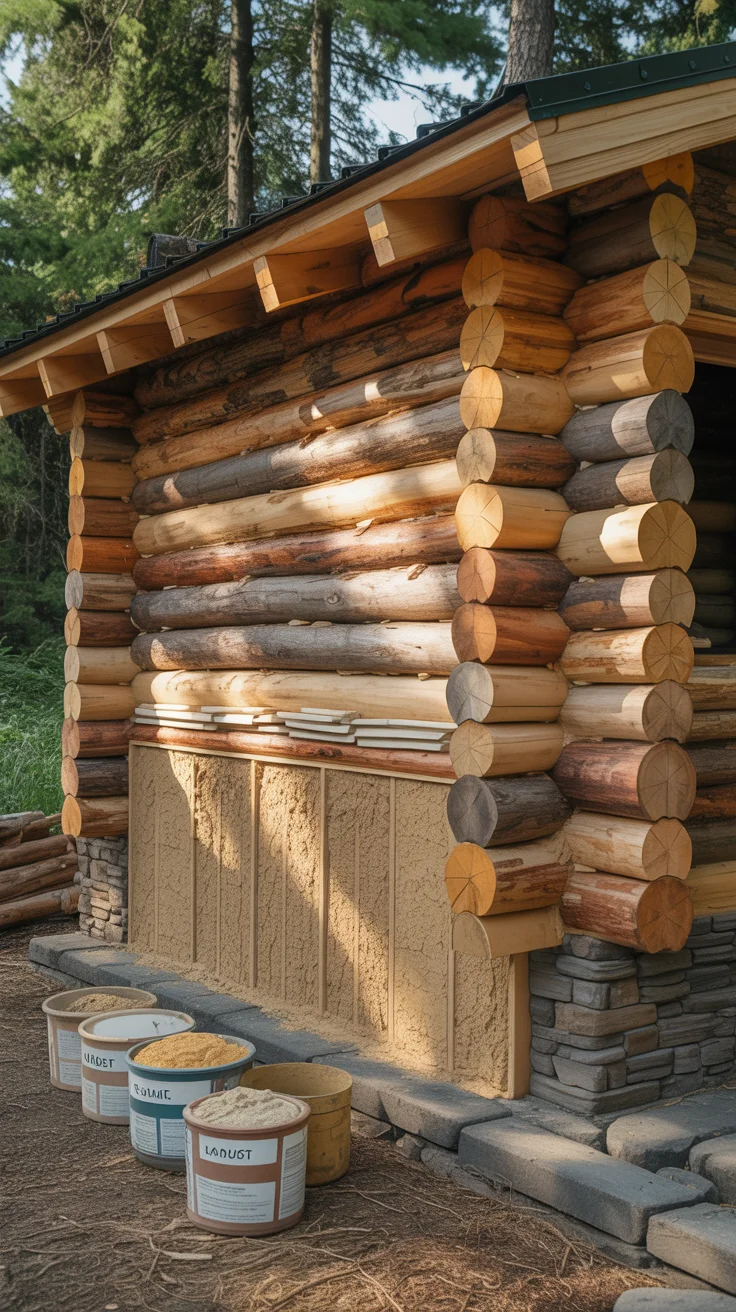
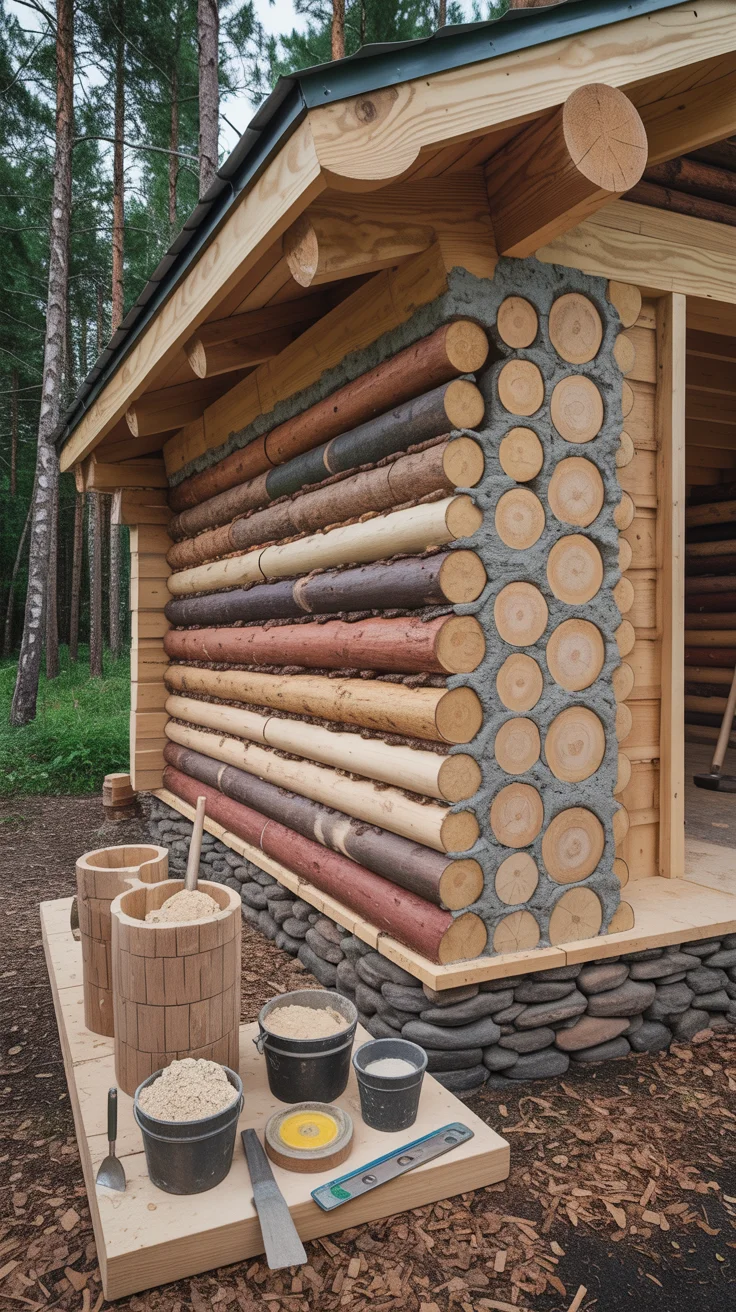
- The mortar bead principle. Rather than filling the entire wall thickness with mortar, you typically lay a 1.5–2 inch mortar bead on the interior and exterior faces, leaving a cavity in the center for insulation. This sandwich reduces mortar volume (and thermal bridging) and increases R‑value.
- Breathable, forgiving mixes. Many builders favor a lime‑rich blend for flexibility and vapor openness. A widely used starting point is by volume: 3 parts sand, 1 part Portland cement, 1 part hydrated lime, plus sawdust or chopped straw to improve workability. Some prefer a leaner cement content for more breathability. Always test small batches with your local sand; adjust sand grading for a creamy, cohesive feel that sticks but doesn’t slump.
- Additives and aggregates. Clean, well‑graded sand is crucial. Avoid too smooth or salty sand. Sawdust, shredded paper, or cellulose can improve workability and crack resistance but don’t overdo it. If using fibers, keep them short and well mixed.
- Center‑cavity insulation options. Popular fills include dry sawdust lightly treated with borax or lime, perlite or vermiculite, loose cellulose, or mineral wool. Each has pros and cons:
- Sawdust: natural, cheap, easy to source; treat lightly to discourage pests.
- Perlite: inert, higher R‑value per inch; needs careful containment so it doesn’t spill.
- Cellulose: good thermal performance; protect from moisture exposure during install.
- Mineral wool: fire‑resistant, consistent; more costly.
- Bond and keying. Tooth mortar into the wood by buttering billet ends, then push and twist slightly to key. Leave a small reveal or “proud” wood end if desired, but don’t let billets protrude so far that water sits at the mortar interface.
- Curing conditions. Keep walls shaded and damp‑cured for several days. Rapid drying or hot sun can cause surface crusting and internal weakness. Mist gently; cover with breathable fabric or tarps that don’t touch fresh joints.
If your site is very wet, lean toward higher lime content for breathability and pair it with generous overhangs. In freezing conditions, don’t lay mortar unless you can maintain temperatures safely above freezing until cure.
For builders seeking resilient systems beyond the wall, a quiet, fuel‑flexible backup power source like the Ultimate OFF-GRID Generator makes cordwood living more reliable when you’re running power tools, lights, and fans during curing and beyond.
Step-by-Step Build: From Foundation to Bond Beam
A reliable build sequence keeps momentum high and quality consistent. Here’s a field‑tested flow from ground to top plate.
- Foundation and stem wall. Start with a drained footing and a stem wall tall enough to elevate cordwood from splashback. Include a capillary break (e.g., sill gasket or bituminous membrane) between masonry and the first cordwood course. Pitch grade away from the structure.
- Sill preparation. Snap chalk lines or set guides for wall thickness. If you’re building within a timber frame, confirm plumb and square of posts and align the inner and outer face strings to the frame.
- Door and window bucks. Build stout, straight bucks from rot‑resistant lumber. Wrap their perimeter in a bond‑friendly material (e.g., expanded metal lath or mesh) to improve mortar grip while allowing for slight movement. Include a backer‑rod‑sized gap for flexible sealant after curing. Install temporary braces and shims to hold bucks square.
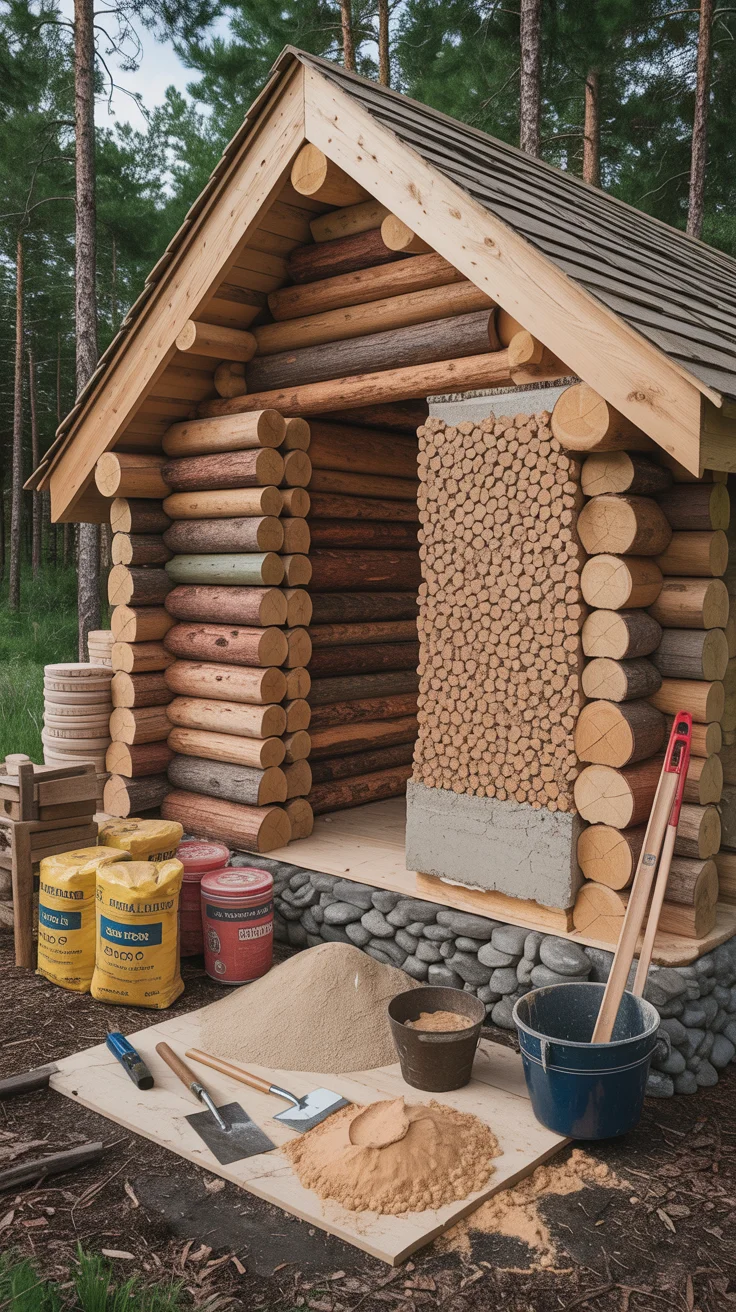
- First courses. Butter both ends of each billet with mortar, set them on the line, and tap gently. Install the inner and outer mortar beads, ensuring a continuous bed. Pack the center cavity insulation as you go. Stagger joints; treat corners like masonry, alternating overlap directions.
- Reinforcement. Every few courses, pin through the wall with fiberglass or basalt rods, or tie into the timber frame with screws or straps embedded in mortar. Avoid rebar that can rust and spall unless well protected.
- Level checks and cleanup. Check level and plumb regularly with long levels and string lines. Brush off smears before they cure. A stiff paintbrush and a small pointing trowel are your friends.
- Lintels and load paths. Over openings, set lintels that carry loads back to posts or the wall mass. Don’t overload cordwood over wide spans; break up spans with posts tied to a beam if necessary.
- Bond beam or top plate. At the top of cordwood cabin walls, tie everything together with a continuous bond beam (timber, concrete, or engineered wood). This ring distributes roof loads and resists lateral forces. Anchor rafters or trusses to the beam, not random billets.
- Roof and flashing. Once your bond beam is set, finish the roof and install all flashings and drip edges. The sooner you dry the structure, the better your mortar cure and interior finishes.
Where you need extra finesse—like picture‑frame patterns around a window—dry‑lay a few courses to visualize. Keep your daily lift heights modest so lower mortar cures enough to carry weight. For more detail on opening trims, see How to install durable window bucks in natural walls.
Moisture Management for Cordwood Cabin Walls
Moisture is the number one long‑term threat to cordwood. Your design should shed rain, block splash, and let walls dry quickly.
- Big hats and good boots. Extend roof overhangs generously (18–24 inches minimum, more in rainy or windy regions). Keep walls well above grade with a high stem wall and good drip edges. Consider stone or gravel perimeter to reduce bounce‑back.
- Flash everything. Use kickout flashings where roofs meet walls, head flashings over windows and doors, and sill pans to direct incidental water out. Set sills with a slight slope to shed water.
- Breathable mortar and finishes. Favor lime‑rich mortars and vapor‑open interior finishes (limewash, clay plaster, breathable paints). Avoid impermeable coatings that trap moisture inside the wall.
- Air sealing at openings. After the wall cures, compress backer rod around window and door bucks and seal with high‑quality, flexible sealant. This air seals without restricting vapor diffusion. Inside trim can hide the gap while preserving the movement joint.
- Capillary breaks and splash control. Keep vegetation away from walls. Use wide gutters and conduct downspouts far from the foundation. A perimeter French drain can help on wet sites.
- Interior humidity control. In cold climates, control indoor humidity during winter to reduce vapor drive into walls. A small HRV/ERV or disciplined ventilation strategy helps while maintaining indoor air quality.
- Maintenance mindset. Check for cracked joints, missing pointing, or gaps around openings once or twice a year. Touch up promptly. Keep an eye on any bottle bricks for condensation in cold spells.
If you’re outfitting your site with independent water, a compact, modular system like The AquaTower can complement rainwater catchment and ensure a reliable supply without tying into utilities.
Avoiding Common Mistakes When Building Cordwood Cabin Walls
A great cordwood cabin is 10% technique and 90% avoiding preventable errors. Here are the pitfalls that cause callbacks—and how to sidestep them.
- Building with green wood. Fresh‑cut billets will shrink and check excessively, loosening joints. Solution: fully debark and air‑dry your stock; store under cover.
- Skipping the stem wall. Wood near grade wicks splashback and rots. Solution: raise your cordwood off the ground 8–12 inches, minimum, with capillary breaks.
- Tiny eaves or no gutters. Roofs that dump water on walls shorten service life. Solution: big overhangs, good gutters, solid site drainage.
- Mortar that’s too rich in cement. Hard, brittle mortar can crack at the wood interface. Solution: include hydrated lime for flexibility and vapor openness; test batches.
- Filling the whole thickness with mortar. Continuous mortar is a cold bridge and heavy. Solution: use inner and outer beads with insulated center cavities.
- Poorly detailed window/door bucks. Smooth lumber wicks; mortar can debond under movement. Solution: add lath for mechanical keying, leave a flexible perimeter gap, flash and seal carefully.
- No bond beam or weak top tie. Without a ring, walls can rack or split. Solution: install a continuous bond beam that ties corners and openings.
- Overbuilding height per day. Lifting too high on fresh mortar leads to slumping. Solution: modest daily lifts and adequate cure time.
- Neglecting freeze protection. Mortar that freezes before cure weakens. Solution: heat and tent or postpone cold‑weather work.
- Random reinforcement. Unplanned pins can corrode or split billets. Solution: select non‑corrosive pins at regular intervals, or tie to a timber frame.
- Uneven billet lengths. This causes out‑of‑plumb faces and big mortar fills. Solution: uniform cutting and frequent string/level checks.
- Trapped moisture with impermeable coatings. Non‑breathable paints or membranes can trap water. Solution: vapor‑open finishes and breathable detailing.
- Ignoring thermal bypass. Air leaks around openings and at the bond beam reduce comfort. Solution: backer rod and sealants at movement joints; gasketed connections.
- Unsafe spans over openings. Heavy loads on weak lintels crack walls. Solution: respect load paths, use proper lintels, or add posts.
- Skimping on site prep. Poor drainage undermines everything. Solution: swales, grading, French drains, and thoughtful water management.
Finally, resist the urge to rush the mortar mix. Batch consistently, measure volumes, and keep a log of each batch that works well so you can repeat it throughout the build.
Thermal Performance, Wall Thickness, and Interior Finishes
Cordwood’s energy performance comes from thickness, the insulated core, and thermal mass. Understanding how these work together helps you choose the right wall for your climate.
- Thermal lag and comfort. Thick walls slow temperature swings. In a 16–20 inch wall, the outer face can experience daytime heat without quickly affecting the interior, moderating indoor temperatures.
- Insulated core. The center cavity insulation is where most R‑value comes from. Perlite, cellulose, or treated sawdust raise R‑value while the inner and outer mortar beads plus wood ends provide thermal mass and robustness.
- Thickness guidelines. For moderate climates, 12–16 inches often suffices. In cold continental climates, 16–24 inches may be worth the extra labor. Evaluate for your heating degree days and energy goals.
- Airtightness matters. Regardless of wall R‑value, air leaks dominate comfort losses. Detail your ceiling, bond beam, and openings for airtightness. Consider an interior plaster that seals micro‑leaks while remaining vapor‑open.
- Floor and roof synergy. A well‑insulated roof and draft‑free floor complement cordwood walls. Cordwood shines when the rest of the envelope is equally well detailed.
- Interior finishes. Lime plaster, clay plaster, or breathable paints pair beautifully with cordwood. Some builders leave the interior face exposed; others parge lightly to fill crevices for dust control. Keep finishes vapor‑open.
- Mechanical systems. For off‑grid winter comfort, combine a small, efficient wood stove with good passive solar design. For backup electricity to run ventilation or pumps during storms, the Ultimate OFF-GRID Generator provides resilience with minimal maintenance.
For a deeper dive into off‑grid food storage and meal planning that matches a low‑energy lifestyle, explore The Lost Superfoods for preservation ideas that don’t depend on constant power. And if you’re designing a whole‑site plan around your cabin, The Self-Sufficient Backyard connects water, garden, and energy with your shelter project. For more building‑science basics, see Off‑grid insulation strategies that actually work.
Cordwood Cabin Walls Detailing at Openings and Corners
Beautiful cordwood cabins often shine at their transitions—corners, window surrounds, and interfaces with the roof and floor systems. Proper detailing here improves durability and visual appeal.
- Corners that lock. Treat corners like masonry. Alternate overlap directions course by course to lock the wall. Use straighter, uniform billets at corners and embed occasional pins that tie inner to outer faces without creating corrosion risks.
- Decorative reveals. Slightly recess mortar around standout billets or create patterns with contrasting species. Keep decorative choices secondary to water shedding—flat ledges can invite water ingress.
- Window surrounds. Build bucks with rot‑resistant material and include a sloped sill piece. Staple expanded metal lath or mesh around buck edges to key mortar. Leave a compressible joint (backer rod) between wood buck and cordwood; seal after curing with flexible sealant. Head and sill flashings are must‑dos.
- Drips and ledges. Avoid horizontal mortar ledges that hold water. Tool joints to shed water. At belt courses or decorative stone bands, include protruding drips or chamfers to flick water away.
- Floor‑wall junction. Use a sill gasket and, where possible, a small interior base trim that allows for a discreet movement joint and air seal. Don’t bridge the capillary break with finish materials.
- Bond beam‑to‑wall. If using a timber bond beam, consider a compressible, airtight sill tape between cordwood and beam, then anchor discreetly. For concrete bond beams, ensure a bond break and consider insulating the beam’s exterior face to avoid a cold stripe.
These details add only modest time but compound benefits over decades by minimizing cracking, leaks, and maintenance calls.
Off‑Grid Systems and Maintenance for Long‑Life Cordwood Cabins
A cordwood cabin excels as a low‑tech, resilient shelter. Pair it with systems that respect the same ethos and establish a maintenance rhythm that keeps the structure tight and dry.
- Power resilience. Tools, fans for mortar curing, and winter ventilation benefit from dependable backup power. The Ultimate OFF-GRID Generator offers a practical hedge against outages without relying on a noisy, fuel‑hungry setup.
- Water independence. Capture roof runoff with large gutters leading to cisterns. A simple, modular treatment stack like The AquaTower integrates into gravity or low‑power pumped systems to keep water flowing safely.
- Food security. Cordwood cabins tend to live in places where grocery runs are optional. Shelf‑stable planning with The Lost Superfoods can cushion against supply hiccups and reduce refrigerator dependence.
- Annual inspection list.
- Roof: check shingles/metal, flashings, and gutters after big storms.
- Walls: look for cracks, gaps at openings, or mortar erosion; re‑point early.
- Grade: confirm slope away from cabin; clear leaf litter and vegetation near walls.
- Interior humidity: use hygrometers; ventilate to keep winter RH in check.
- Pests: inspect for carpenter ants, wasps in eaves, or rodents near storage.
- Cleaning and re‑sealing. A soft brush and water clean most wall surfaces. Avoid power washing that drives water into joints. Renew flexible sealants at bucks every few years as needed.
- Fire safety. Maintain defensible space if you’re in wildfire zones. Mineral wool in center cavities and metal flashings at eaves improve fire resistance. Keep stovepipes well flashed and inspected.
For a whole‑property blueprint—including garden zones, compost, and rainwater routing that complement your cabin—The Self-Sufficient Backyard provides step‑by‑step systems you can adapt to your site.
Conclusion
Cordwood cabin walls deliver a rare mix of beauty, mass, and insulation when planned and executed with care. Start with a raised, well‑drained foundation and big overhangs, choose dry, debarked billets, and use a breathable mortar mix with insulated center cavities. Tie walls together with a bond beam, detail windows and doors for movement and moisture control, and avoid common mistakes like green wood, shallow eaves, and overly stiff mortars. With those fundamentals, your DIY rustic shelter will be strong, comfortable, and easy to maintain. Round out your project with off‑grid essentials—the Ultimate OFF-GRID Generator for power, The AquaTower for water, and The Self-Sufficient Backyard for a property plan—and your cordwood cabin walls will support a resilient life on your terms.
FAQ
Are cordwood walls strong and durable?
Yes—properly built cordwood walls are robust and long‑lasting. Strength comes from the composite of wood billets, mortar beads, and a continuous bond beam. Durability depends most on water management: a raised stem wall, big eaves, sound flashing, and breathable mortar/finishes. Many cordwood buildings stand for decades, even in harsh climates, when they’re detailed to shed and dry.
What are common cordwood building mistakes?
The biggest mistakes are using green wood, skipping a stem wall, building with tiny or no eaves, making mortar too cement‑rich and non‑breathable, filling the whole thickness with mortar (creating cold bridges), neglecting bond beams, and poorly detailing window/door bucks. Each issue reduces longevity or comfort. Plan for moisture control, movement joints, and staged daily lifts to avoid slumping.
How do you prevent moisture issues in cordwood walls?
Start with “big hat, good boots”: generous roof overhangs and a raised foundation with capillary breaks. Flash every opening, slope sills, and air seal with backer rod and flexible sealants after cure. Use lime‑rich, vapor‑open mortar mixes and breathable interior finishes. Maintain gutters and grade away from the cabin, and keep interior humidity reasonable in winter to reduce vapor drive.
How thick should cordwood walls be for insulation?
For many climates, 12–16 inches balances labor and thermal performance. In cold regions, 16–24 inches can be worth the extra effort. Most builders use inner and outer mortar beads with an insulated center cavity (perlite, cellulose, treated sawdust, or mineral wool) to boost R‑value while keeping walls breathable and lighter.