
A thriving compost corner that doesn’t stink is the beating heart of a productive, low-waste backyard. The secret isn’t a fancy tumbler or chemical additives—it’s a simple, scalable 3-bin backyard system that balances air, moisture, and materials so decomposition happens fast and odor-free. This guide shows you how to design, build, and run a compost setup that turns kitchen scraps and yard waste into rich, crumbly soil without offending noses (yours or your neighbors’).
Want to connect your compost with a resilient homestead plan? Explore practical, backyard-scale systems with The Self-Sufficient Backyard to learn how compost, gardens, and water all support each other: The Self-Sufficient Backyard.
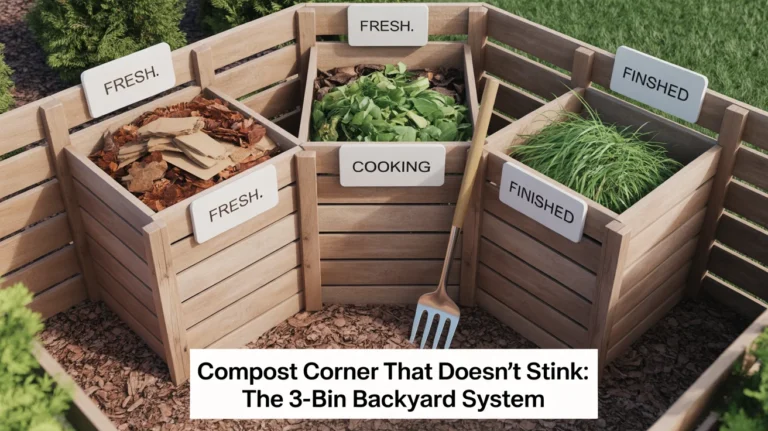
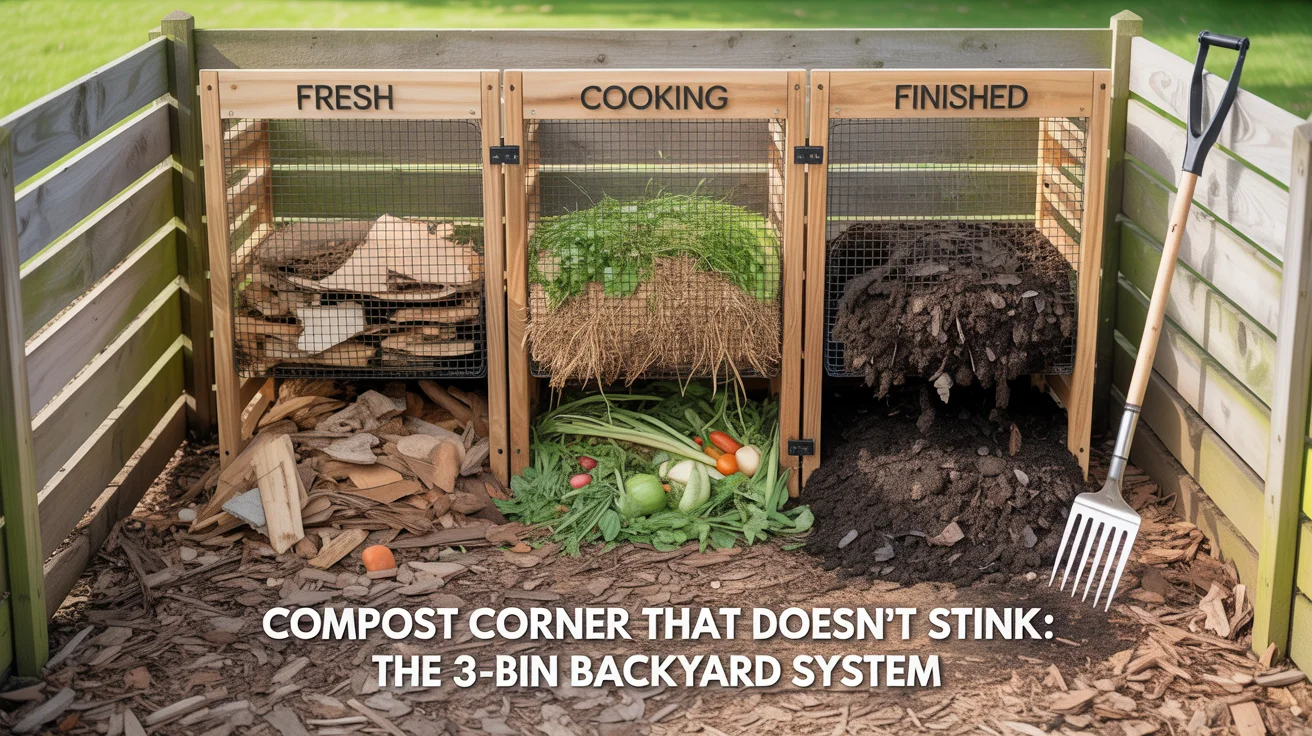
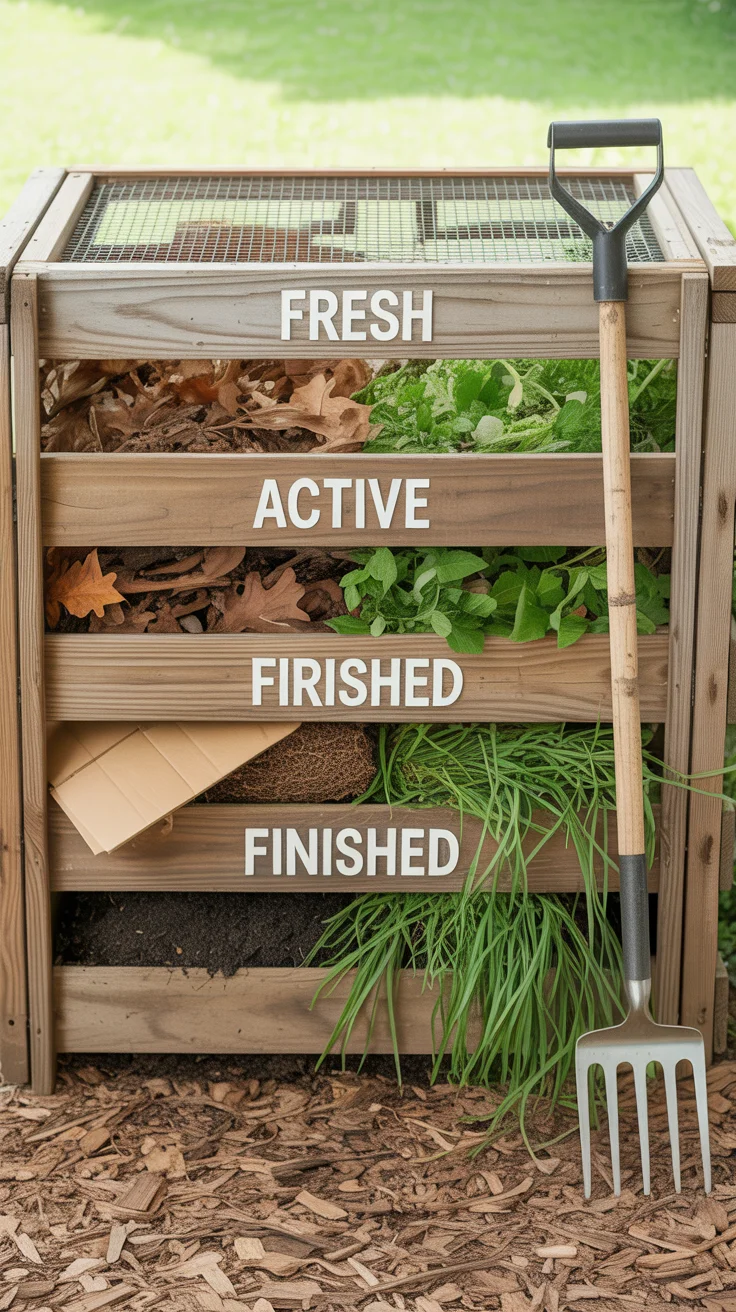
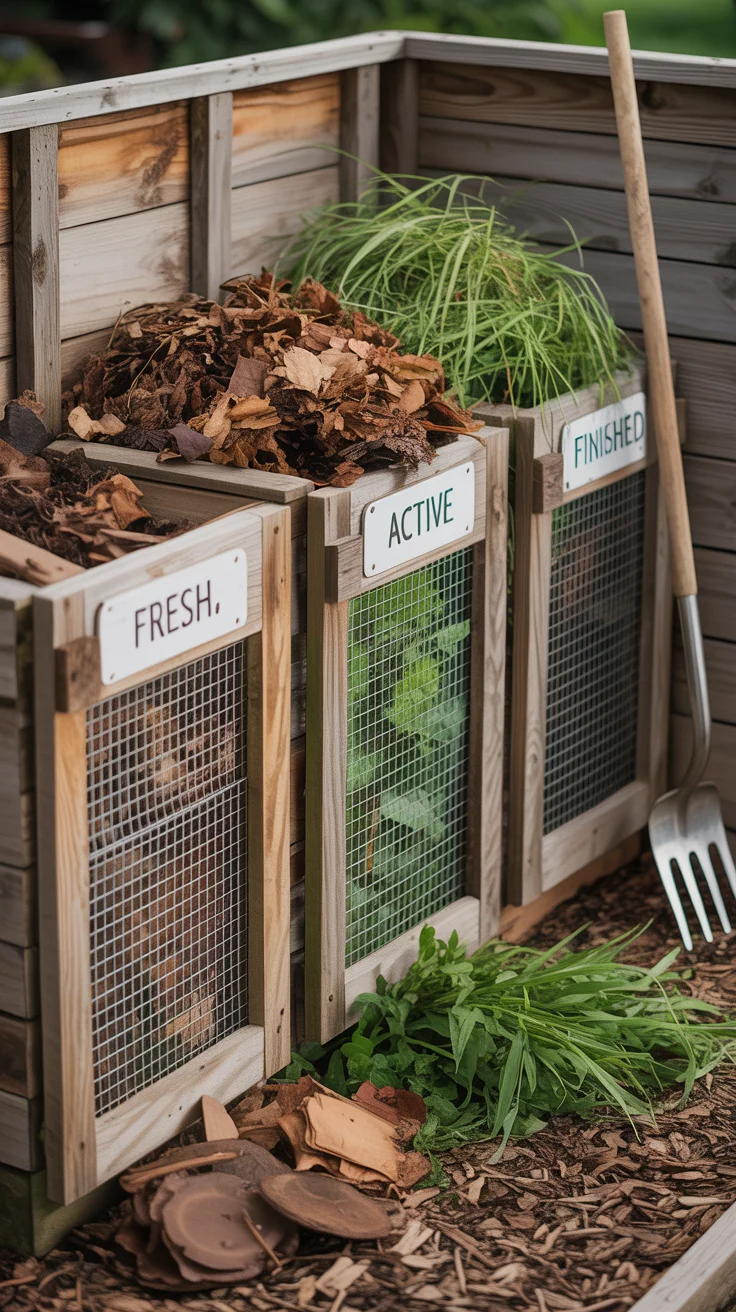
Why a Compost Corner That Doesn’t Stink Works: The 3-Bin Backyard System
Compost doesn’t smell bad when it’s managed properly—it’s that simple. What most people call “compost smell” is actually the odor of anaerobic rot: swampy, sulfurous gases from oxygen-starved microbes breaking down wet, nitrogen-heavy materials. A 3-bin system prevents this by giving you structure and space to balance carbon, nitrogen, moisture, and air at each stage of decomposition.
Here’s the flow:
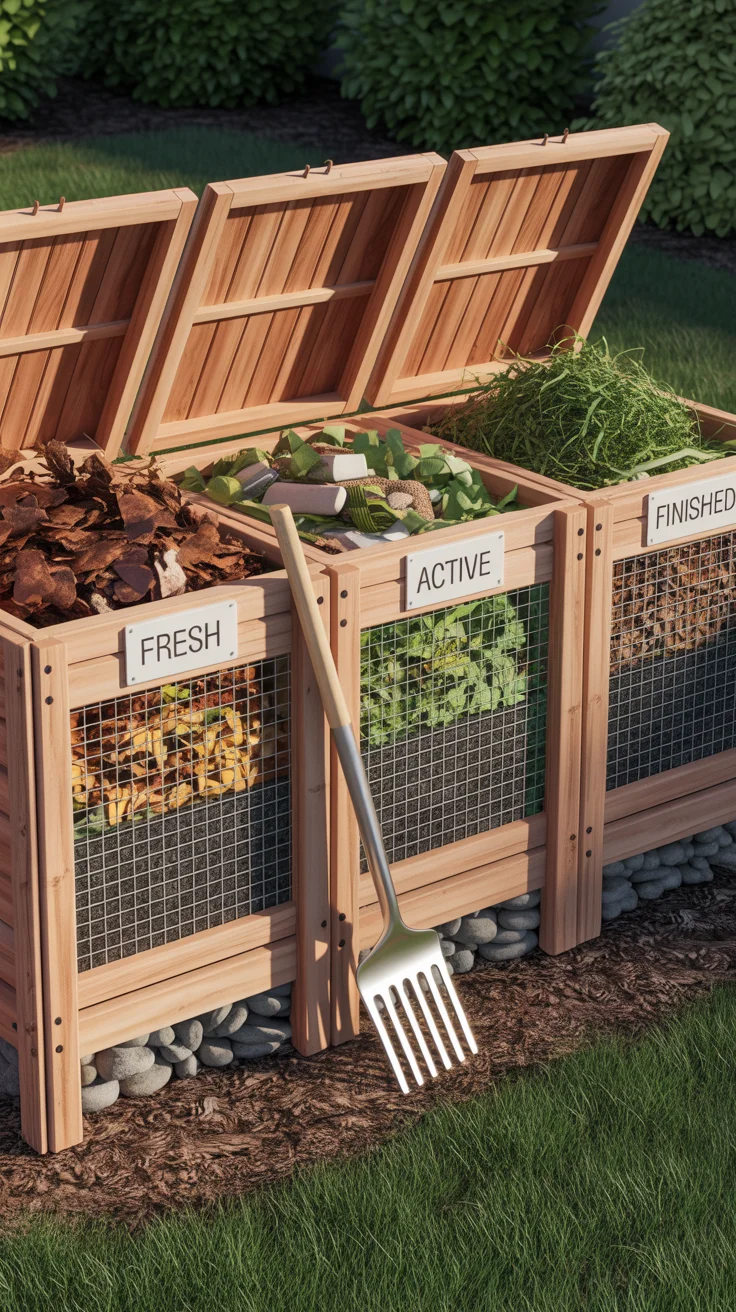
- Bin 1 (Active): Where fresh inputs go. You layer browns (carbon) and greens (nitrogen), correct moisture, and turn to aerate.
- Bin 2 (Cooking): Once Bin 1 fills, you fork it into Bin 2 in one go. This move mixes materials and injects air, kicking off an even, hot “cook” with minimal new inputs.
- Bin 3 (Curing): After Bin 2 heats and settles, you transfer to Bin 3 to finish. Curing is quieter but crucial—it stabilizes nutrients, reduces salts, and builds humus-like structure.
Why it’s odor-proof:
- Airflow is built in. The transfers and turning reset oxygen levels. Oxygen-loving microbes (aerobes) dominate, and they don’t produce foul smells.
- Moisture management is easier. Three parallel bins mean you’re not dumping wet kitchen scraps onto a sodden, stagnant pile.
- Carbon cover controls odors on contact. Finely chopped browns—leaves, shredded cardboard—layered on top create a biofilter that scrubs any whiffs as they happen.
- Clear stages prevent contamination. By separating active, cooking, and curing materials, you avoid mixing fresh scraps into nearly finished compost where they can rot anaerobically.
In short, the 3-bin backyard system adds structure so you can course-correct quickly: if a bin is too wet or green-heavy, you fix it now—not weeks later when it’s a smelly mess. If you’re coming from a single mound or bagged tumbler, the jump in control (and drop in odor) will be dramatic.
Learn the basics of soil food webs and mulch layering
Choose the Right Spot and Layout for a Fresher Compost Corner
Location is odor control. A smart site reduces leachate (smelly runoff), maintains steady moisture, and keeps neighbors happy.
What to look for:
- Firm, well-drained ground: Compost wants contact with soil biology but not standing water. Slight slope with a gravel apron works well.
- Dappled light or morning sun: Too much shade slows decomposition; scorching afternoon sun can over-dry the active bin. Partial sun is ideal.
- Windbreak with airflow: Hedge, fence, or shed nearby can soften strong winds while still allowing air movement through the bins.
- Close to your workflows: Keep it near the kitchen path and garden beds, so you’ll actually use and turn it.
- Hose reach but no runoff to drains: You need water access, but situate it so leachate can’t enter storm drains or neighbor property.
Sizing and spacing:
- Typical home-use footprint: three bins each about 3 ft wide x 3 ft deep x 3 ft tall, with a 2–3 ft working aisle in front.
- Space for staging: Leave a spot for a browns stockpile (dry leaves, shredded cardboard) to top each deposit. Keep a covered bucket or bin nearby to store browns dry.
- Tools at hand: Hang a long-handled fork, flat shovel, and moisture meter or use the “squeeze test.” Add a simple thermometer (18–24 in) if you want to track heat.
Aesthetics and neighborly design:
- Screen with a trellis and climbers or use cedar slats that match nearby fencing. Top bins with simple lids that shed rain and keep pests out.
- Add a small paver pad in front to keep your work area clean and prevent muddy boots.
If you plan to integrate water capture and irrigation with compost tea or leachate management, map that now. Gravity-fed systems or drip lines from rain barrels can keep compost moisture on point without overwatering. For a vertical garden-water solution that pairs well with compost-rich beds, consider The AquaTower as an efficient way to make the most of limited space and water.
Rainwater collection basics for gardeners
Build a Compost Corner That Doesn’t Stink: Materials and Steps
You can build a sturdy 3-bin system over a weekend with common materials. Choose for durability, airflow, and ease of turning.
Material options:
- Wood slats + hardware cloth: Use rot-resistant wood (cedar preferred; pine works with maintenance). Hardware cloth (1/2 in) on sides prevents pest intrusion while allowing airflow.
- Reclaimed pallets: Economical and quick—ensure they’re heat-treated (HT), not chemically treated. Add wire mesh inside to control slumping.
- Concrete blocks: Very durable; leave 1/2 in gaps between blocks for airflow. Line inside with hardware cloth if rodents are a risk.
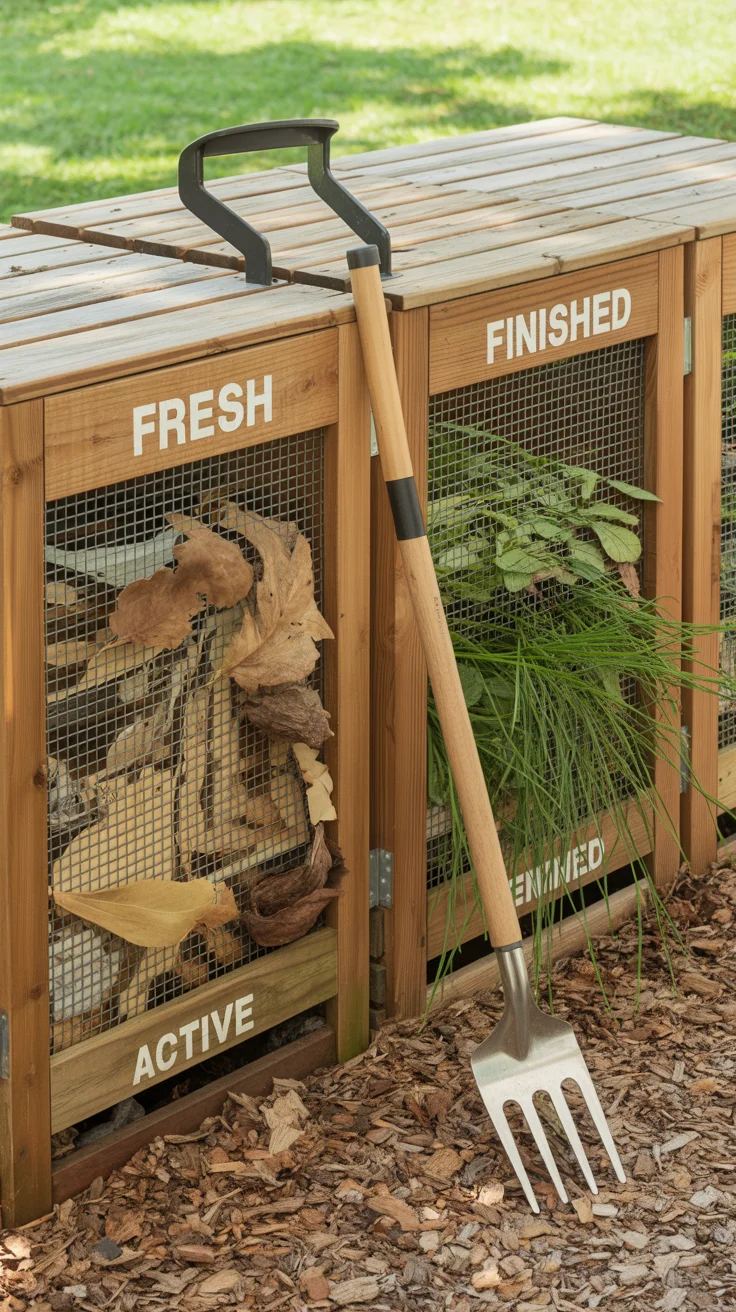
- Hinged lids and removable fronts: Lids keep rain and pests out. Slatted or removable fronts let you fork material easily when turning.
Basic dimensions:
- Each bin: 36 in W x 36 in D x 36 in H is a sweet spot—enough mass to heat, small enough to turn.
- Gap between bins: 1–2 in for frame tolerance.
- Front slats: 1×6 or similar; notch or slide-in channels to remove.
Tools:
- Circular saw or handsaw, drill/driver, exterior screws, stapler for mesh, square, level, shovel, pitchfork, gloves, eye protection.
Step-by-step build:
- Prepare the pad: Level the area. Lay down a base of compacted gravel or pavers for the working aisle; leave the bin footprints open to soil.
- Frame the corners: Build three cube frames using 2×4s (or strong pallet corners). Anchor them on pavers or ground stakes if wind is an issue.
- Skin the sides: Attach slats with 1/2–1 in gaps for airflow, or staple hardware cloth to frames for open sides with strong containment.
- Install dividers: Shared walls between bins save materials. Ensure each bin is fully enclosed minus the removable front.
- Add the fronts: Create slide-in channels or hinge a low door that opens fully for turning.
- Fit lids: Simple framed lids with corrugated panels or cedar boards. Add a back tilt for runoff and a latch for critter resistance.
- Finish and inspect: Sand sharp edges, check for wobble, and test the fronts/lids for smooth operation. Label bins (Active, Cooking, Curing).
Optional upgrades:
- Aeration pipes: Perforated 2–3 in PVC set vertically in the active bin can boost airflow and reduce turning frequency.
- Roof overhang: A small lean-to roof reduces rain saturation—especially helpful in wet climates.
- Tool rack and browns box: Keep everything within arm’s reach to make good habits easy.
Step-by-step carpentry guide for garden projects
Feed the Bins Right: Carbon-Nitrogen Balance, Moisture, and Layering
Odor-free composting starts with materials and proportions. Greens are nitrogen-rich and moist; browns are carbon-rich and typically dry. Get the mix right, and your compost will heat, break down, and smell earthy.
Greens (N):
- Kitchen scraps (veg/fruit), coffee grounds, tea leaves
- Fresh grass clippings, green pruning
- Manures from herbivores (well-managed; avoid pet waste)
Browns (C):
- Dry leaves, straw, shredded cardboard/paper
- Wood chips/sawdust (use sparingly and mix well)
- Cornstalks, dried garden residues
Quick ratio rule:
- By volume, aim for 1 part greens to 2–3 parts browns at each addition. Cover every green addition with a generous brown “cap” to create a biofilter—this is your no-smell insurance.
Layering recipe for the active bin:
- Base: 3–4 in coarse browns (twigs, rough stems) for airflow.
- Add greens: 2–3 in, spread evenly.
- Add browns: 3–4 in, finely shredded to catch odors.
- Sprinkle water as needed: Moist like a wrung-out sponge.
- Repeat until 18–24 in tall; cap with 3–4 in browns.
Moisture targets:
- Squeeze test: Grab a handful—one or two drops is perfect. More than that = too wet; dust-dry = too dry.
- Fixes: Too wet? Fork in dry leaves/cardboard, open the lid to vent, and avoid adding more kitchen scraps until corrected. Too dry? Lightly water while turning to distribute moisture.
Turning schedule:
- Active bin: Turn weekly or when temps peak and start to drop. Each turn breaks up mats, injects oxygen, and evens out moisture.
- Cooking bin: Turn lightly every 2–3 weeks to maintain aeration.
- Curing bin: Leave mostly undisturbed, checking moisture monthly.
What not to compost if you want a nose-friendly corner:
- Large amounts of cooked food, meat, fish, dairy, or oily foods
- Glossy/coated papers, pet waste, diseased plants
- Huge dumps of fresh grass without mixing browns (they mat and go anaerobic)
Integrating water efficiency:
- Collect rinse water from produce washing to moisten the active bin.
- If water is scarce, a vertical garden-water solution like The AquaTower can pair with rain capture and compost-rich beds to recycle nutrients and moisture efficiently.
What to compost and what to avoid
Run the System Through the Seasons and Keep It Smell-Free
Daily habits make your compost corner truly odorless.
- Keep a countertop caddy lined with paper; empty every 1–2 days. Always cap with browns immediately.
- Chop or tear inputs smaller. More surface area = faster, cleaner breakdown.
- Keep the browns box full. Dry leaves are gold—stash extras in fall.
The 3-bin rhythm:
- Fill Active (Bin 1) for 3–6 weeks depending on volume; turn weekly.
- Fork to Cooking (Bin 2) once Bin 1 is near full; mix thoroughly on transfer.
- After 4–8 weeks of cooking and one or two turns, move to Curing (Bin 3) for 4–8+ weeks.
Climate tweaks:
- Wet climates: Add a lid overhang and more coarse browns to keep airflow. Increase turning frequency after heavy rain.
- Dry climates: Pre-soak browns in a tub; add moisture at each turn. Cover with a lid to reduce evaporation.
- Cold winters: Compost slows but doesn’t stop. Build larger batches for thermal mass, insulate bins with straw bales, and accept slower timelines. Save up browns indoors so you can cap winter greens properly.
- Hot summers: Monitor moisture closely; high temps can drive piles too dry, leading to stalled, dusty compost. A light watering paired with turning resets the microbiology.
Powering tools off-grid:
- If you prefer to run a small aeration fan, shed lights, or a pump for rainwater near your compost corner, a portable off-grid power option can make the area self-contained. See the Ultimate OFF-GRID Generator for flexible, off-grid power ideas that keep your compost workflow independent of the house.
Harvest and use:
- Finished compost looks dark and crumbly, smells like forest soil, and is cool to the touch.
- Screen if desired to remove sticks and return them to the active bin as inoculant.
- Use in beds, around perennials, or to top-dress lawns. Blend with garden soil for potting mixes.
Troubleshoot Smells, Pests, and Setbacks Fast
Even dialed-in composters hit snags. Here’s how to respond quickly and keep your compost corner that doesn’t stink—well—odorless.
If it smells like rotten eggs or sewage:
- Diagnosis: Anaerobic zones—too wet, compacted greens, poor airflow.
- Fix: Fork in twice the volume of dry leaves/cardboard. Fluff thoroughly. Add coarse browns at base for drainage. Leave lid vented for 24–48 hours if weather allows.
If it smells like ammonia or cat litter:
- Diagnosis: Too much nitrogen (greens) or urine-rich manures; pH tilting alkaline.
- Fix: Add 3–4 times the volume of browns, mix well, and cap. Include some high-carbon materials like shredded paper and dry leaves.
If it smells sour or vinegary:
- Diagnosis: Acidity from fruit overload or fermenting scraps.
- Fix: Mix with neutral browns and a handful of mature compost to buffer pH and re-seed good microbes.
If it smells like garbage quickly after adding kitchen scraps:
- Diagnosis: No carbon cap; food exposed at the surface.
- Fix: Always bury scraps mid-pile and cap with at least 3 in of browns.
Fruit flies or gnats:
- Fix: Bury deeper, cap thicker with browns, and keep the lid closed. A layer of finished compost on top acts as a biological filter and microbe shield.
Rodents:
- Prevention: Use hardware cloth on sides and bottom edges; avoid food-like items (meat/dairy). Keep the area clean and remove spilled scraps promptly.
- Fix: Retrofit mesh, tighten lids, reduce open gaps.
Mats and clumps (grass clippings, coffee grounds):
- Fix: Mix with coarse browns and fork aggressively to break layers. Alternate thin layers, not thick dumps.
Pile won’t heat:
- Diagnosis: Not enough greens, too dry, or too small volume.
- Fix: Add greens in modest amounts with moisture, then turn. Larger batches heat better; build faster or stockpile until you can assemble a critical mass.
Remember: smells are messages. With a 3-bin setup, you have room and flexibility to correct course immediately without compromising the entire system.
Integrate Compost With Your Garden and Water for a Closed-Loop Yard
A compost corner that doesn’t stink is only part of a resilient backyard. Close the loop by cycling nutrients and moisture back into your beds.
Smart integrations:
- Mulch synergy: Use rough, unfinished compost as a mulch under shrubs to feed soil slowly while your finished compost goes to high-demand crops.
- Compost-tea workflows: Aerated teas are optional; if you brew them, use finished compost and clean water. Never apply anaerobic leachate directly to edible leaves.
- Water capture: Route roof or shed gutters to a rain barrel near the compost area. Moistening the active bin with captured rain protects microbes and saves tap water.
- Vertical gardens: Where space is tight, feed compost into bed top-dressing and pair with a vertical growing system like The AquaTower to maximize yield per square foot.
Soil-first gardening:
- Test soil annually to track organic matter gains from compost applications.
- Use compost to buffer pH and improve structure—sandy soils hold water better; clay soils drain and aerate more readily with added organic matter.
Workflow tips:
- Stage finished compost near your beds in spring to speed up planting.
- Keep a simple log of bin status, temps, and transfers. Patterns emerge quickly, helping you fine-tune inputs and keep odors at zero.
Helpful Resources for Self-Reliant, Odor-Free Composting
Want a step-by-step, whole-yard plan that connects compost, gardens, water, and self-reliant living? The following resources can help you scale up without adding complexity.
- The Self-Sufficient Backyard: A practical resource for building a resilient, backyard-scale system—gardens, compost, and water working together. See it here: The Self-Sufficient Backyard
- Ultimate OFF-GRID Generator: Useful if you want independent power for shed lighting, small blowers for aeration experiments, or rainwater pumps near your compost corner: Ultimate OFF-GRID Generator
Use them to round out your setup, not replace the core principles: airflow, balanced inputs, and consistent management.
Recommended Tools and Materials Checklist
Keep these on hand to avoid missed turns and moisture mishaps:
- Pitchfork and flat shovel
- 18–24 in compost thermometer (optional but insightful)
- Covered bin for dry browns
- Hardware cloth for pest-proofing
- Lid latches and weatherproof hinges
- Moisture meter or just your hand for the squeeze test
- Rain barrel or hose splitter for measured watering
- Sturdy buckets or totes for transfers
As you refine your system, small upgrades—like removable front slats and a lean-to roof—can further reduce mess and moisture swings, reinforcing your compost corner that doesn’t stink year-round.
Conclusion
Set up a compost corner that doesn’t stink by giving decomposition what it needs most: air, balanced inputs, and time. The 3-bin backyard system builds these needs into your routine—fresh scraps go in one place, the hot work happens in another, and quiet maturing finishes the job elsewhere. That separation, plus a steady habit of carbon caps and occasional turning, keeps odors to a minimum and yields rich, stable compost you’ll be proud to spread. Whether you’re feeding a small kitchen garden or a full backyard homestead, this simple structure turns waste into wealth—cleanly, quickly, and consistently.
Garden bed crop rotation made simple
FAQ
Why does my compost smell bad?
- Bad odors come from anaerobic (oxygen-poor) conditions, usually caused by too many wet greens, compacted layers, or excess moisture from rain. In a 3-bin system, you can fix this fast by adding dry browns, turning to add air, and capping with a carbon layer to biofilter smells. A compost corner that doesn’t stink relies on oxygen and balance.
What can you add to compost to reduce odor?
- Add dry, high-carbon materials—shredded leaves, cardboard, straw—immediately after each greens deposit. This carbon cap absorbs moisture, balances nitrogen, and filters odors. Turning to add oxygen and maintaining “wrung-out sponge” moisture are just as important as the materials you add.
How does a 3-bin compost system work?
- Bin 1 is the active bin for fresh inputs and regular turning. When full, you fork the mix into Bin 2 to “cook,” which spreads microbes, injects air, and kicks off hot composting. After several weeks, you move it to Bin 3 to cure. This staged approach speeds decomposition, prevents odors, and makes harvest timing easy.
How long does it take compost to finish?
- With good balance and turning, expect 8–16 weeks from first load to finished compost in warm seasons: 3–6 weeks active, 4–8 weeks cooking, and 4–8 weeks curing. Cold weather slows things down. Finished compost is dark, crumbly, earthy-smelling, and cool.