
❤️ Why Canning Meats Belongs in Your Pantry
Picture this: It’s a stormy evening, the power’s out, and dinner still needs to be made. You open your pantry and there it is—a jar of tender, flavorful beef ready to heat and serve. That’s the magic of canning meats. Not only does it give you shelf-stable protein options, but it also ensures you’re never far from a homemade meal, even in emergencies.

Whether you’re new to pressure canning or looking to expand your food storage game, learning how to can meats safely is a vital step toward food independence and meal prep mastery. This guide will walk you through everything you need to know—from choosing your meats to sealing the final jar.
🔗 Want to build a pantry that truly supports your self-reliant lifestyle?
👉 Discover how The Self-Sufficient Backyard can help you preserve more than just meat—with systems for food, water, and energy independence.
🔍 Understanding the Basics of Canning Meats

🧪 Why Pressure Canning Is Essential
Unlike fruits or pickles, meat is low-acid. That means it can’t be safely preserved using a water bath method. Canning meats always requires a pressure canner to reach the temperatures necessary to kill dangerous bacteria like botulism.
📏 USDA Recommendations You Can Trust
For safety, always follow tested time and pressure guidelines from reliable sources like:
- USDA Home Canning Guidelines
- The National Center for Home Food Preservation
- Ball Blue Book of Canning
Never guess when it comes to meat. Your safety depends on exact timing, temperatures, and proper equipment.
🛠️ Gear and Ingredients for Canning Meats

Before diving into the process, make sure you’ve got everything lined up.
🧰 Equipment Checklist
- Pressure canner (dial gauge or weighted)
- Mason jars (pint or quart)
- New canning lids and screw bands
- Jar lifter, bubble remover, wide-mouth funnel
- Clean towels and a workspace free of clutter
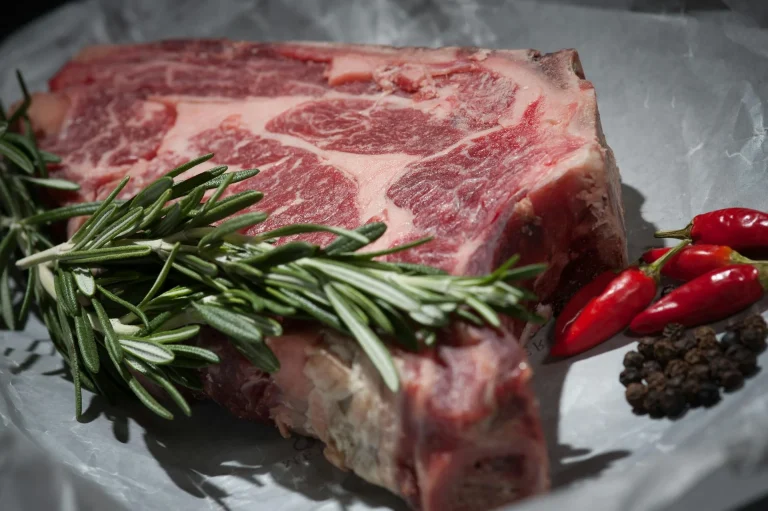
🥩 Common Ingredients
Here are examples of meats you can safely pressure can and how to handle them:
- Beef chunks: You can dry pack or add broth. Add about 1 teaspoon of salt per quart if desired.
- Boneless chicken: Can be packed raw or pre-cooked. Water or broth may be added for hot pack method.
- Pork (shoulder or loin): Trim off excess fat and pack raw or cooked. Broth optional.
- Ground meats: Must be browned and crumbled before canning. Pack into jars with broth.
- Venison or other game: Use same method as beef. Meat must be lean and very fresh.
Never include dairy, flour, grains, or thickeners in your canning process. They can affect safety and cause sealing issues. 1 tsp salt per quart (optional), dry packed or in broth
- Chicken (boneless): Packed raw or pre-cooked, water or broth added
- Pork (shoulder or loin): Trimmed of fat, canned raw or cooked
- Ground meats: Browned, crumbled, and packed with broth
- Venison/game: Same process as beef, must be lean and fresh
Never add dairy, grains, flour, or thickeners. These can interfere with safe canning.
🥩 What Types of Meat Can You Pressure Can?

🧊 Raw Pack vs. Hot Pack
- Raw Pack: Pack uncooked meat directly into jars. Easier prep, more shrinkage.
- Hot Pack: Pre-cook the meat, then pack it hot. Less shrinkage, better texture.
✅ Meats Approved for Canning
- Beef (roasts, stew meat, ground beef)
- Pork (shoulder, loin, ham chunks)
- Poultry (boneless thighs, breasts, drumsticks)
- Game meats (venison, elk, moose)
- Sausage (crumbled or patty, precooked)
Bacon and smoked meats are not USDA-recommended due to fat content.
🍳 How to Prepare Meat for Canning

Proper preparation makes all the difference.
- Trim excess fat from all cuts—fat can cause seal failure.
- Cut into uniform pieces for even processing.
- For ground meat: Brown and drain thoroughly.
- For chunks: Can raw or briefly brown before packing.
Tip: Use clean, sterilized equipment to minimize the risk of contamination.
🫙 How to Can Meat Safely: Step-by-Step

- Sanitize jars and keep them warm until filled.
- Pack meat using raw or hot pack method.
- Leave 1–1¼ inches of headspace.
- Add boiling water or broth for hot pack.
- Remove air bubbles with a spatula.
- Wipe jar rims with a vinegar-damp cloth.
- Place lids and rings on jars; tighten finger-tight.
- Load jars into the canner with 2–3 inches of hot water.
- Lock the lid, vent steam for 10 minutes.
- Process at 10 PSI (or as adjusted for altitude):
- Pints: 75 minutes
- Quarts: 90 minutes
- Let pressure return to zero naturally.
- Remove lid, wait 5 minutes, then carefully lift jars out.
- Cool jars undisturbed for 12–24 hours.
❄️ Storage and Safety After Canning

Once your jars are cool:
- Check seals (the lid should not flex)
- Label jars with content and date
- Store in a cool, dark place for up to 18 months
Do not eat if:
- The lid bulges or pops up
- There’s a foul odor upon opening
- Liquid appears cloudy or foamy
When in doubt, throw it out. Never risk eating questionable canned meat.
🍽️ How to Use Your Home-Canned Meats

Your canned meats are not just emergency food—they’re versatile, delicious, and ready to heat.
- Add to stews, soups, or chili
- Mix into pasta, rice, or noodle dishes
- Top baked potatoes with shredded beef
- Use in tacos, enchiladas, or sandwiches
- Combine with frozen veggies for stir-fry
Canned meats save time and reduce the need for takeout on busy nights.
❓ FAQ – Canning Meats
Can I can meats with vegetables or sauces?
Only with USDA-tested recipes. Different ingredients require different processing times.
Can I reuse old lids?
No. Always use new lids to ensure a proper seal.
Can I can meat with seasonings?
Yes, but use dry spices only—no dairy, butter, or flour.
How long is home-canned meat good for?
Best within 12–18 months. Discard if seal is broken or spoilage is visible.
Is it safe to can bone-in meats?
Yes, as long as you follow USDA pressure canning times.
🛠️ Recommended Resource: The Self-Sufficient Backyard
If you’re serious about food preservation and long-term resilience, The Self-Sufficient Backyard is the ultimate guide to maximizing your land and time. Created by seasoned homesteaders with decades of experience, this comprehensive blueprint teaches you:
-
How to raise and preserve your own food
-
Rainwater harvesting and off-grid power options
-
Seasonal task lists for full backyard productivity
Whether you live on a farm or in a suburban neighborhood, this guide helps you turn any space into a year-round homestead.
👉 Check out The Self-Sufficient Backyard here and start building a resilient pantry today.
✅ Final Thoughts: Why Canning Meats Should Be in Your Rotation
If you want a well-rounded pantry, don’t stop at fruits and veggies. Canning meats is one of the most powerful ways to build food resilience and save time.
It may seem intimidating at first, but once you get the hang of pressure canning, you’ll wonder how you ever managed without jars of beef stew or pulled pork on hand.
So go ahead—pick your favorite cut, gather your gear, and start building a meaty pantry that works as hard as you do.
💡 Ready to level up your food security?
Start your self-sufficient journey with The Self-Sufficient Backyard and gain the confidence to preserve, grow, and live off your own land rel=”dofollow” .
Preserve boldly. Eat richly. And take pride in every jar.